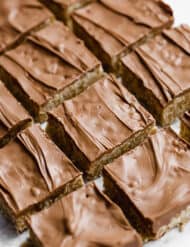
Homemade Brownies
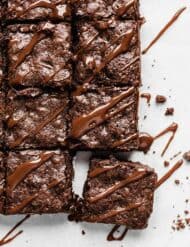
These Homemade Brownies are deliciously fudgy, ultra chocolatey and have perfect crackly tops! If you’re looking for a brownies from scratch recipe to outshine the gooey boxed brownies, you’ve found them!
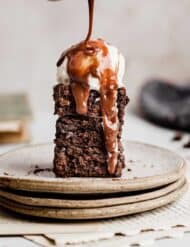
Growing up, we always had brownies from the box. But, I hardly ever bake from a box mix these days (except when it comes to doctoring a boxed brownie mix like in my Buckeye Brownies, Oreo Truffle Brownies and Fudgy Oreo Brownies recipes!). That’s why I’m so excited to share this homemade brownies recipe! It’s from scratch and tastes better than box mix brownies! Serve it with some Homemade Vanilla Ice Cream and some Old Fashioned Hot Fudge Sauce!

Why This Recipe Works
- Dutch process cocoa powder brownies. The fact that this homemade brownies from scratch are made with Dutch processed cocoa powder is a big win! Dutch process cocoa has a deeper, rich chocolate flavor, making these the best homemade brownies!
- Made with chocolate and cocoa. Making easy homemade brownies with melted chocolate and cocoa powder will give us double the chocolate and double richness in flavor!
- Bloomed cocoa. The cocoa powder is bloomed by adding boiling water. This intensifies the chocolate flavor in these scratch brownies!
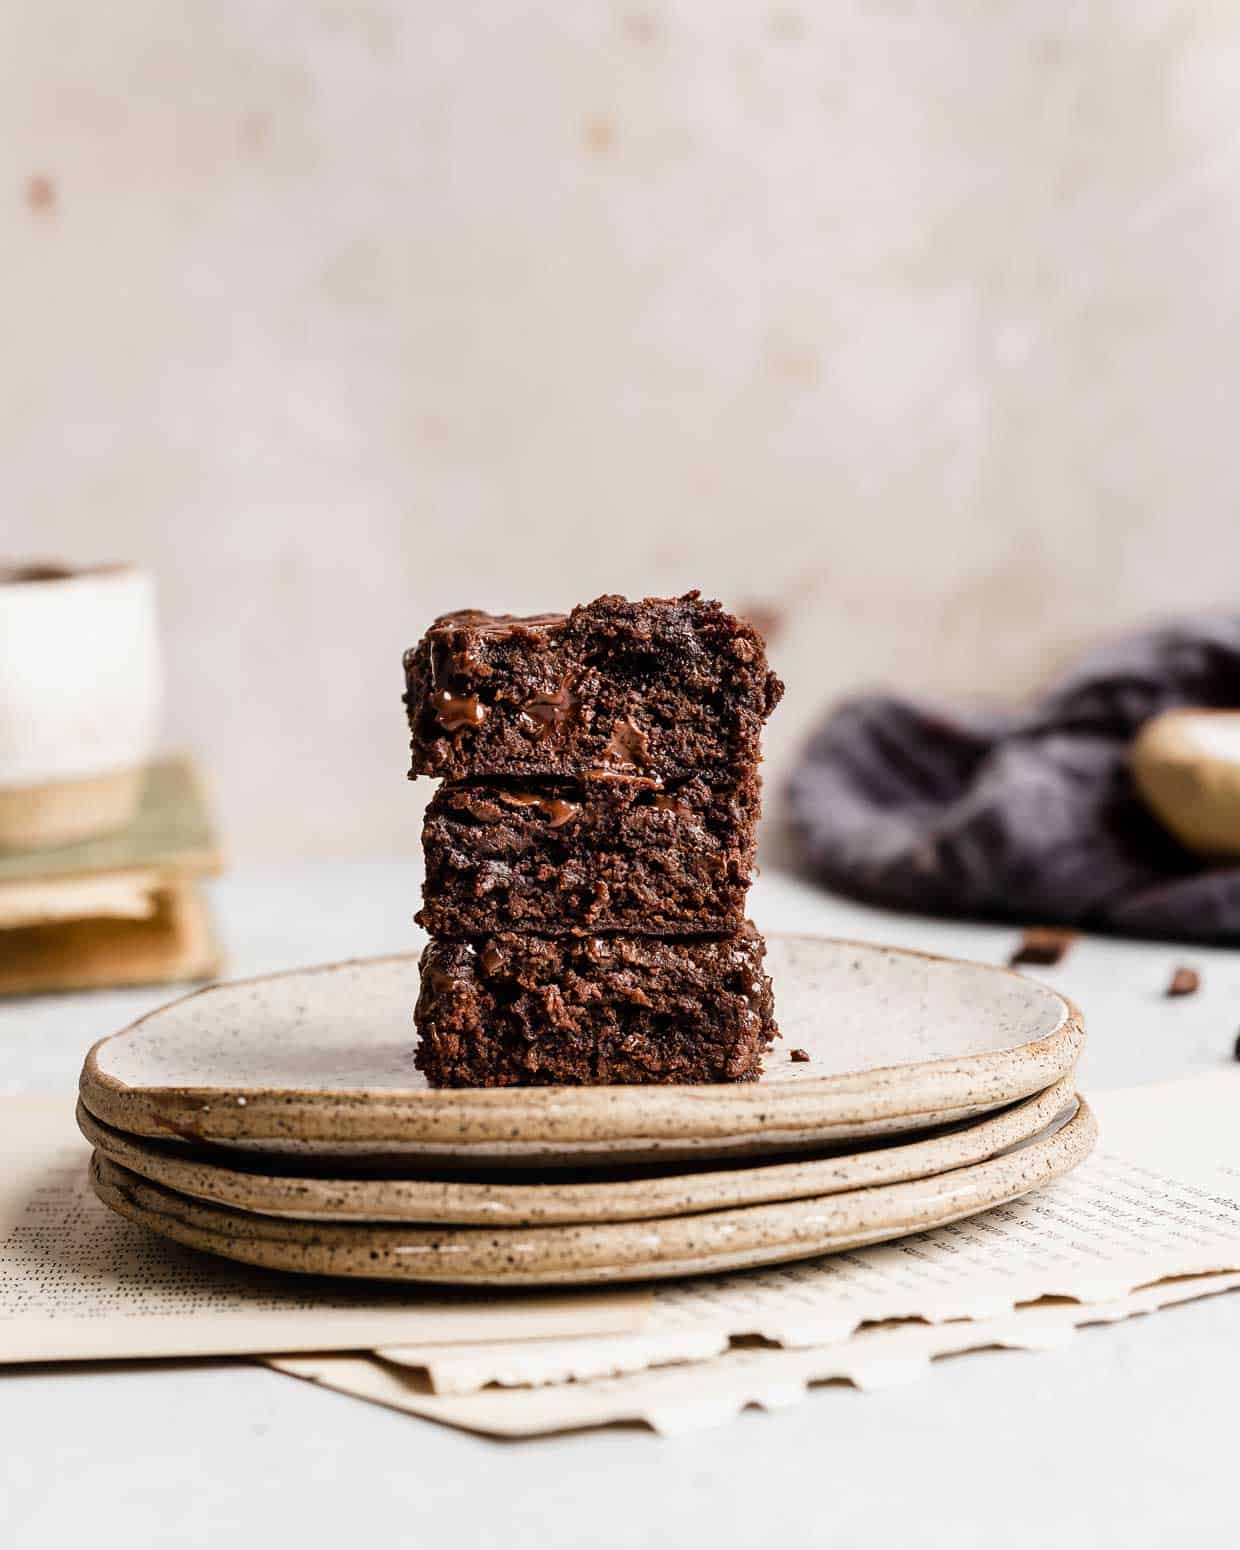
- Delicious brownies — and batter! Growing up, my sister and I would make brownies — from the box — and I’d love licking the spoon. I’d even try and convince her that we didn’t really need to bake the batter. Well, you finally have a recipe that yields not only great brownie batter but incredible baked brownies!
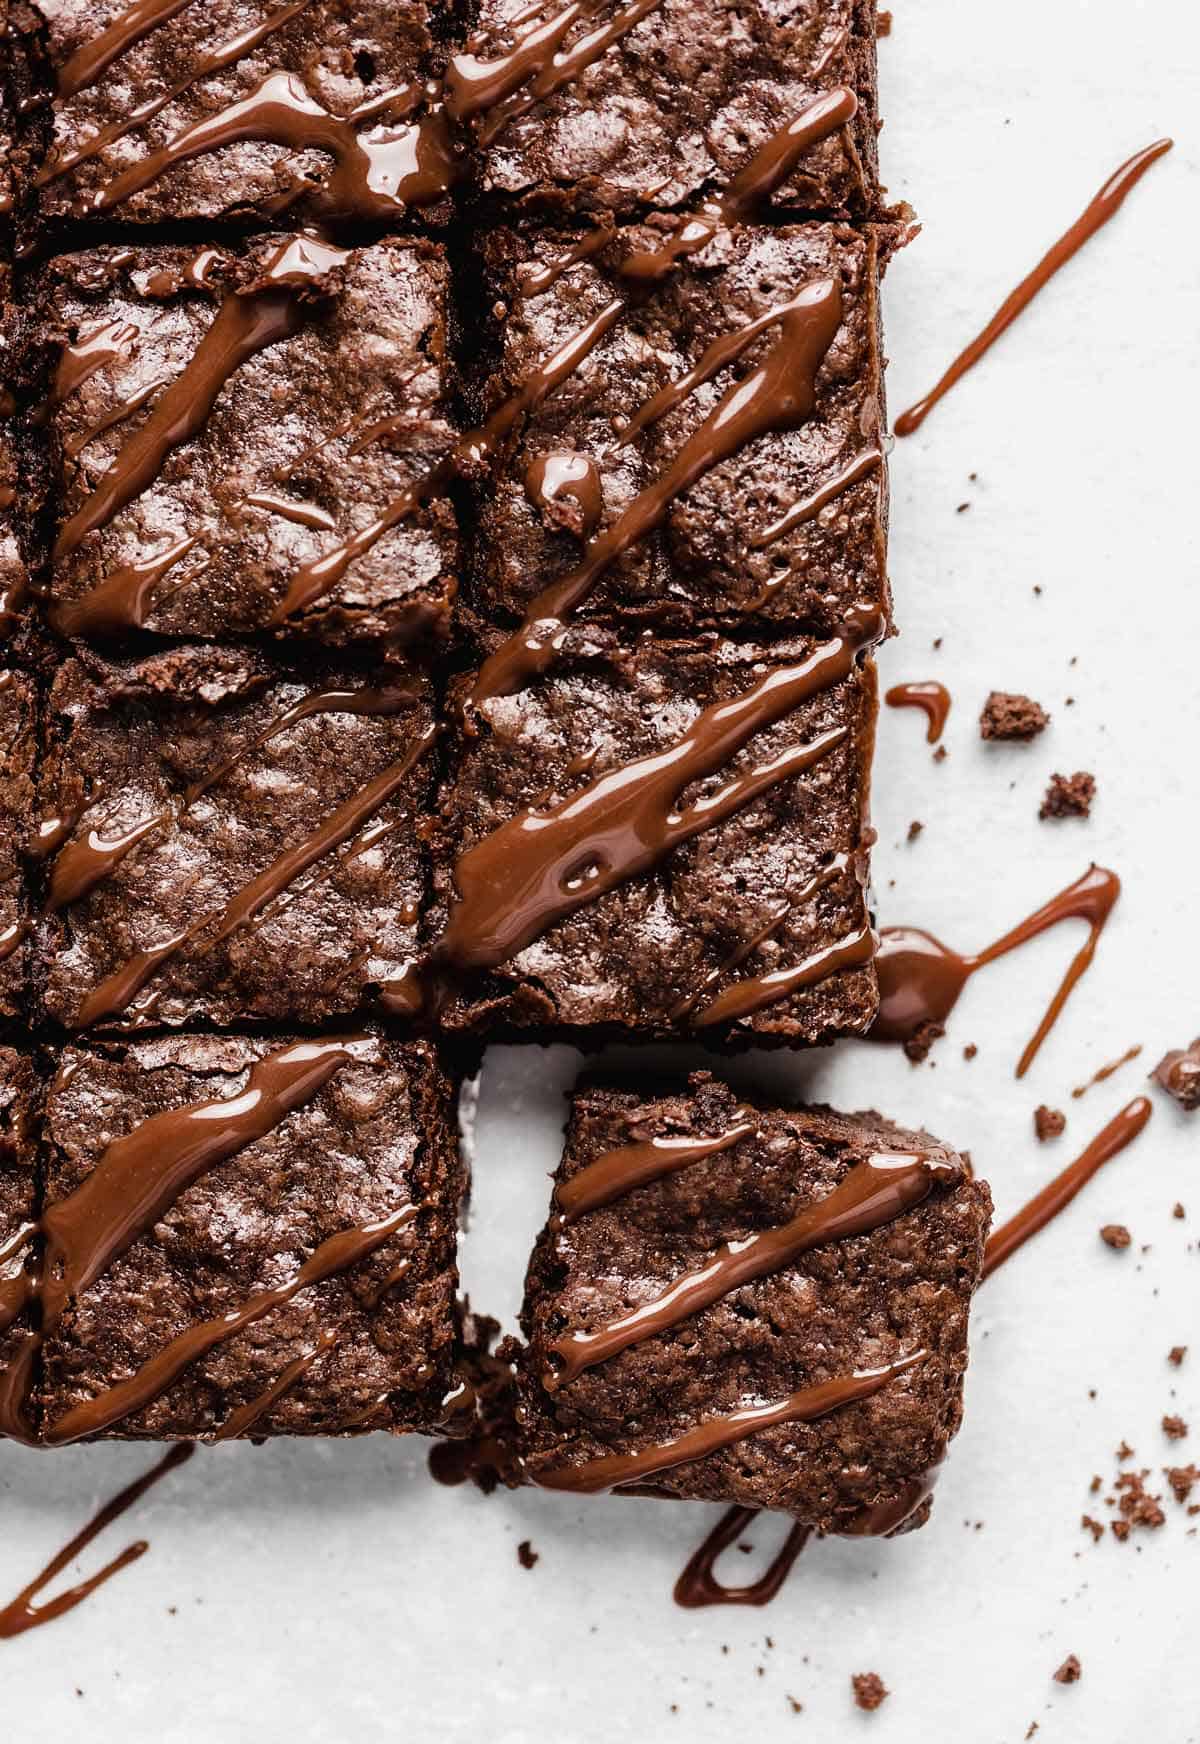
- Crackly tops. One of my favorite things about this recipe is the thin, shiny, crackly top. That’s total professional brownie baker status.
Ingredient Notes
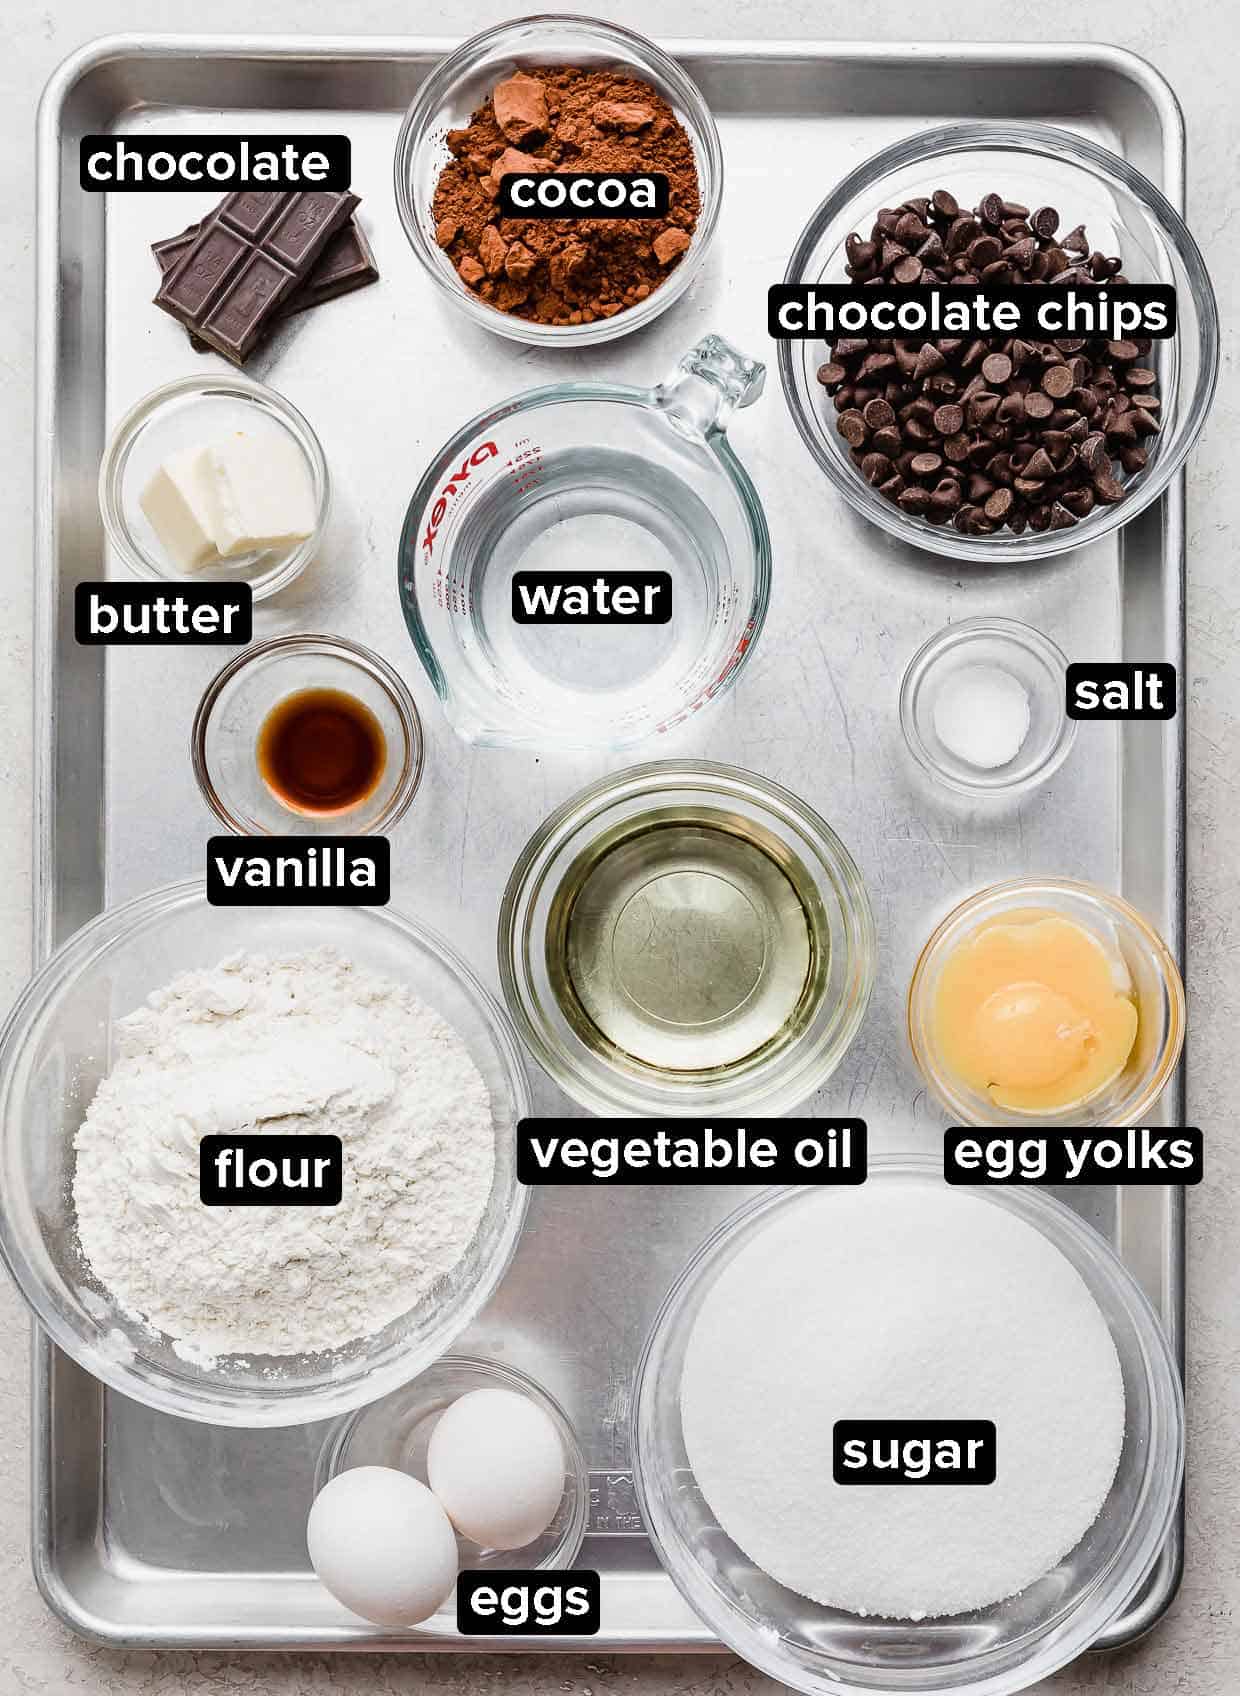
- Dutch Processed Cocoa: Using Dutch process cocoa powder is key! It has a richer and deeper chocolate flavor (as well as color) than traditional unsweetened cocoa powder. Read more here: Best Cocoa Powder for Baking
- Boiling Water: The boiling water will bloom the cocoa powder. Blooming is the process of adding hot water to chocolate. It brings out a richer chocolate flavor.
- Unsweetened Chocolate: Adding unsweetened chocolate will amp up the chocolate flavor in these homemade brownies.
- Unsalted Butter: The melted butter will give us the gooey brownie texture.
- Eggs: You’ll use an additional 2 egg yolks on top of the eggs called for.
- Granulate Sugar: Using just granulated sugar is an important different between brownies and cookies (which use brown sugar and granulated sugar).
- Flour: Getting the perfect flour to butter and oil ratio is what will give us the perfect texture!
- Semi Sweet Chocolate Chips: The chocolate chips will give you delicious pockets of melted chocolate when you take a bite of these homemade fudgy brownies!
Step-by-Step Instructions
- Move oven rack. Place your oven rack to the lowest position. Preheat oven to 350°F.
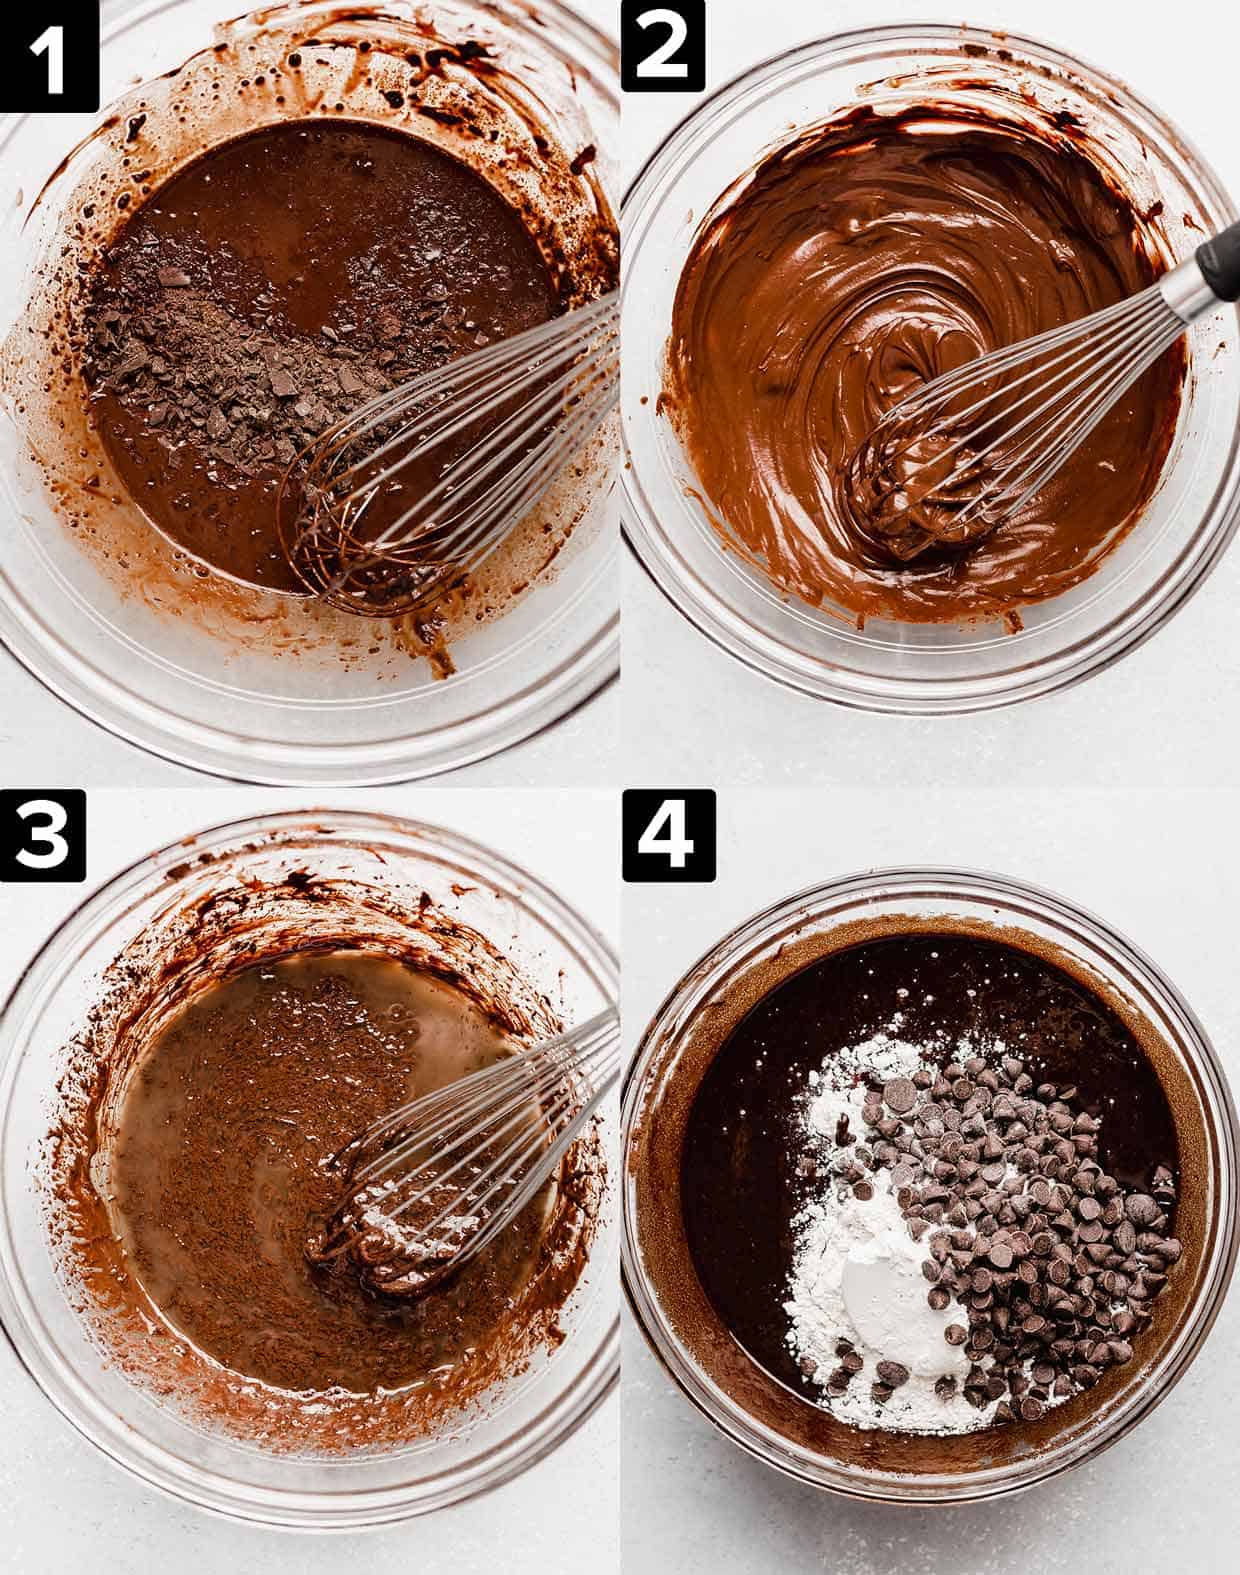
- Bloom the cocoa powder. Add the cocoa powder to a large bowl. Slowly pour in the boiling water and whisk until smooth.
- Add the chocolate. Finely chop the unsweetened chocolate and add it to the bloomed cocoa. Mix until melted.
- Add remaining wet ingredients. Add the melted butter and the vegetable oil. Mix until combined (mixture may look clumpy and curdled, which is normal). Add in the eggs, egg yolks, and the vanilla extract. Mix until smooth.
- Whisk in the sugar. Add in the sugar and whisk until smooth.
- Fold in the dry ingredients. Fold in the flour, salt and the chocolate chips using a rubber spatula. Do not over mix. Stop mixing once the batter is just barely combined.
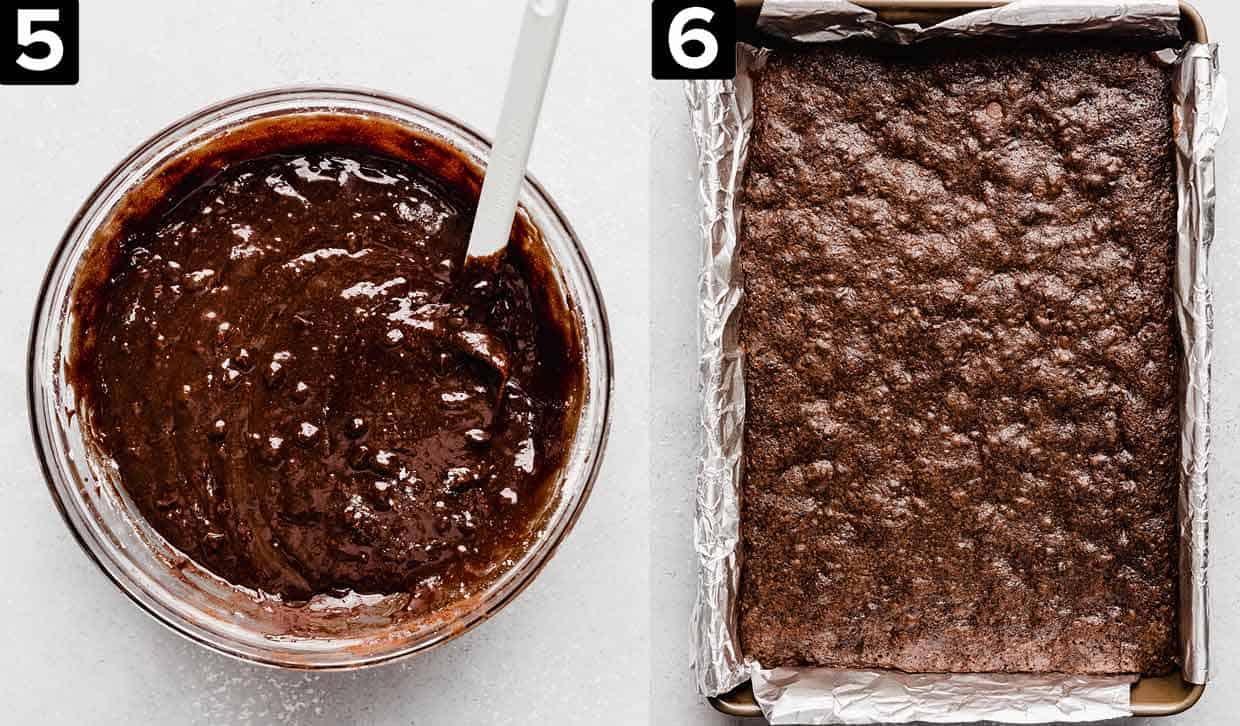
- Prepare the pan. Line a 9×13-inch pan with foil, leaving an inch or two overhanging to help remove the brownies from the pan, and spray with nonstick spray. Pour the batter into the pan and spread into an even layer.
- Bake the homemade fudgy brownies. Bake for 30-35 minutes or until a toothpick in the center of the pan comes out with a few moist crumbs. Do not over bake or the brownies will be dry. Remove and place the pan on a wire rack to help cool.
- Cool and serve. Let the brownies cool. Grab the overhanging tin foil and remove brownies from the pan. Slice and serve!
Recipe Tips
Make sure to finely chop the unsweetened chocolate, this helps it melt easier and faster when stirred into the warm water + cocoa mixture.
To check for doneness use a toothpick. Insert the toothpick in the center of the brownies, if there are a few moist crumbs clinging to the toothpick the brownies are done baking. If the toothpick comes out clean they are over-baked.
Do not over bake brownies. Doing so will result in dry, chalky brownies. It’s better to pull brownies out of the oven too soon than too late! They’ll continue to set up as they cool.
You can use a smaller square pan such as a 9″x9″ or 8″x8″ brownie pan for very thick brownies, however the baking time will vary.
You can substitute bittersweet chocolate for the unsweetened chocolate, however you will lose some of the intense chocolate flavor.
Practice patience and let the brownies cool before cutting and eating them! Not only will it make it easier to cut the brownies (giving you crisp brownie squares) but it will give the brownies time to set up so they don’t fall apart in your hands and will help them be gooier!
If you’re looking for a smaller batch, try my Small Batch Brownies recipe!
Make Ahead, Storing, and Freezing
I wouldn’t make these too much ahead of time. You do want the brownies to cool completely before cutting them to make it easier to cut (about 1.5 hours). So you can make them about 2-2.5 hours before serving.
To store leftover brownies, place in an airtight container and store at room temperature for 3-4 days. The airtight container will keep the brownies from drying out.
To freeze, let the brownies cool completely then wrap in plastic wrap and store in an airtight container. The brownies will keep in the freezer for up to 2 months. Remove and let thaw in the fridge or on the counter before enjoying.
Recipe FAQs
Yes! They will go stale. It’s best to enjoy these brownies within a few days of making them.
You can use regular all-purpose flour.
I would check your oven temperature. I use an oven thermometer. My oven runs about 10º off from what it says. Be sure to bake your oven at the proper temperature. Next, check how you are scooping your flour. Are you packing it in? If so, this could be adding excess flour to your brownie batter. Spoon the flour into the cup and level it off. Finally, do not over bake the brownies. It doesn’t matter how perfect your ingredient ratios are, if you over bake them, they will be dry.
Don’t get me wrong, I love a good boxed brownie mix! But if you are looking for a delicious and easy homemade brownie recipe that will put a brownie mix to shame? Then you’ve found it!
More Brownie Recipes
- Nutella Brownies – think chocolate + Nutella. Yeah, these are amazing.
- Mint brownies – with the most amazing mint and chocolate frosting.
- Cosmic Brownies – better than Little Debbies. It’s true.
- German Chocolate Brownies – for all of my German chocolate lovers.
- Oreo Truffle Brownies – if you like Oreo balls, then this recipe is def made for you.
- Biscoff Brownies – total cookie butter heaven.
- Ferrero Rocher Brownies – the chocolate hazelnut candy in brownie form.
Homemade Brownies
Ingredients
- 1/3 cup Dutch processed cocoa
- 1/2 cup + 2 tablespoons boiling water
- 2 oz unsweetened chocolate - finely chopped
- 4 tablespoons unsalted butter - melted
- 1/2 cup + 2 tablespoons vegetable oil
- 2 eggs
- 2 egg yolks
- 2 teaspoons vanilla extract
- 2 1/2 cups granulated sugar
- 1 3/4 cup all-purpose flour
- 3/4 teaspoon salt
- 1 cup semi sweet chocolate chips
Equipment
Instructions
- Adjust oven rack to middle lower position. Preheat oven to 350°F.
- Line a 9×13 inch pan with foil, leaving a 1-2 inch overhang on all sides so that you can easily remove the brownies. Spray the foil with nonstick cooking spray.
- In a large bowl whisk the boiling water and cocoa powder until smooth. Add the unsweetened chocolate and whisk until the chocolate is melted. Next, whisk in the butter and oil. (Mixture might look clumpy and curdled).
- Whisk in the eggs, egg yolks, and vanilla, stirring until smooth.
- Whisk in the sugar until thoroughly combined. Using a spatula fold in the flour, salt, and chocolate chips. Do not overmix.
- Transfer the batter to the prepared pan and bake for 30-35 minutes or until a toothpick inserted in the center comes out with a few moist crumbs. Be careful not to overbake as that makes brownies dry.
- Remove pan from the oven and place on a wire rack to cool completely. (about 1 ½ hours).
- When ready to slice and serve remove the foil liner, lifting the brownies out of the pan. Cut serve!
 Welcome to this delicious corner of the internet! Here I share the recipes my family loves.


One Comment on “Homemade Brownies”
Made these tonight and they couldn’t have been better- definitely will be my go to brownie recipe now! Thank you so much!!!