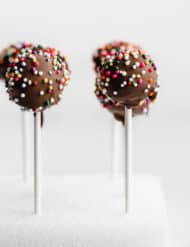
Chocolate Cake Pops
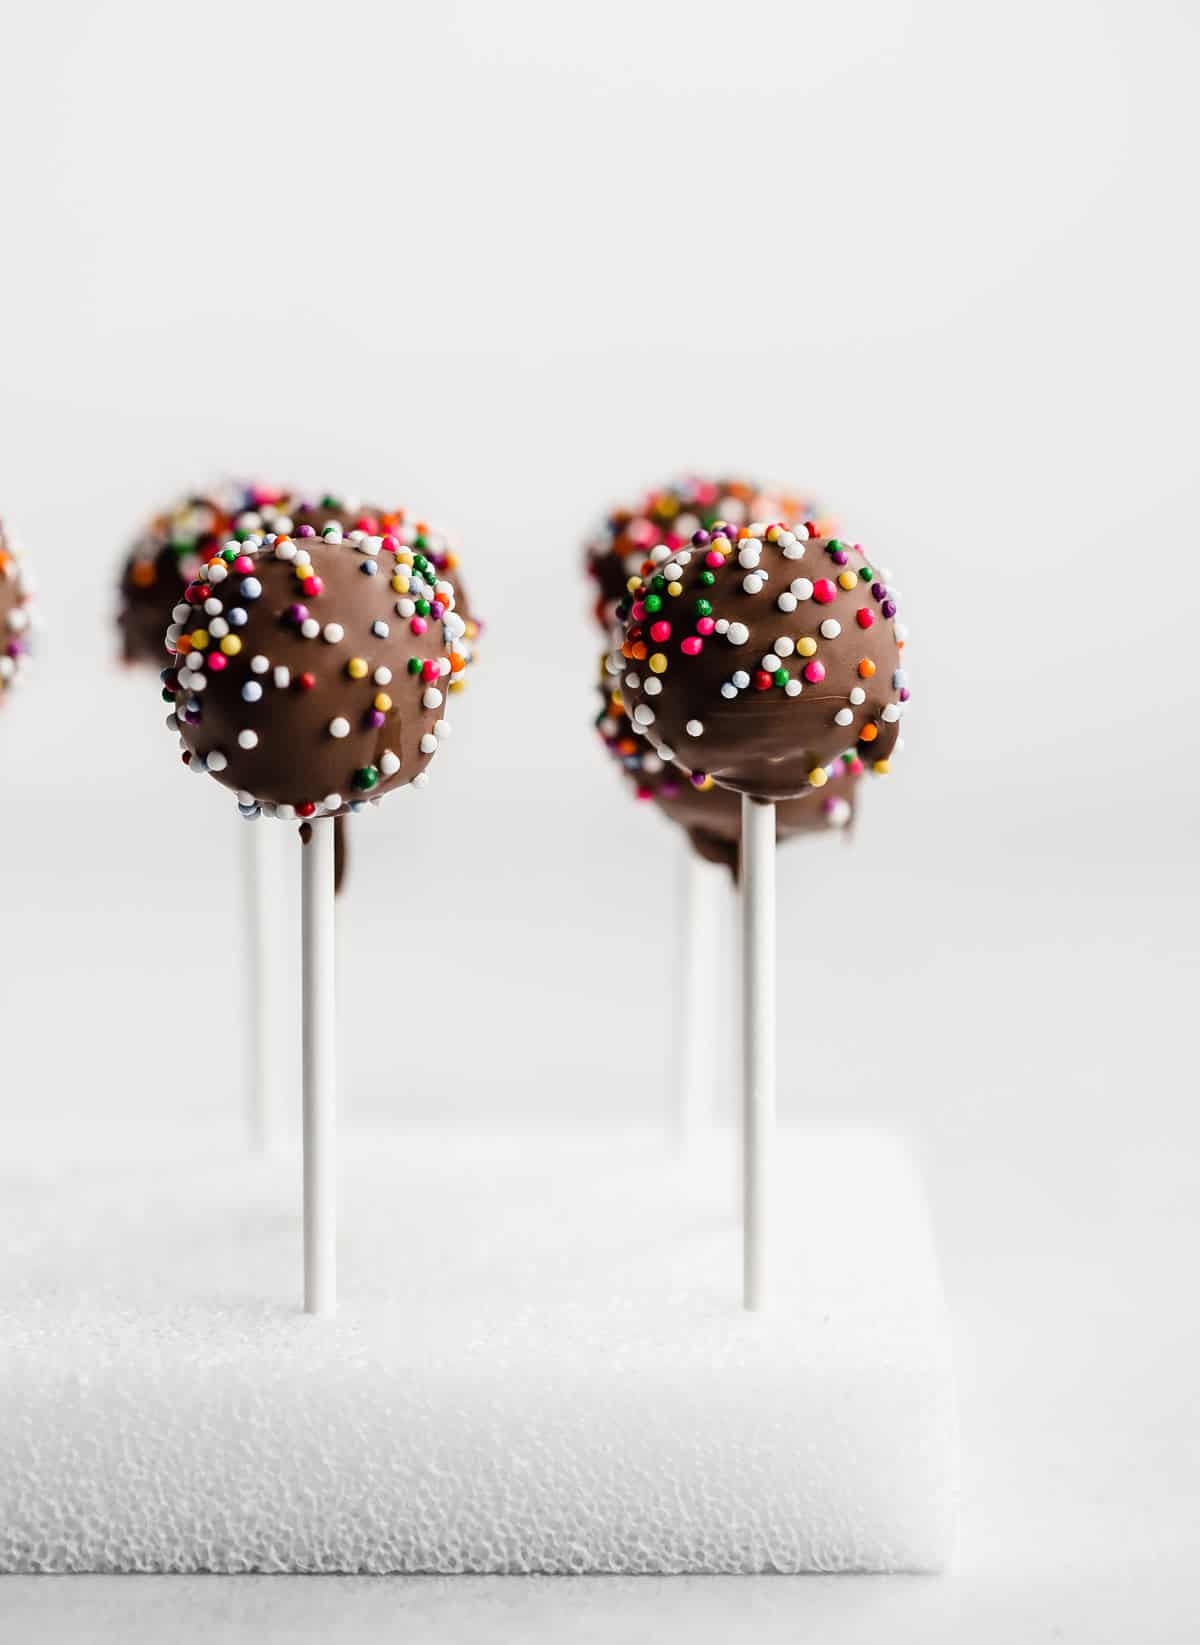
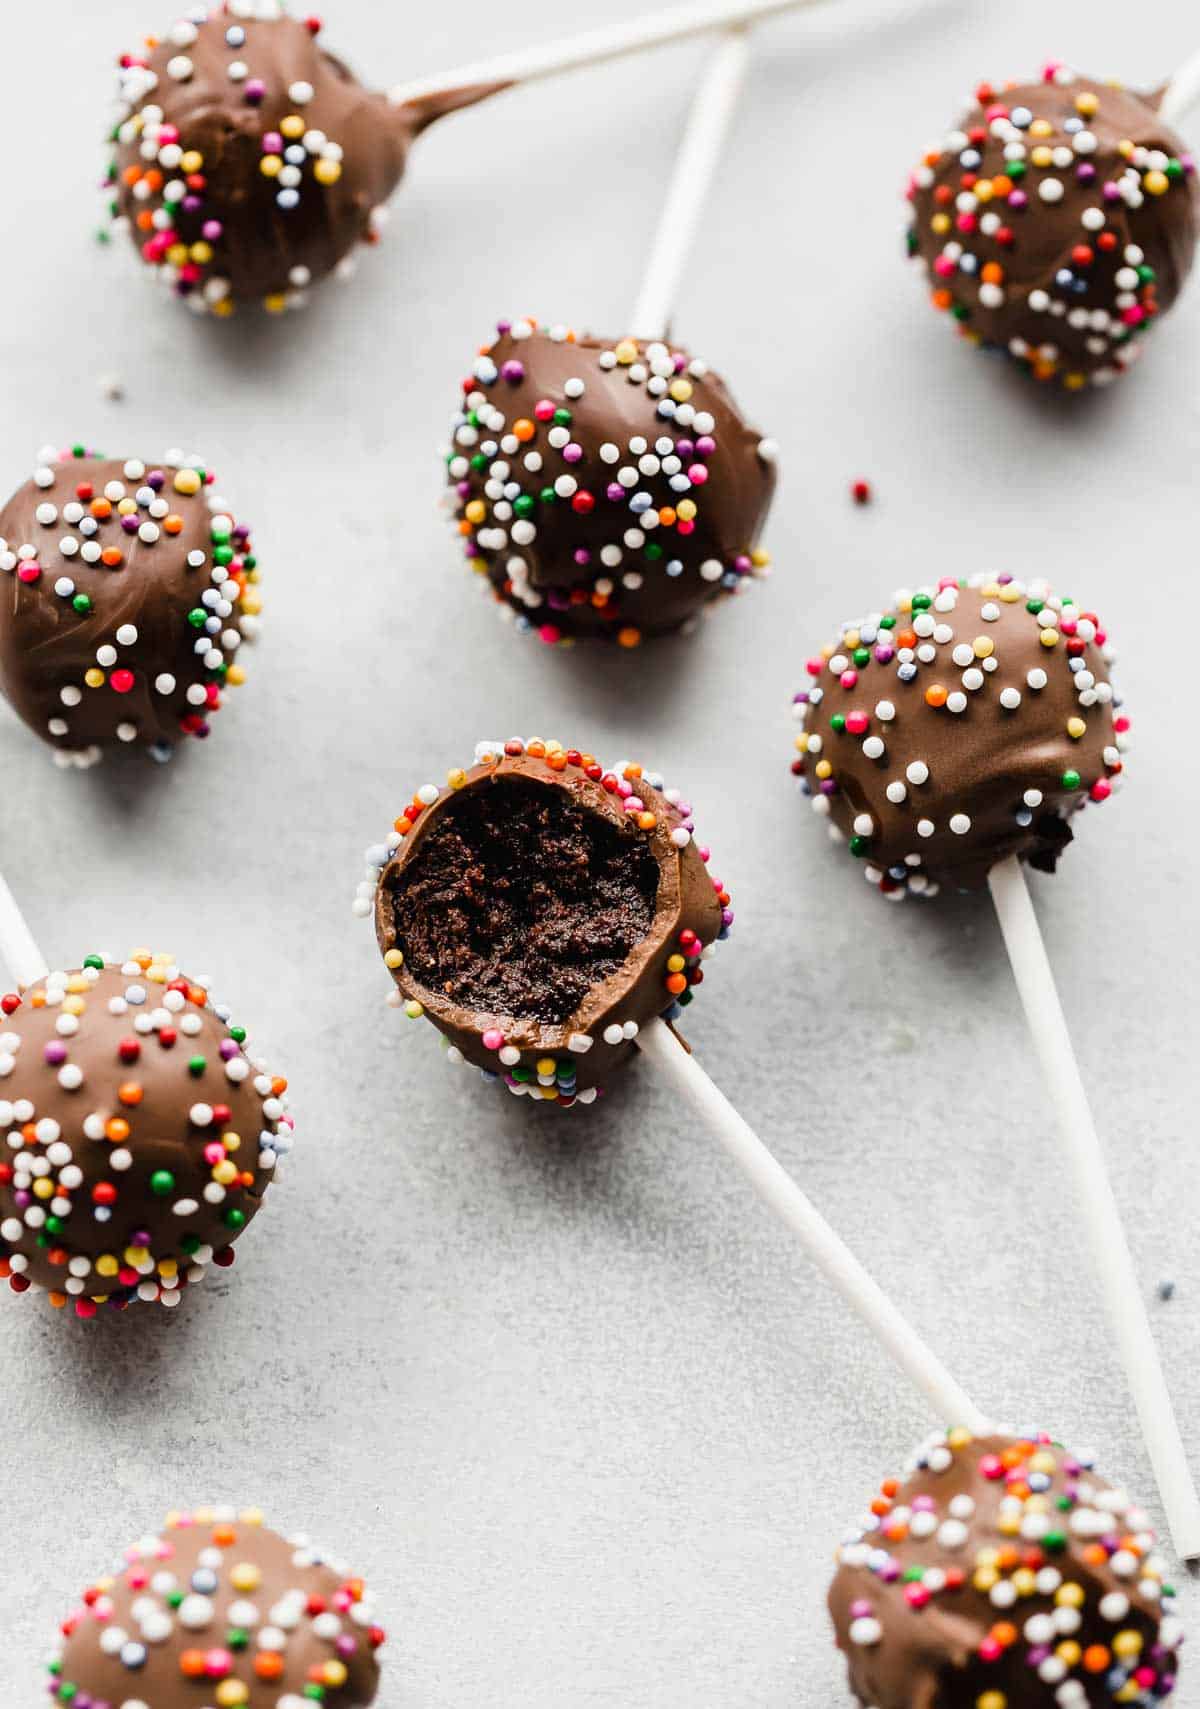
These Chocolate Cake Pops are made with a really moist chocolate cake from scratch and rich homemade chocolate frosting. Use them for any occasion by decorating with festive sprinkles!
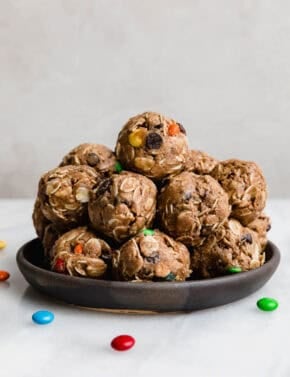
If you are an Oreo fan, then you’ll definitely want to try our Oreo Cake Pops too! For more fun desserts rolled into balls, try our Buckeye Balls and Chocolate Peanut Butter Protein Balls.
Why This Recipe Works
- Chocolate cake pops from scratch. This chocolate cake pop recipe uses a chocolate cake from scratch to make the cake pops. No boxed cake mix flavor here at all — completely homemade cake pops!
- Bloomed cocoa powder. Blooming cocoa powder is what happens when you add hot water to cocoa. This helps activate the cocoa to make the flavor richer and more delicious!
- Cake on a stick … I mean. 🙂 I really enjoy eating a rich and Moist Chocolate Cake with a fork, but having it on a stick is waaaay more fun!
- Customize for any holiday or party. You can use whatever sprinkles you’d like to customize these simple cakes pops into something fun, festive, and celebratory!
Ingredient Notes
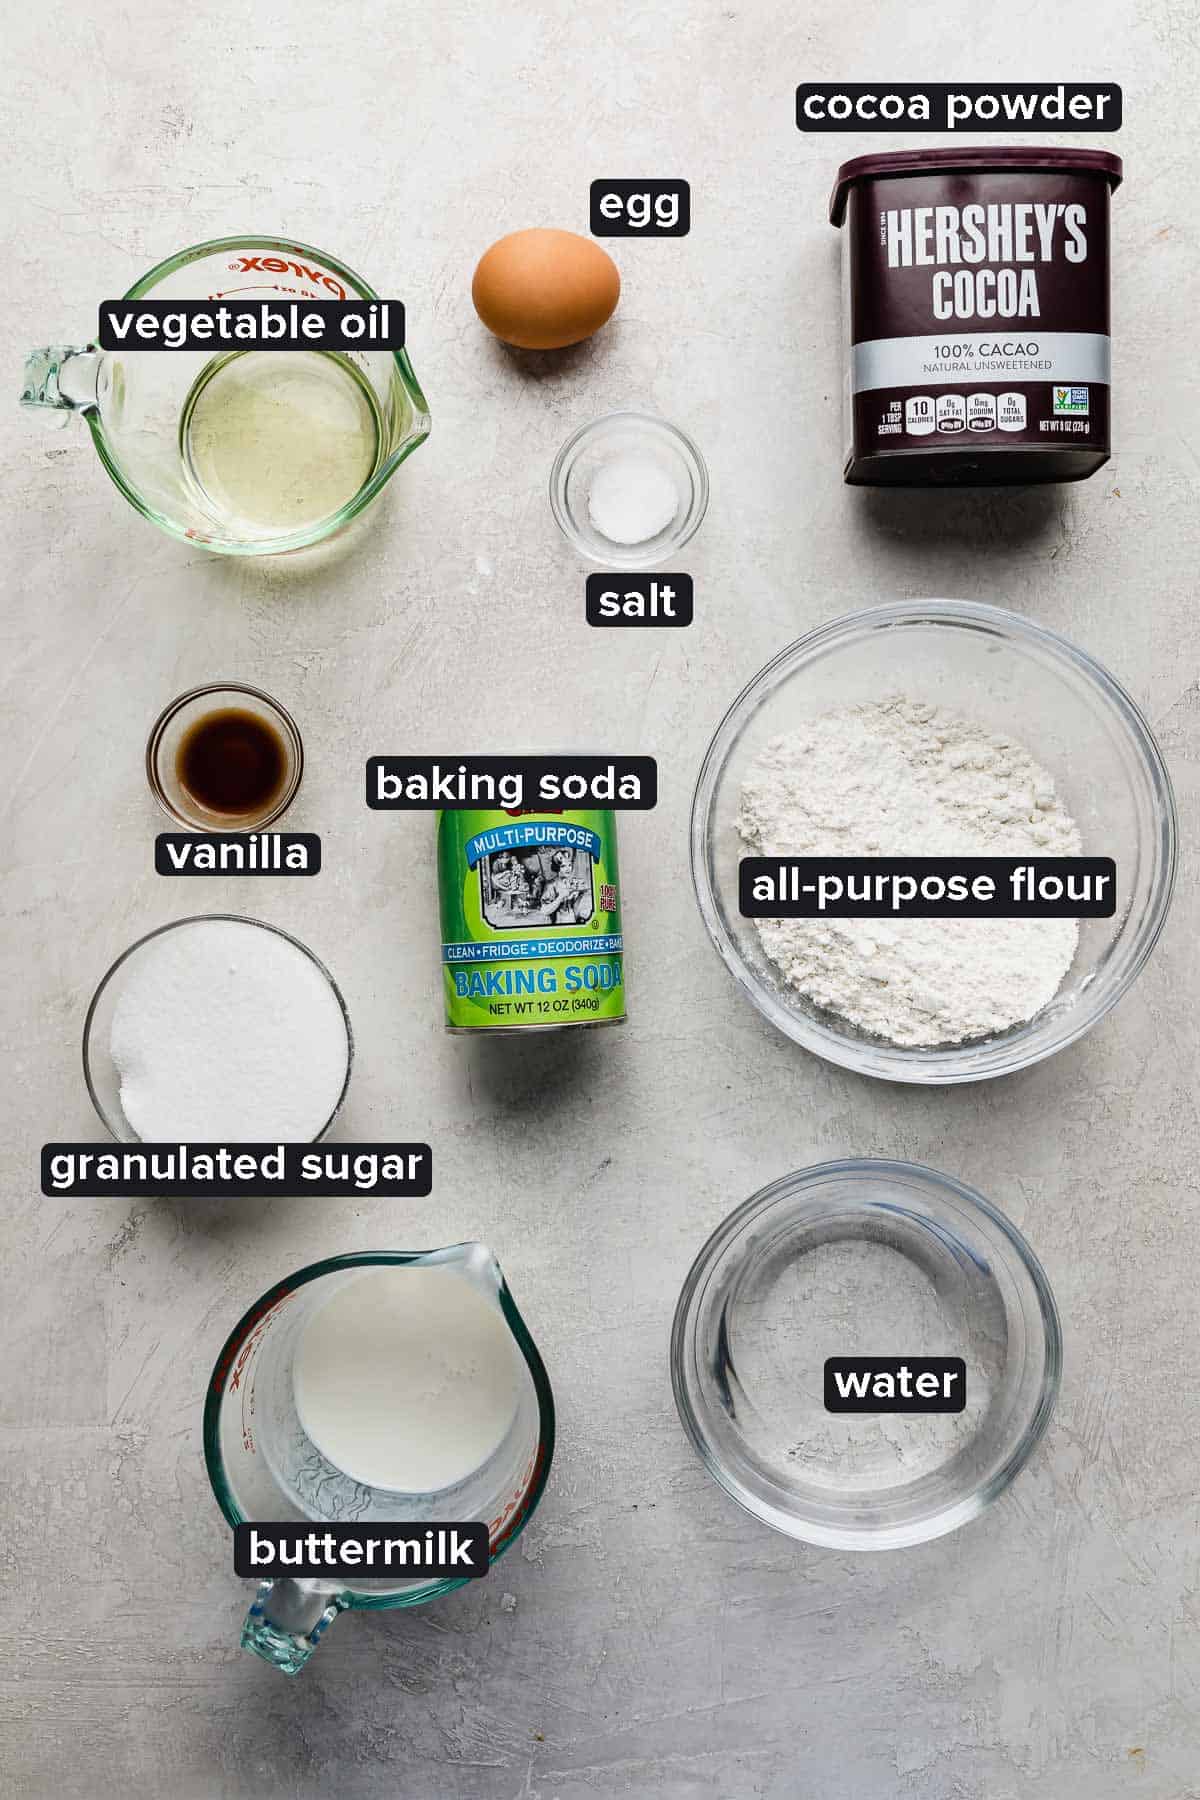
- Flour: You don’t need cake flour for this chocolate cake pops recipe. Just all-purpose flour!
- Unsweetened Natural Cocoa Powder: You’ll use the unsweetened cocoa powder for the homemade chocolate cake recipe, but you can use Dutch process cocoa powder if you wish for the chocolate frosting.
- Buttermilk: Use room temperature buttermilk to get the best rise results on your chocolate cake from scratch.
- Vegetable Oil: Using oil in cakes is best because oil is a liquid at room temperature so your cakes will remain moist and delicious!
- Hot Water: The hot water added to the cocoa will “bloom” the cocoa powder. This means it will help the cocoa to develop into a deeper and richer flavor.
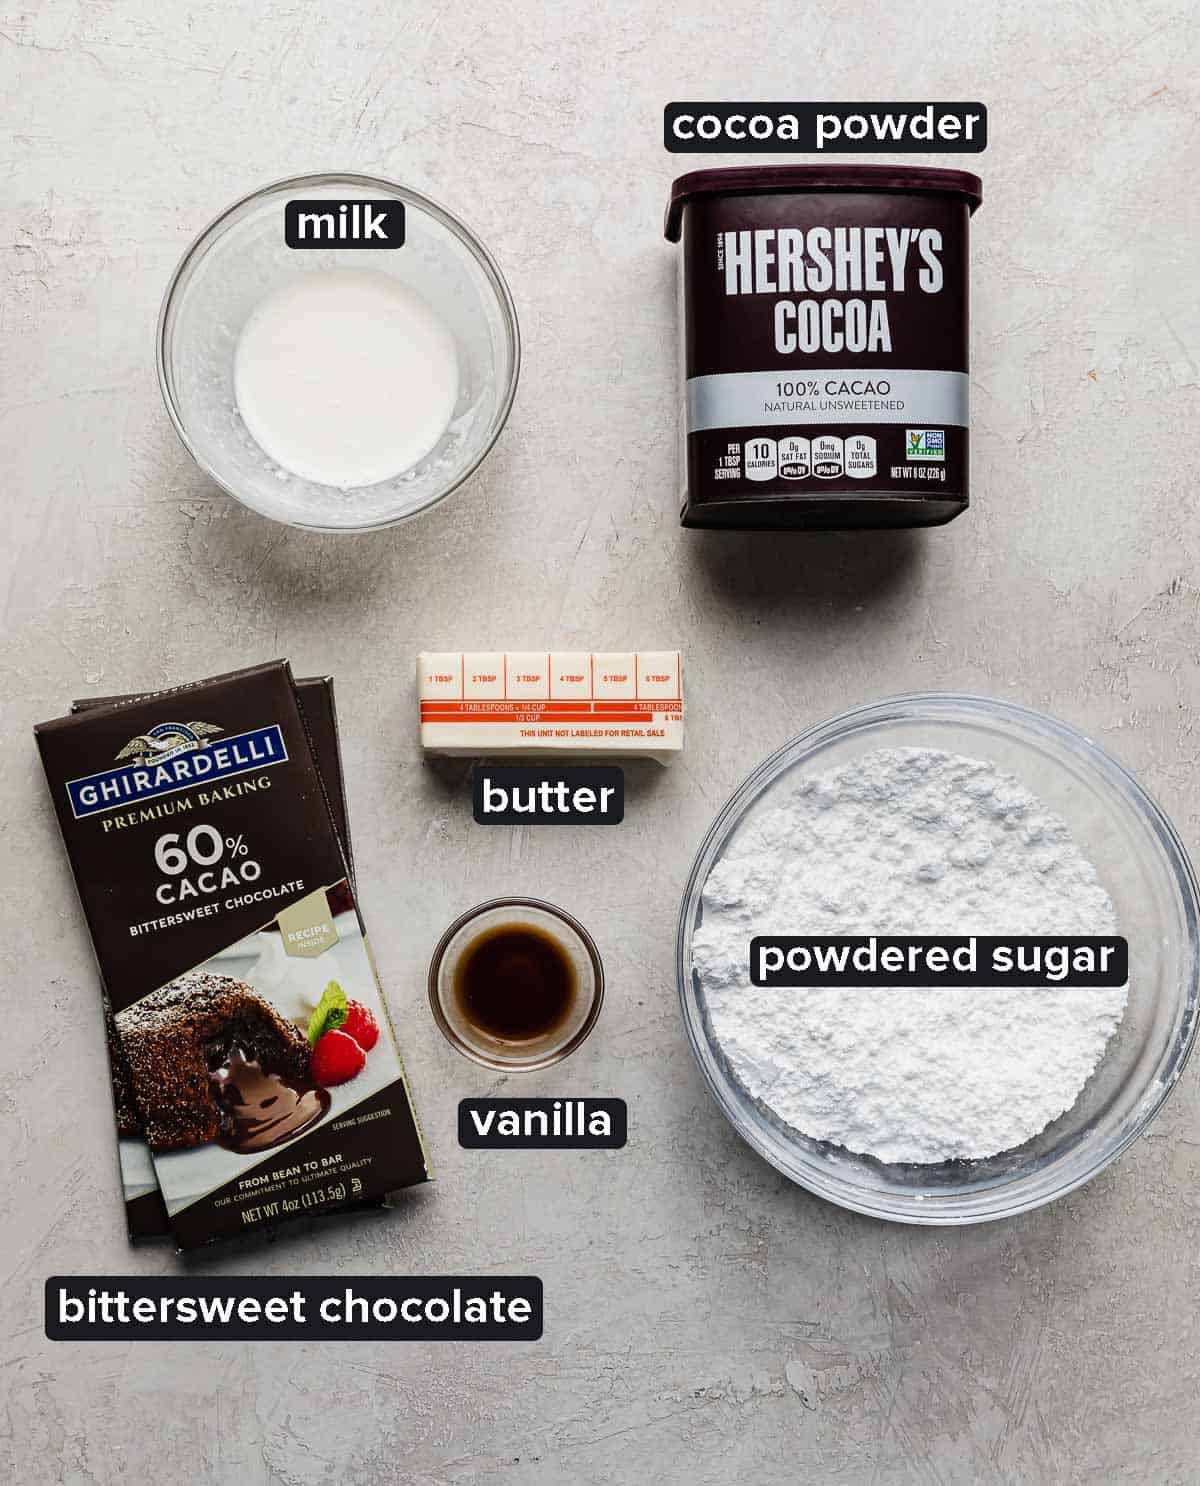
- Unsalted Butter: Typically you want butter that is slightly cold for frosting, but in this case you want room temperature butter to get a softer texture to combine with the crumbled cake.
- Powdered Sugar: Measure then sift your powdered sugar for a smoother consistency in your frosting.
- Chocolate Melts or Chocolate: I used a Ghirardelli bittersweet chocolate bar. You can use candy melts if you’d like instead.
- Sprinkles: Pick your favorite sprinkles that are festive for your event or celebration you are serving these homemade chocolate cake pops at!
Step-by-Step Instructions
Make the Chocolate Cake
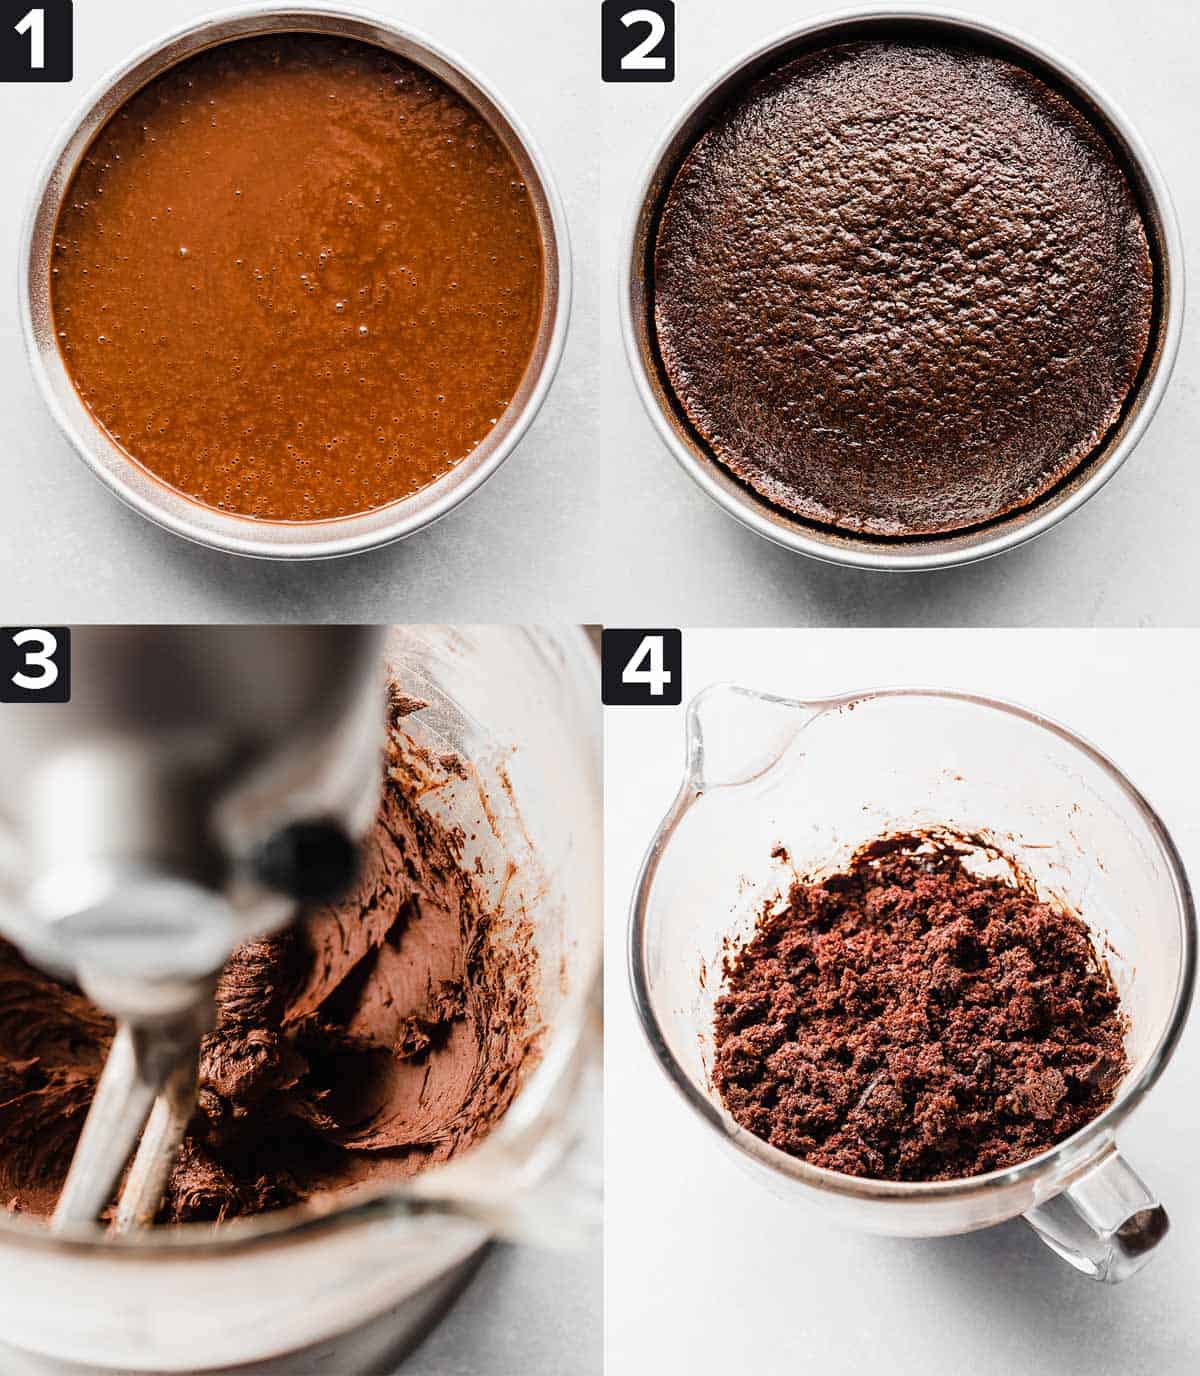
- Combine the dry ingredients. Preheat your oven to 325ºF. To a medium bowl, add 1 cup all purpose flour, 1 cup granulated sugar, 1/3 cup unsweetened cocoa powder, 1 tsp baking soda, and 1/2 tsp salt. Whisk until combined.
- Combine the wet ingredients. To the bowl of a stand mixer fitted with the paddle attachment add 1 egg, 1/2 cup buttermilk, and 1/2 cup vegetable oil. Mix until combined.
- Combine wet and dry ingredients. Add the flour mixture to the wet ingredients in the stand mixer and mix until combined. Add 1 tsp vanilla extra and 1/2 cup hot water and mix on medium speed until just combined.
- Bake the chocolate cake. Spray one 9-inch round cake pan (or square) with cooking spray that contains flour! Pour the chocolate cake batter into the pan and bake for 29-33 minutes or until a toothpick in the center comes out with a few moist crumbs but no wet batter. Remove and let cool in the pan for 10 minutes then turn out and let cake cool completely on a wire rack.
Make the Chocolate Frosting
- Combine the ingredients. Add 6 T of unsalted butter to the bowl of a stand mixer (or use a bowl and a hand mixer). Beat until very smooth. Add 3/4 cup powered sugar, 1/2 cup cocoa powder, 3 tsp milk, and 1/2 tsp vanilla extract. Beat until creamy, about 2-3 minutes.
Assemble the Cake Pops
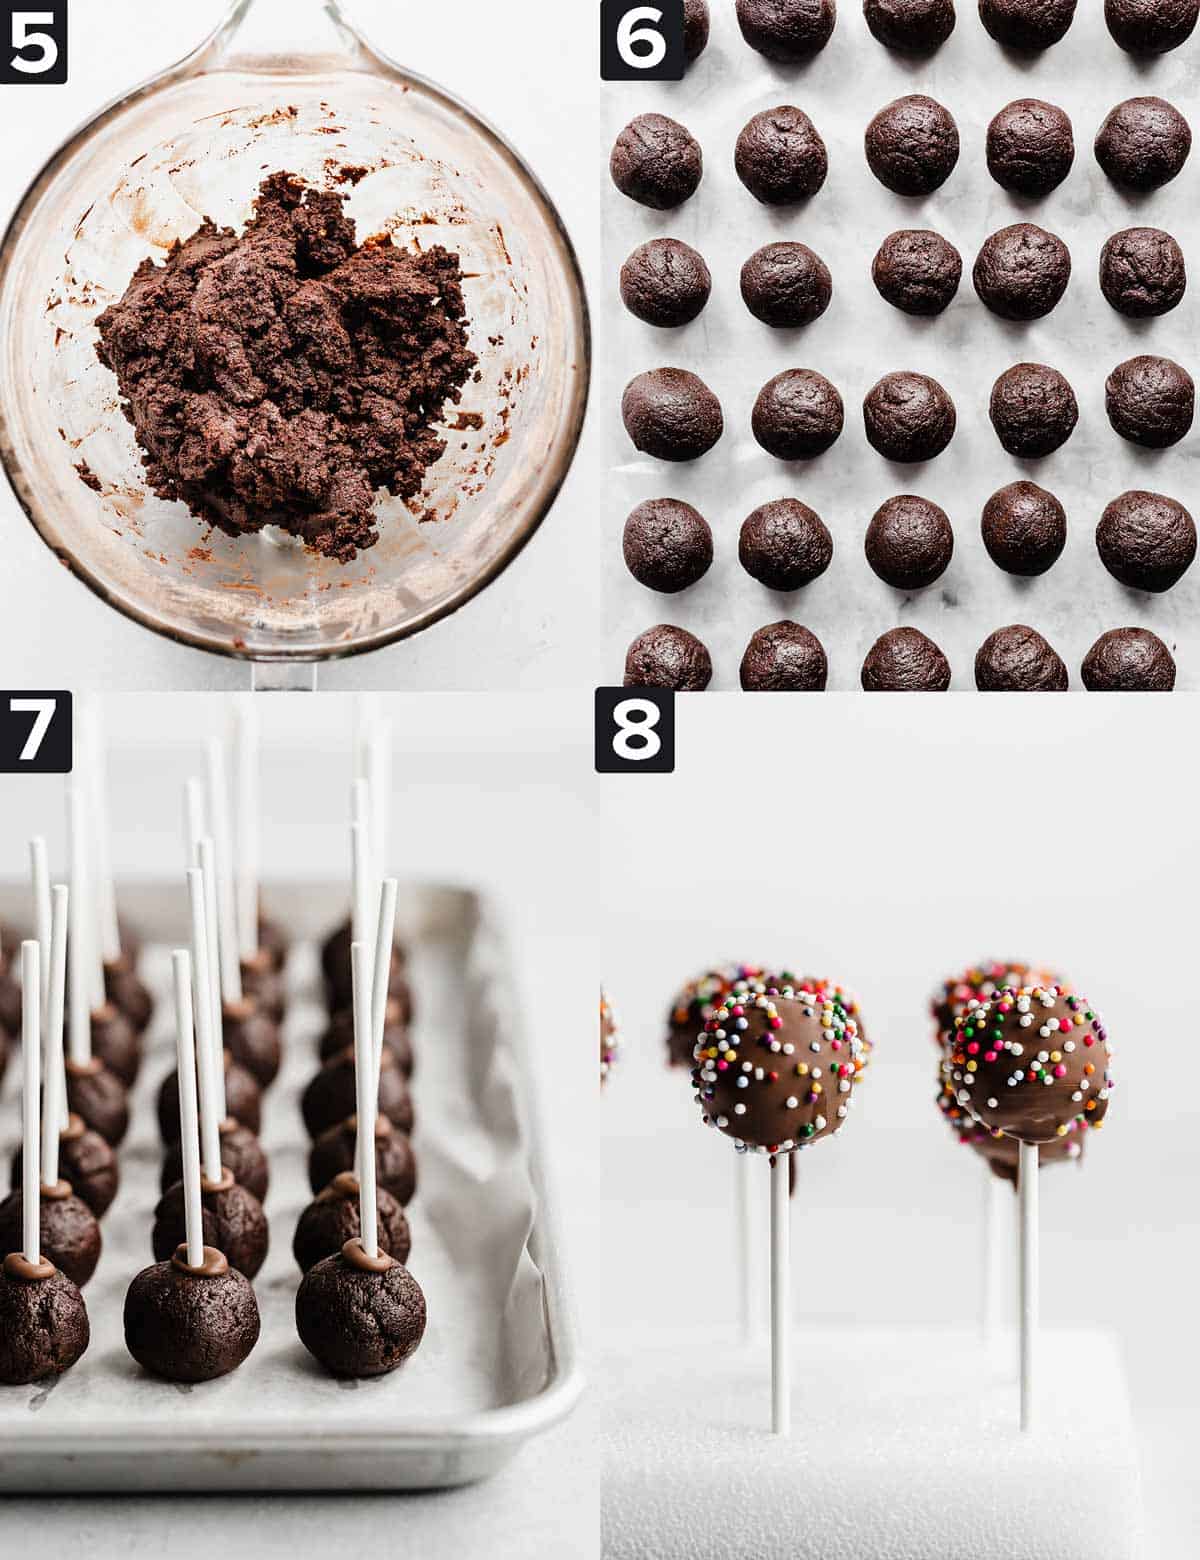
- Combine the cake and chocolate buttercream. Crumble the cake into the frosting, making sure there are no large cake chunks. Mix the cake crumbles and frosting until combined.
- Roll into balls. Roll the cake pops batter into 1 T balls using a 1 T cookie scoop. Place the rolled balls on a baking sheet lined with wax paper. Chill all the cake balls in the fridge for 2 hours — or overnight — or in the freezer for at least 1 hour.
- Make the chocolate coating for cake pops. Place 12-24 oz candy melts in a liquid measuring cup or microwave-safe bowl. Microwave for 20-second increments, stirring after each, until all the chocolate is melted and uniformly smooth.
- Dip the cake pops. Take a lollipop stick and dip one of the ends in the melted chocolate (about 1/2 inch) then poke the chocolate dipped stick into the center of one of the chilled cake balls, pushing the stick about 1/2-3/4 through the cake ball. Place on the baking sheet and repeat with each cake pop stick and ball. Place the sheet with all the cake pops back in the fridge for chill for 30 minutes.
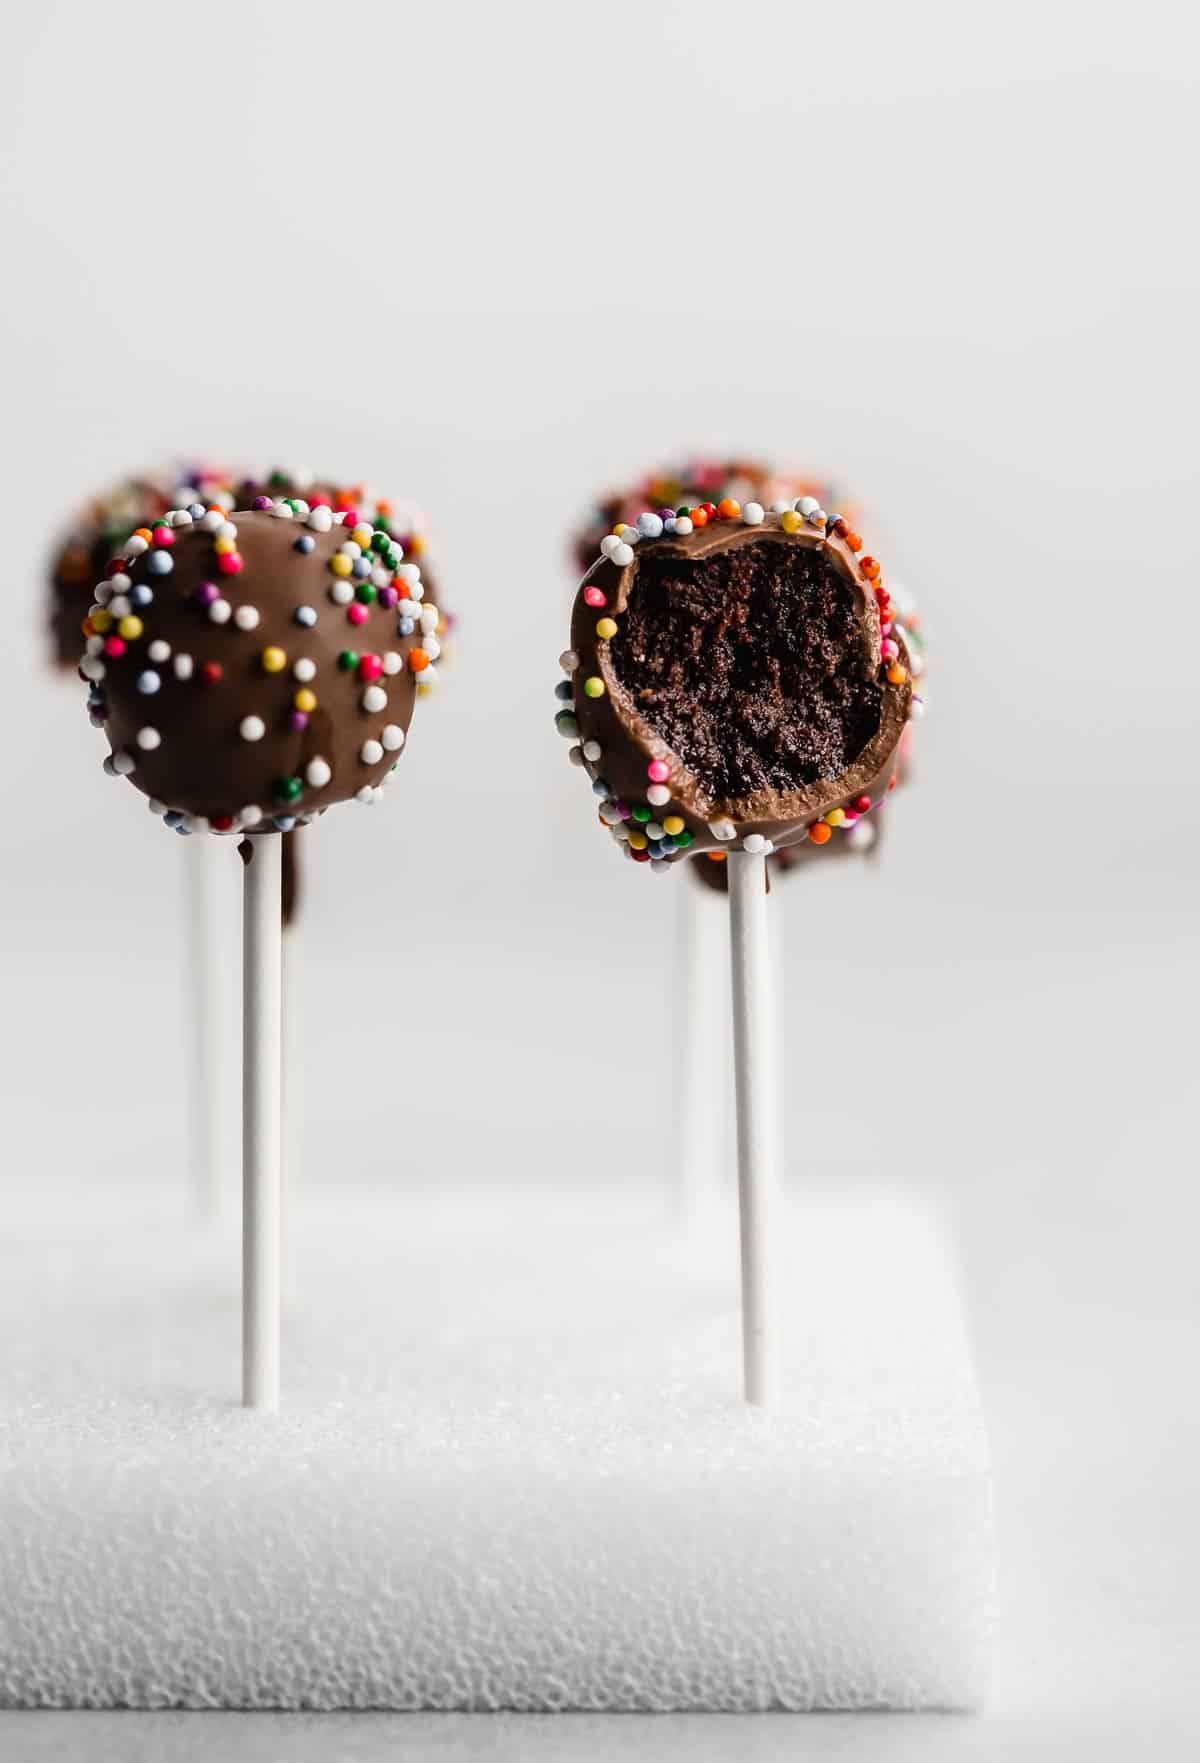
- Coat the cake pops in chocolate! Dip each of the chocolate cake pops in the melted chocolate until completely covered, tapping off any excess chocolate by tapping the stick against the side of the measuring cup. After dipping, you can roll or coat the cake pop in sprinkles of your choice.
- Let set. Place your cake pops in a stand or styrofoam block to set. Let set at room temperature for 1 hour or I the fridge. Serve for a holiday party, baby showers, bridal shower, brunch, birthday party and more!
Recipe Tips
Make sure you use a cooking spray that contains flour. This is very important to help the cake come out of the pan fully.
Don’t make the cake balls too big! You want them to be exactly 1 T. Too big and they’ll be too top heavy on the sticks and they’ll fall off.
You don’t want the cake pops to be in the fridge for too long after poking them with the sticks and before dipping in the chocolate. If the cake balls are too cold and the melted chocolate is still pretty hot, you can get cracking in the cake pops.
I dipped some of my cake pops in chocolate candy melts, and some in dark chocolate. Be careful when melting the chocolate, you don’t want to scorch it!
If using pure chocolate, make sure you add 1 teaspoon of coconut oil or vegetable oil to thin it out before melting it. This will make the coating smoother and all around better for coating the cake pops.
No cake pop stand or styrofoam? No worries! If you have a box from a recent Amazon delivery, you can place that on the counter and poke the sticks through that!
You can also nix the sticks and serve them as cake balls.
To make things easier, you can make the chocolate cake and frosting one day (store the cake covered at room temperature and the frosting in an airtight container in the fridge) and then assemble and dip the next day!
Make Ahead, Storing, and Freezing
Store cake pops at room temperature for 5 days or in an airtight container in the refrigerator for up to 1 week.
Freeze un-dipped cake balls in a freezer-safe ziplock bag for 6 months.
If you’re wanting to freeze chocolate covered cake pops, the best way to avoid the chocolate from cracking is to prevent drastic temperature changes. So let the chocolate set, then place in the fridge and then the freezer. You might experience slight condensation when you remove them from the freezer. They will last for 2 months in the freezer.
Recipe FAQs
I dipped some of mine in chocolate candy melts and some in dark chocolate. You pick your favorite!
Yes you can, I would just add 1 tsp of coconut oil to help the chocolate chips melt more evenly.
This happens when the chocolate is too hot and the cake balls are too cold. The stark difference of temperature can cause the chocolate coating on the outside to crack. You want the balls to be slightly chilled so the melted chocolate will firm up quickly (and not be dripping off the ball), but you don’t want them to be frozen are super cold. And you won’t need to reheat your chocolate prior to dipping the balls. Let the chocolate temperature come down so it isn’t so hot, but is still melted.
You either didn’t have enough frosting for the amount of cake or when crumbling the cake, you didn’t crumble it into small enough pieces. You want the cake to be very crumbled so that it will fully combine into the frosting and become a uniform texture. That should roll into cake balls very easily and stay together really well. You shouldn’t have any issues with crumbling.
While writing this blog post it occurred to me that I had no idea who invented cake pops. I mean, it’s definitely more of a recent “invention.” Well, apparently Angie Dudley invented cake pops. She obviously had a lot of time on her hands! 😂
My Best Chocolate Cake Recipes
- Chocolate Cake with Chocolate Cream Cheese Frosting
- Moist Chocolate Cake Recipe
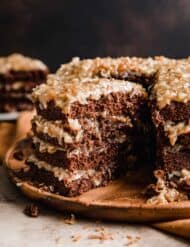
- German Chocolate Cake
- Chocolate Buttermilk Bundt Cake
- Chocolate Cake with Peanut Butter Frosting
Chocolate Cake Pops
Ingredients
Chocolate Cake
- 1 cup all purpose flour
- 1 cup granulated sugar
- 1/3 cup unsweetened natural cocoa powder
- 1 teaspoon baking soda
- 1/2 teaspoon salt
- 1 egg - at room temperature
- 1/2 cup buttermilk
- 1/2 cup vegetable oil
- 1 teaspoon vanilla extract
- 1/2 cup hot water
Frosting
- 6 tablespoon unsalted butter - softened to room temperature
- 3/4 cup powdered sugar
- 1/2 cup cocoa powder - Dutch process or unsweetened natural
- 3 teaspoons milk
- 1/2 teaspoon vanilla extract
- 12-24 oz candy melts or chocolate for coating - see notes
Equipment
Instructions
Make the Cake
- Preheat oven to 325°F. Spray 1- 9 inch round cake pan (or square). Make sure you use a cooking spray that contains flour. (VERY important you use a cooking spray that contains flour).
- In a medium bowl whisk the flour, sugar, cocoa, baking soda, and salt.
- In the bowl of a stand mixer fitted with paddle attachment mix the eggs, buttermilk, and veg oil until combined.
- Add the dry ingredients to the stand mixer and mix until combined. Pour in the vanilla and hot water, mix on medium speed until combined.
- Pour the batter into the cake pan and bake for 29-33 minutes (mine baked for 30 minutes) or until a toothpick inserted in the center of the cake comes out with a few moist crumbs but no wet batter.
- Remove cake from the oven and let cool for 10 minutes. Remove from the cake pan and allow cake to cool completely.
Make the Frosting
- In the bowl of your stand mixer fitted with the paddle attachment, cream the butter until smooth. Add the powdered sugar, cocoa powder, milk, and vanilla and mix until smooth and creamy, about 2-3 minutes.
Assemble the Cake Pops
- Once the cake is cool, crumble it into the frosting bowl. You want to be quite thorough. Make sure there are no large cake chunks. With the paddle attachment, mix the frosting and cake on low speed until it comes together.
- Roll into 1 tablespoon sized balls. Place the balls on a wax paper or parchment lined baking sheet.
- Chill the cake balls in the fridge for 2 hours (or overnight), or chill in the freezer for at least 1 hour.
- Melt the chocolate in a 2-cup liquid measuring cup. (Note: if using pure chocolate make sure you chop the chocolate before melting AND add ½ tsp vegetable oil to thin it out. This will make the coating smoother and all around better for coating the cake pops).
- Dip the ends of the lollipop sticks in the melted chocolate, you want the top 1/2 “ inch of the stick coated in chocolate, then insert the stick into the center of the chilled cake ball, pushing the cake ball about ½ way to ¾ the way through the ball. Repeat until all cake balls have a lollipop stick inserted in it.
- Place the cake pops back on the baking sheet and freeze for 30 minutes or until cold and firm.
- Dip the cake ball into the chocolate coating until it is completely covered. Gently tap the lollipop stick against the side of the measuring cup to allow excess chocolate to drip off.
- Immediately after dipping in the chocolate, roll the cake pop in the sprinkles OR sprinkle the sprinkles overtop of the wet chocolate.
- Place the cake pops in a Styrofoam block to set. (This is the best way to get them to set without ruining the beautiful appearance!) Cake pops will set in 1 hour at room temperature.
- Continue until all cake pops are done. Let set at room temperature. Store the coated cake pops at room temperature for up to 5 days, store in the fridge in an airtight container for 1 week.
 Welcome to this delicious corner of the internet! Here I share the recipes my family loves.


6 Comments on “Chocolate Cake Pops”
Just saw one of the photos and knew I had to make them. These chocolate cake pops just look so tasty and colorful! Used the ingredients precisely as listed here and when I showed the final result to my kids, they were quite excited! They loved the taste (as did I!), so I think I’ll make these again from time to time now.
Delicious & perfect..instead of candy melts I used chocolate chips..they were delish 😊
This made a red velvet cake not chocolate!!!! but it was really good. I made it gluten free and it was soooooooooooooo fluffy and amazing!!
Loooove 🥰
This cake is more red velvet than chocolate!!!! But is sooooo delish!!! Loooove 🥰 I made it gluten free and it was sooooo fluffy andamazingg
Love this recipe! I’ll have to use it for a birthday for one of my kids someday. Also could use it as favors for a baby shower or something. Super yummy, super easy to make!
I LOOOVVE this recipe, so delish!!