Ferrero Rocher Cake
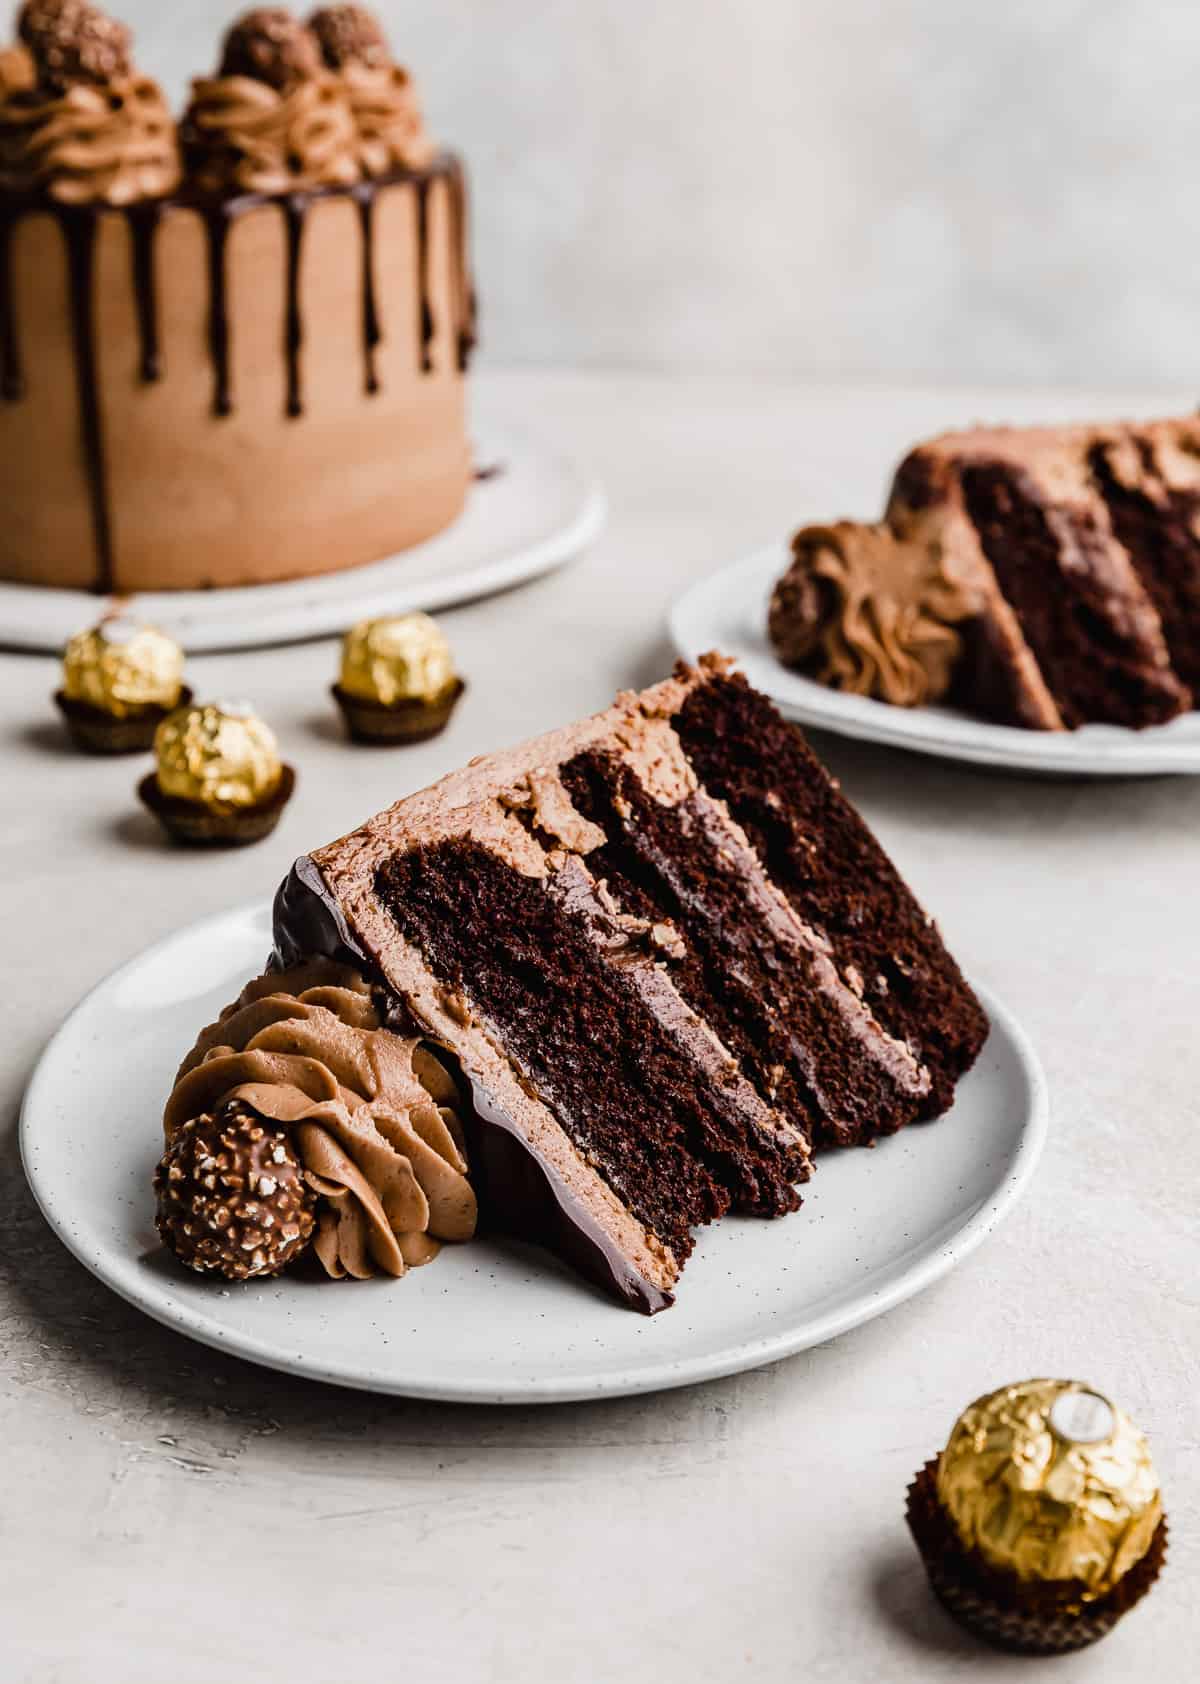
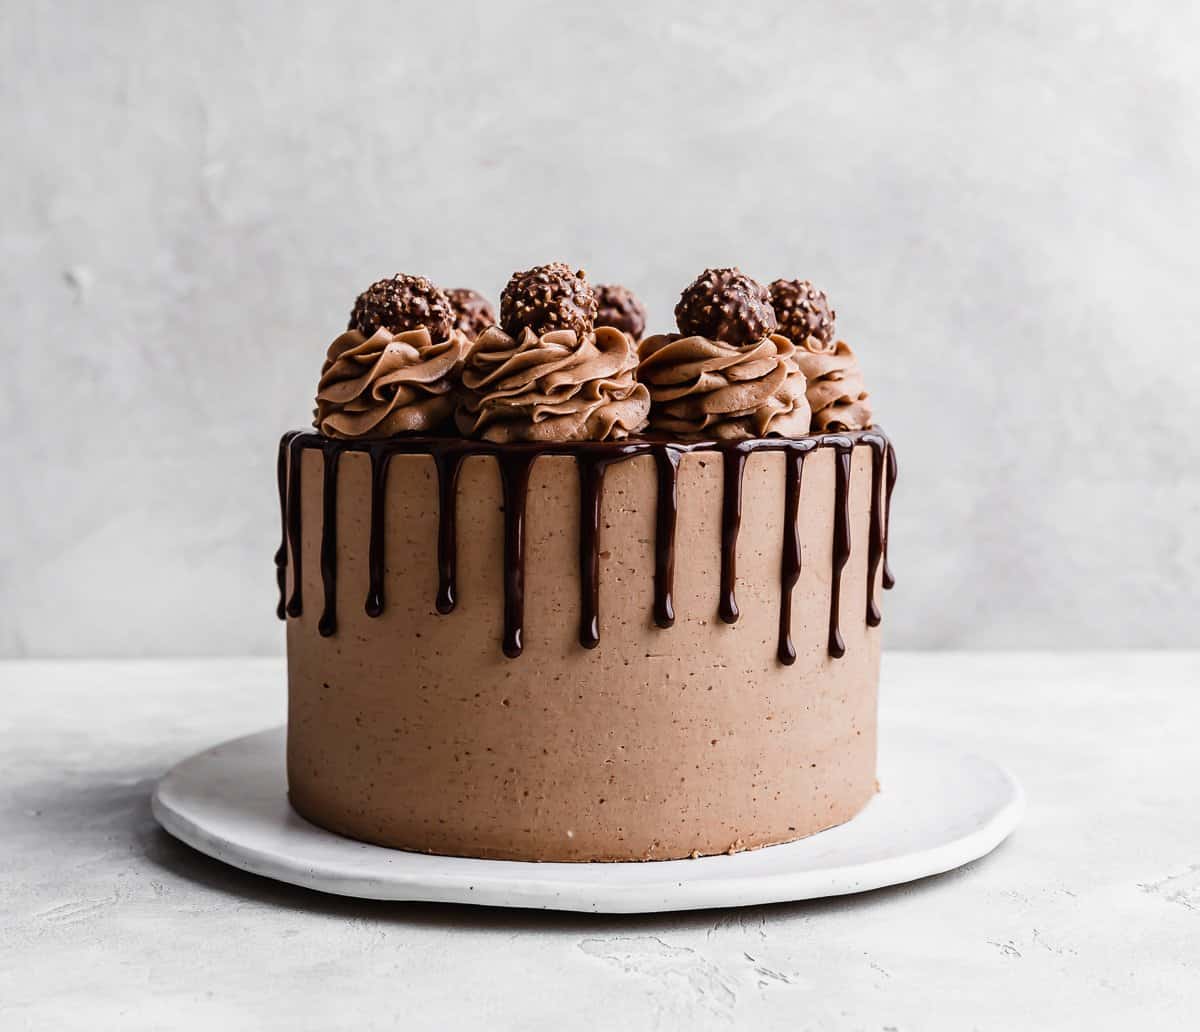
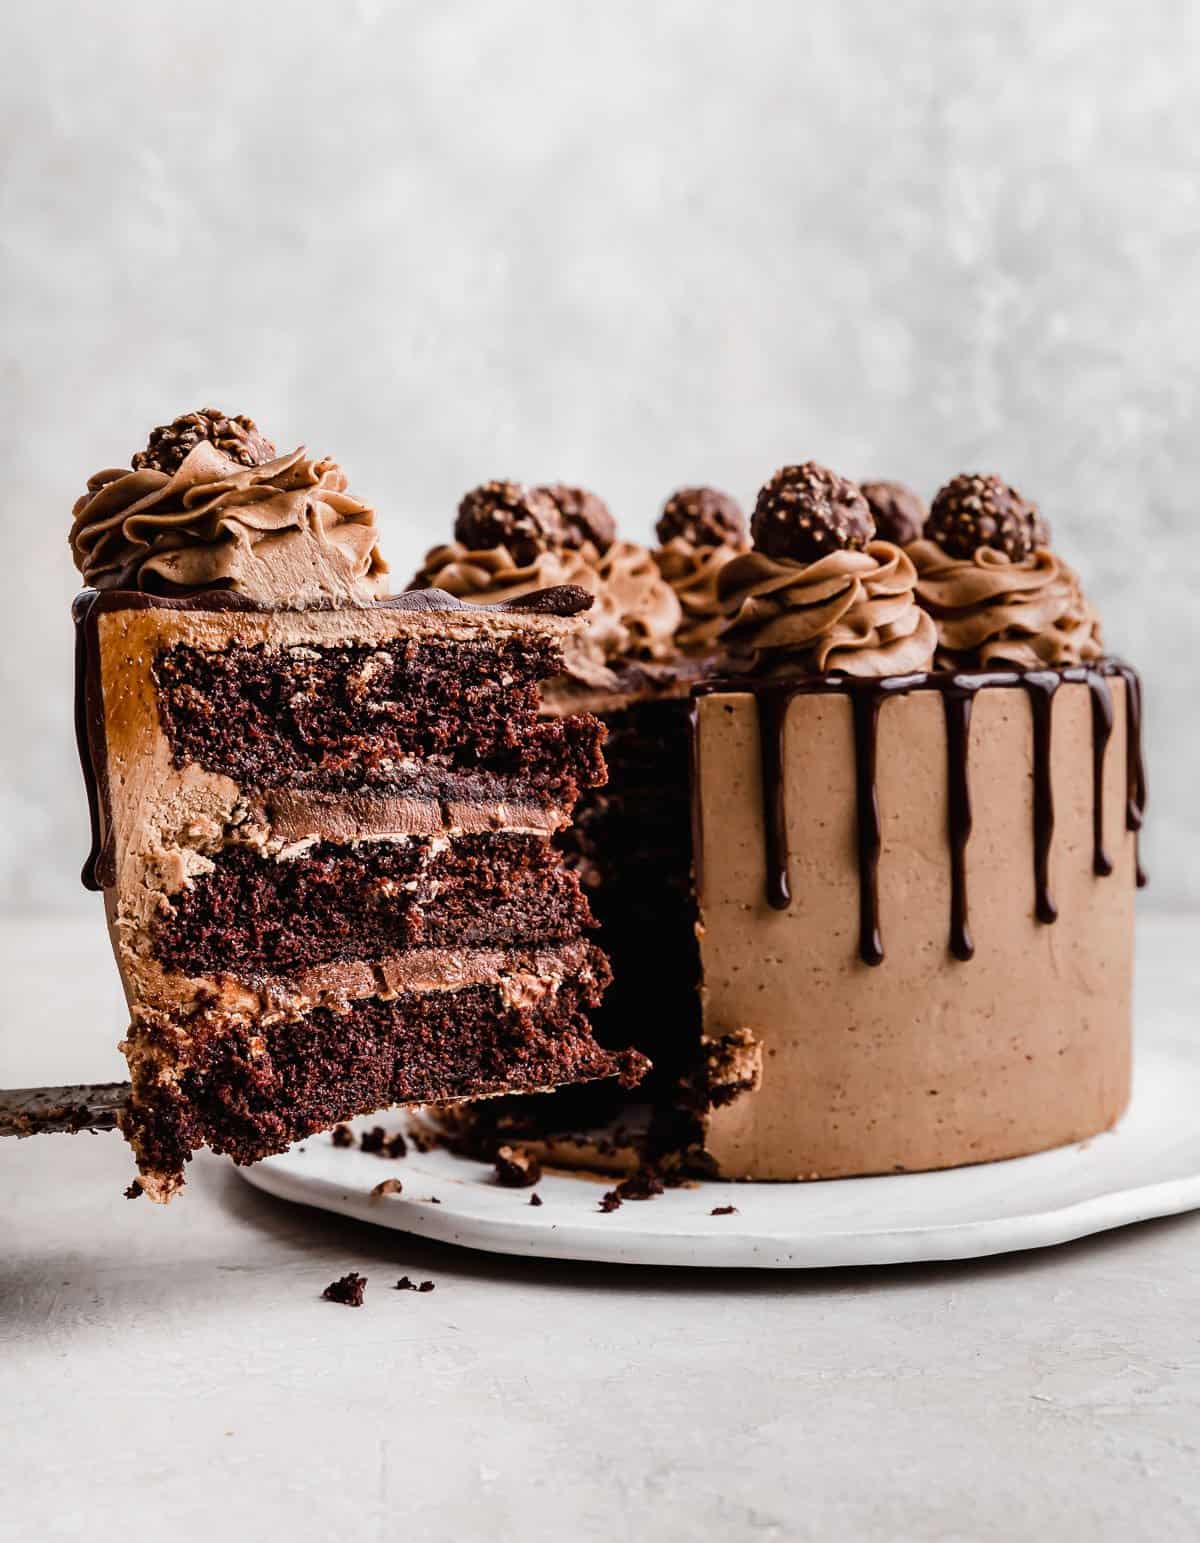
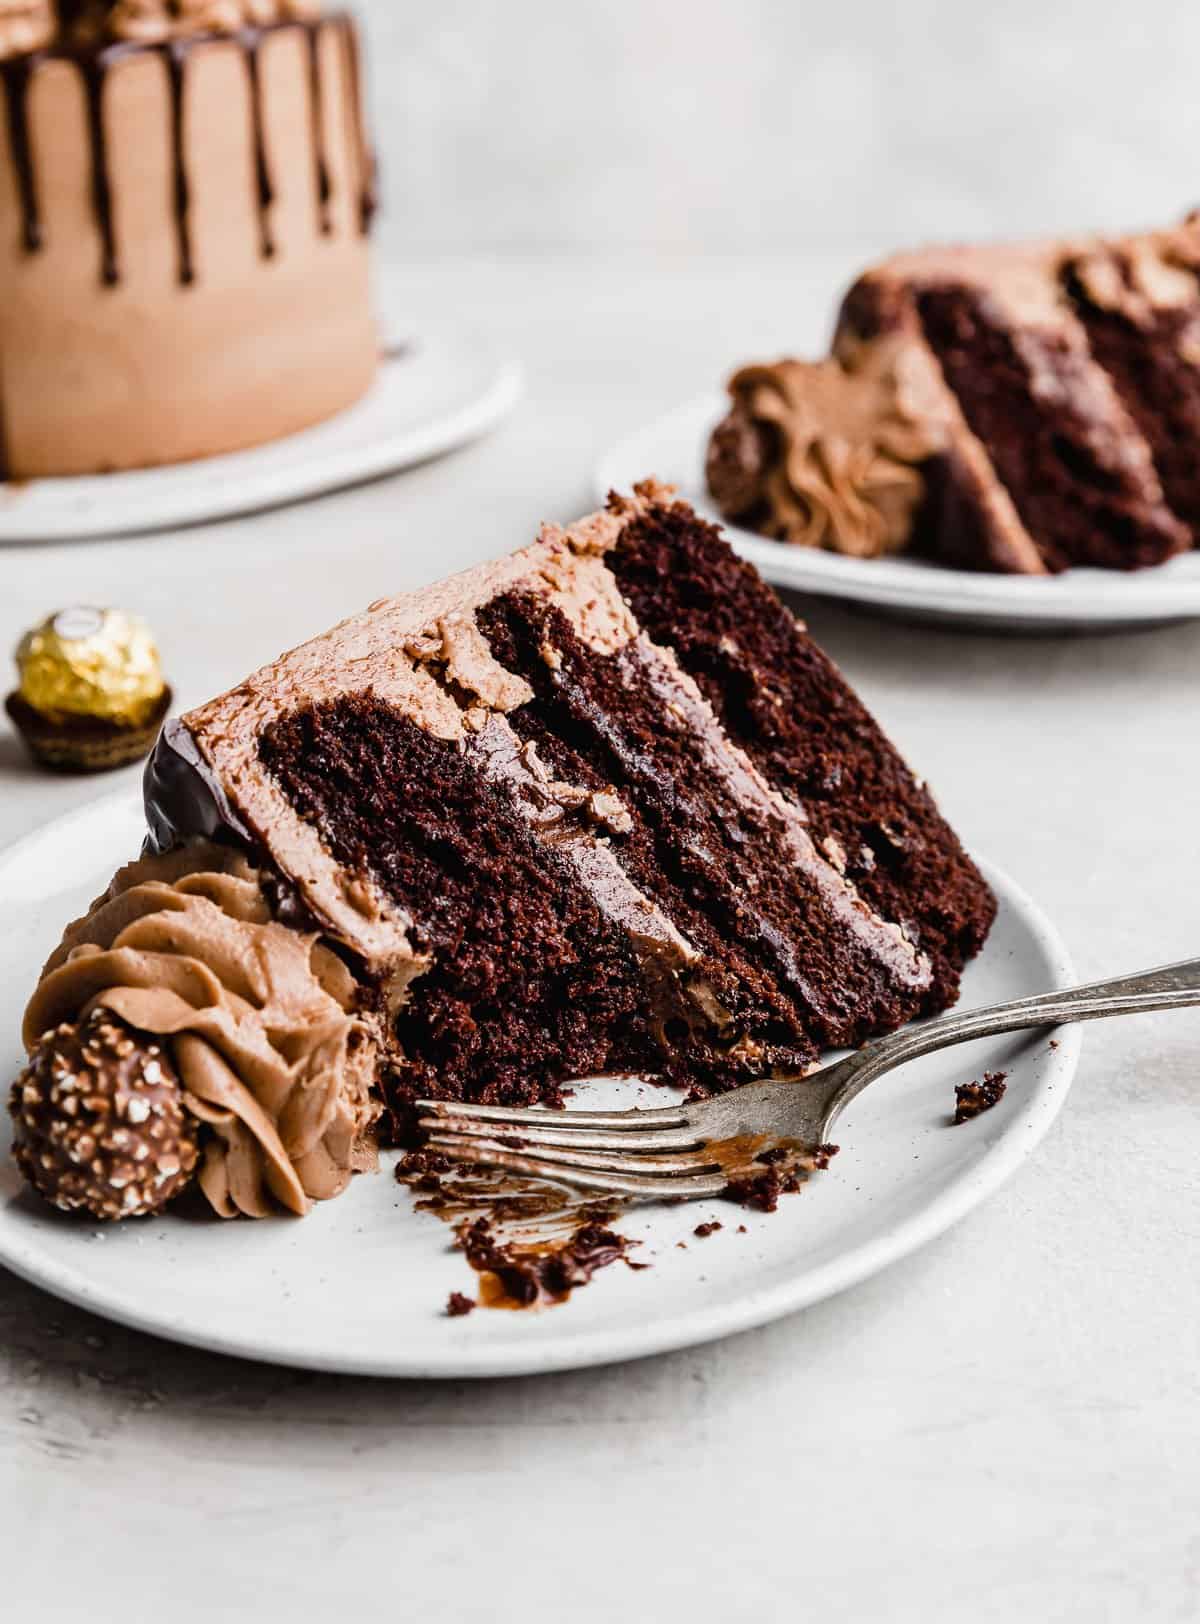
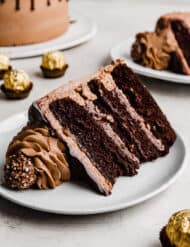
This Ferrero Rocher cake has three layers of super moist chocolate hazelnut cake, a delicious chocolate hazelnut buttercream and a soft whipped Nutella filling studded with chopped hazelnuts. Complete with chocolate ganache drip and Ferrero Rocher candies, this Ferrero cake will knock your socks off!
If you’re looking for another fun way to use Ferrero Rocher candies, then you’ll love my Ferrero Rocher Brownies and Ferrero Rocher Cupcakes!
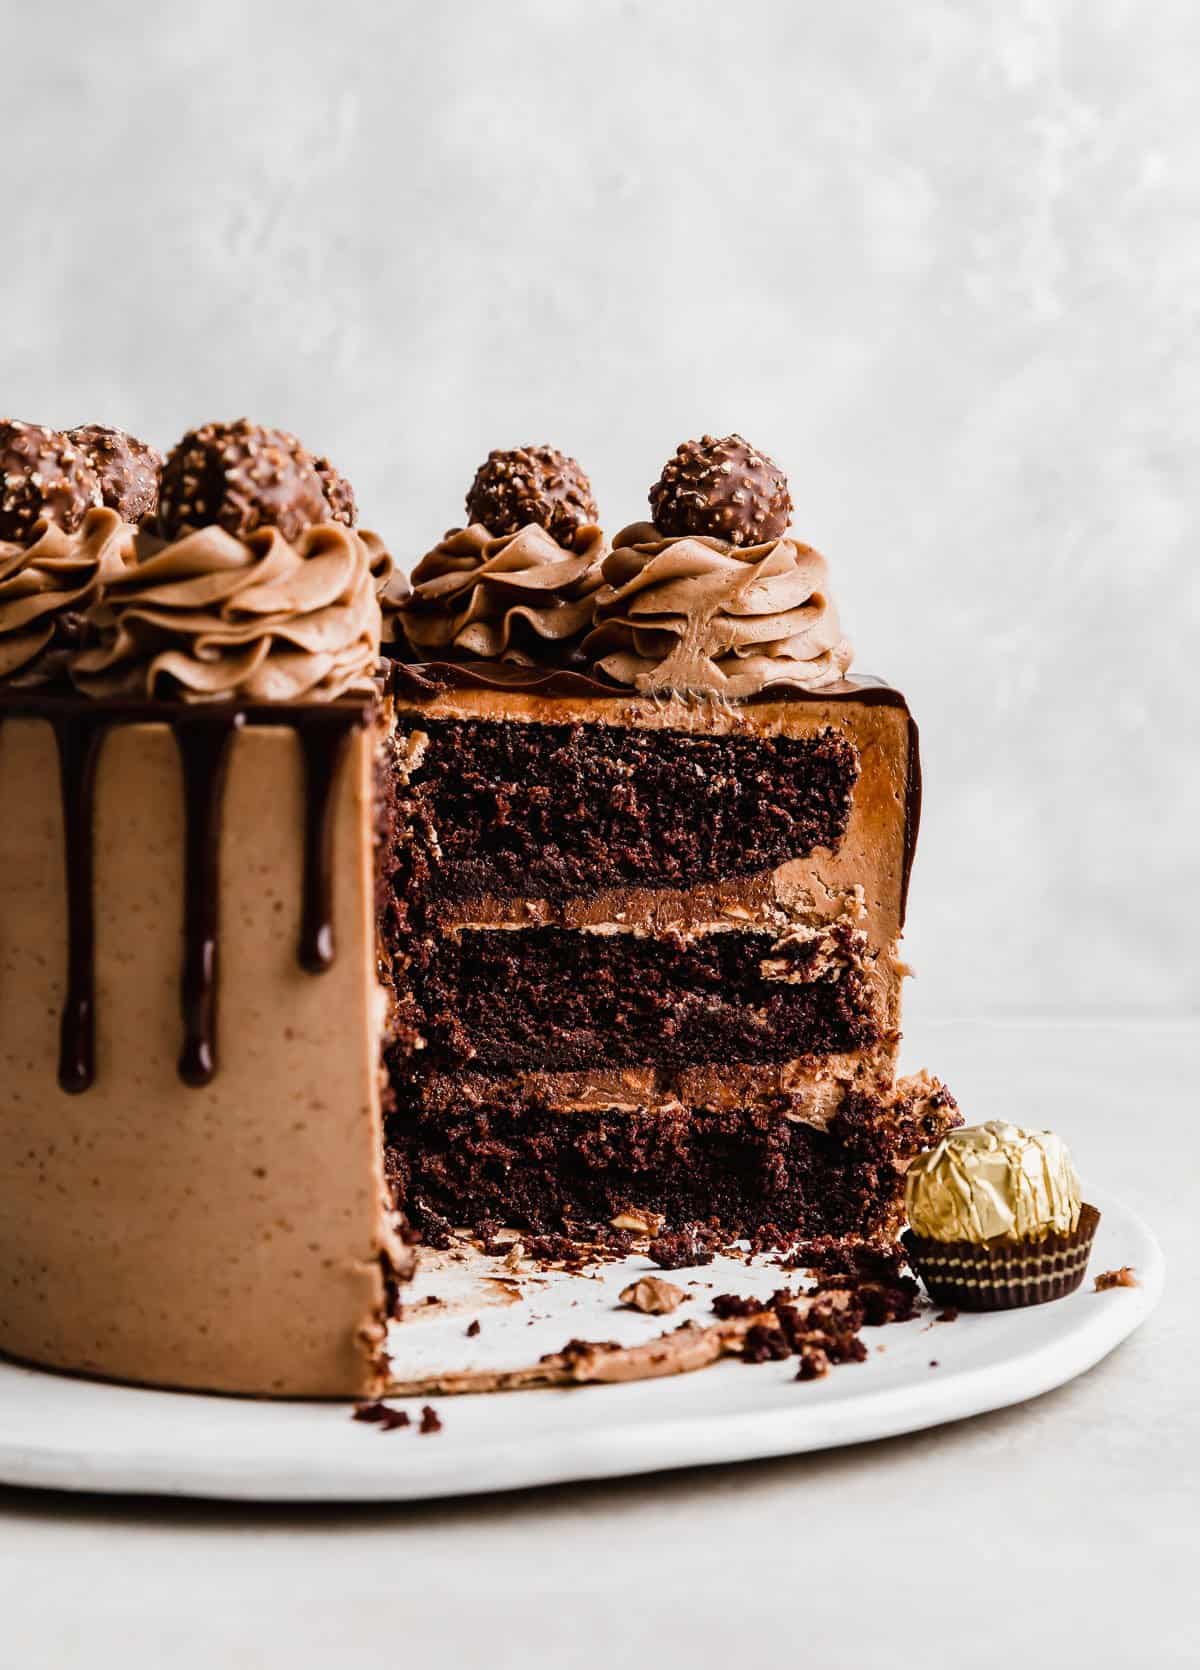
I am a big sucker for chocolate and hazelnut! One of my favorite spreads is Nutella! It is so yummy to make into desserts! If you love Nutella (that delicious chocolate + hazelnut combination), then I know you’ll love my Creamy Nutella Cheesecake Recipe, Nutella Brownies, Nutella Stuffed Nutella Cookies, and Crumbl Hazelnut Churro Cookies!
Why This Recipe Works
- The BEST chocolate hazelnut buttercream you will ever have! OK. Hear me out. This buttercream recipe is through-the-roof amazing! The chocolate isn’t just from cocoa powder, nope! We make a delicious chocolate ganache with melted chocolate and cream. That’s added to the whipped butter. Then, the hazelnut isn’t your ol’ hazelnut extract, nope! We make a hazelnut paste out of toasted hazelnut and cream that together with the chocolate ganache and butter. Guys! It’s so good!
- Every element of the Ferrero Rocher candy is represented. We literally took every element of this delicious chocolate hazelnut candy and put it in this Ferrero Rocher cake! The filling is my Nutella whipped cream recipe with toasted chopped hazelnuts folded into it to replicate the smooth and crunchy filling in the Ferrero Rocher. Then, the chocolate hazelnut frosting is like the chocolate of the candy: milk chocolate with some hazelnuts in it! Pair that with the delicious and moist chocolate hazelnut cake!
- Toasted hazelnuts bring out the hazelnut flavor. Toasting the hazelnuts we use in the whipped Nutella filling and in the buttercream really makes a difference! It brings out the hazelnut flavor and makes it more prominent and rich.
- Moist cake layers. This cake recipe is my Moist Chocolate Cake recipe with hazelnut emulsion. It is so incredibly moist thanks to the buttermilk and the oil! Cakes with oil are really moist because oil is a liquid at room temperature.
Ingredient Notes
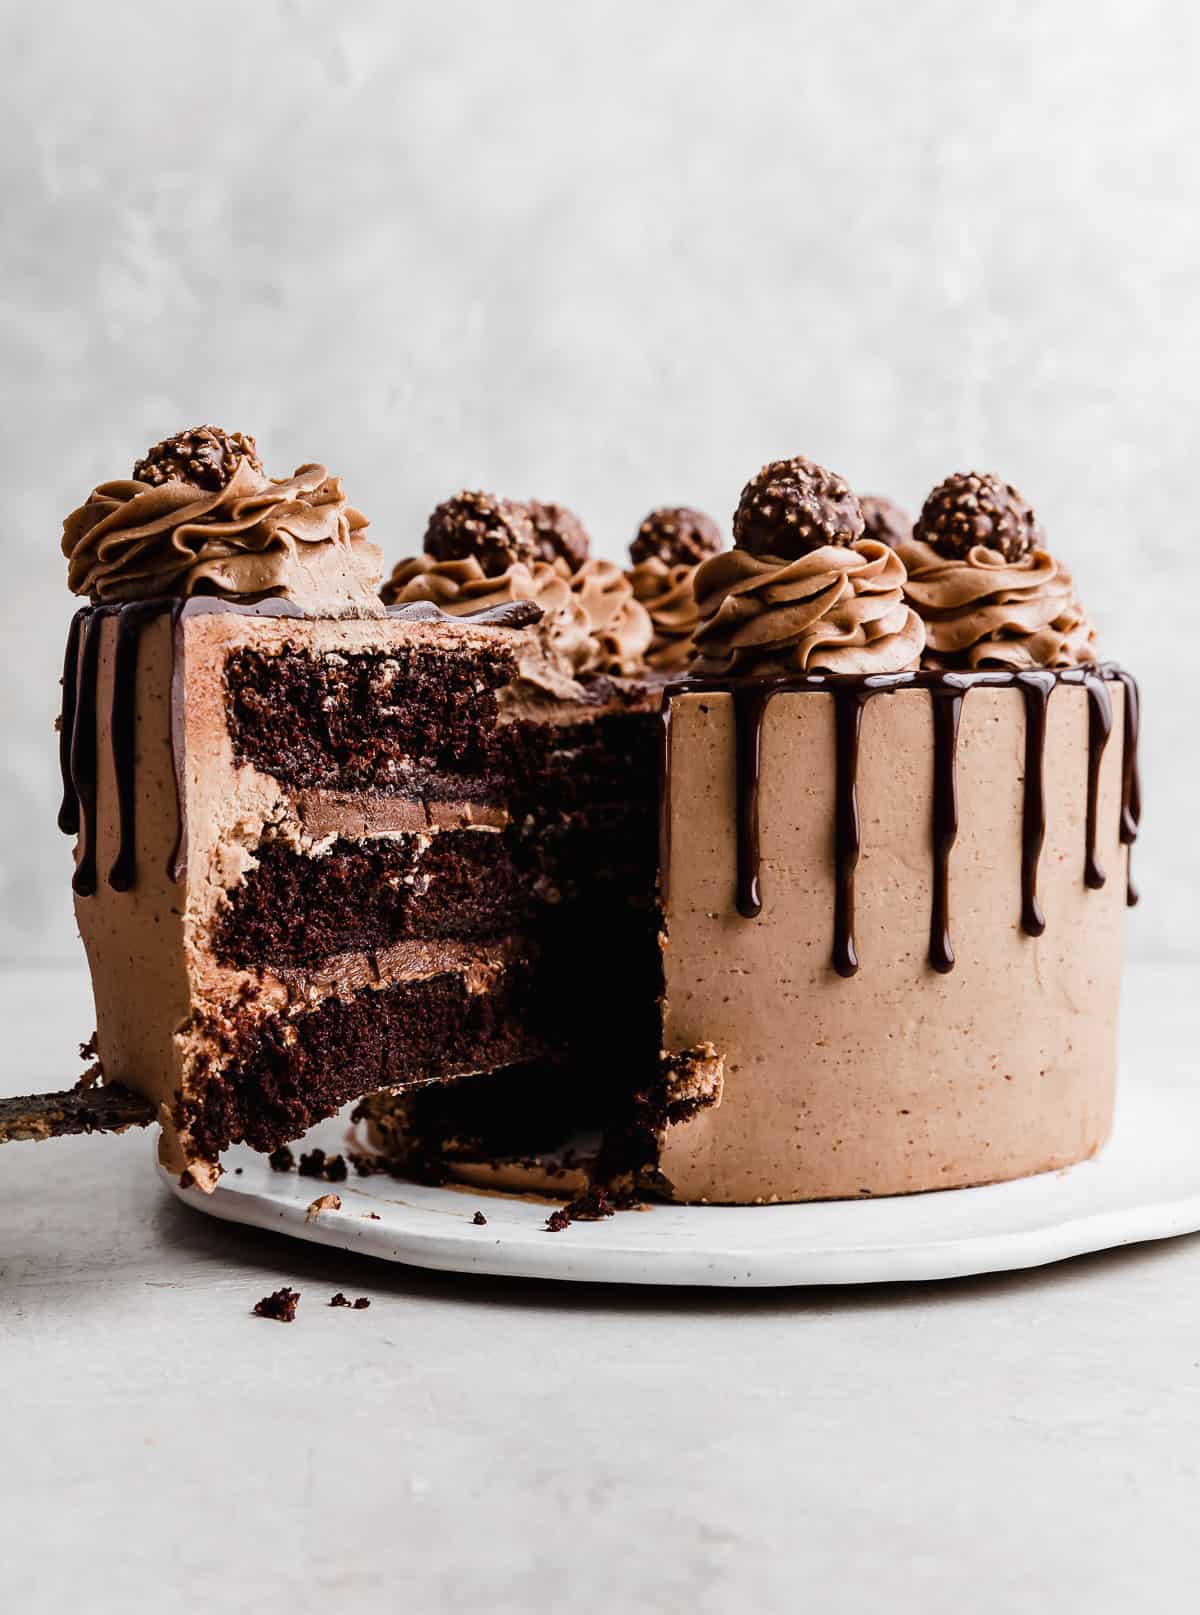
- Ferrero Rocher Candies: These are optional. We added them to the top of the Ferrero Rocher chocolate cake as decoration!
- Unsweetened Cocoa Powder: Unsweetened (or natural) cocoa powder is acidic, which means it is always paired with baking soda (at least! some recipes will also include baking powder).
- Buttermilk: The acid in the buttermilk reacts with the baking soda which helps give added rise to the cake. The buttermilk also helps provide moisture to the cake!
- Vegetable Oil: Cakes with oil produce a much more moist texture because oil is a liquid at room temperature.
- Hazelnut Emulsion: Hazelnut emulsion isn’t like hazelnut extract. Extracts are alcohol-based, meaning they evaporate quicker when heated. Since emulsions are water-based, the flavor endures better.
- Hot Water: The hot water helps to bloom the cocoa powder in the cake batter, making a richer chocolate flavor.
- Nutella: The beautiful thing about this cake is that every element has the chocolate hazelnut combination, but only one element uses Nutella! This means we are using real chocolate and real hazelnuts to really bring out that delicious flavor combination!
- Hazelnuts: The hazelnuts are used in two elements of the cake: the Nutella filling and the buttercream. In both cases, we’ll toast the hazelnuts to bring out the flavor. In one case, we turn some of the hazelnuts into a hazelnut paste!
- Milk Chocolate Baking Bars: Using baking bars is preferred over chocolate chips. Chocolate chips contain stabilizers in them to help keep their shape, making it harder to melt and get a smooth enough texture. Chocolate chips also contain less cocoa butter than baking bars.
- Unsalted Butter: You want the butter for the buttercream slightly chilled but not cold. This will ensure that it whips up without getting melty.
- Powdered Sugar: Sift the powdered sugar to ensure a smoother buttercream texture.
- Heavy Cream: Some of the heavy cream will be to make the Nutella whipped cream and some will be used for the buttercream.
Step-by-Step Instructions
- Make the chocolate hazelnut cake. Whisk the flour, sugar, cocoa, baking soda, baking powder, and salt together in a medium bowl. Mix the eggs, buttermilk, vegetable oil, hazelnut emulsion, and vanilla (we’ll use the hot water in a second) in the bowl of a stand mixer with the paddle attachment until combined. Combine the wet and dry ingredients and mix until combined. Pour in the hot water and mix on medium speed until combined.
- Bake. Spray three 8-inch cake pans with nonstick spray, then line the bottoms with parchment paper and spray again. Divide the cake batter evenly between the pans and bake at 325° F for 23-27 minutes or until a toothpick comes out with a few moist crumbs but no wet batter. Remove the cakes from the oven and let them cool in the pans for 10 minutes. Remove from the cake pans and cool completely on a cooling rack.
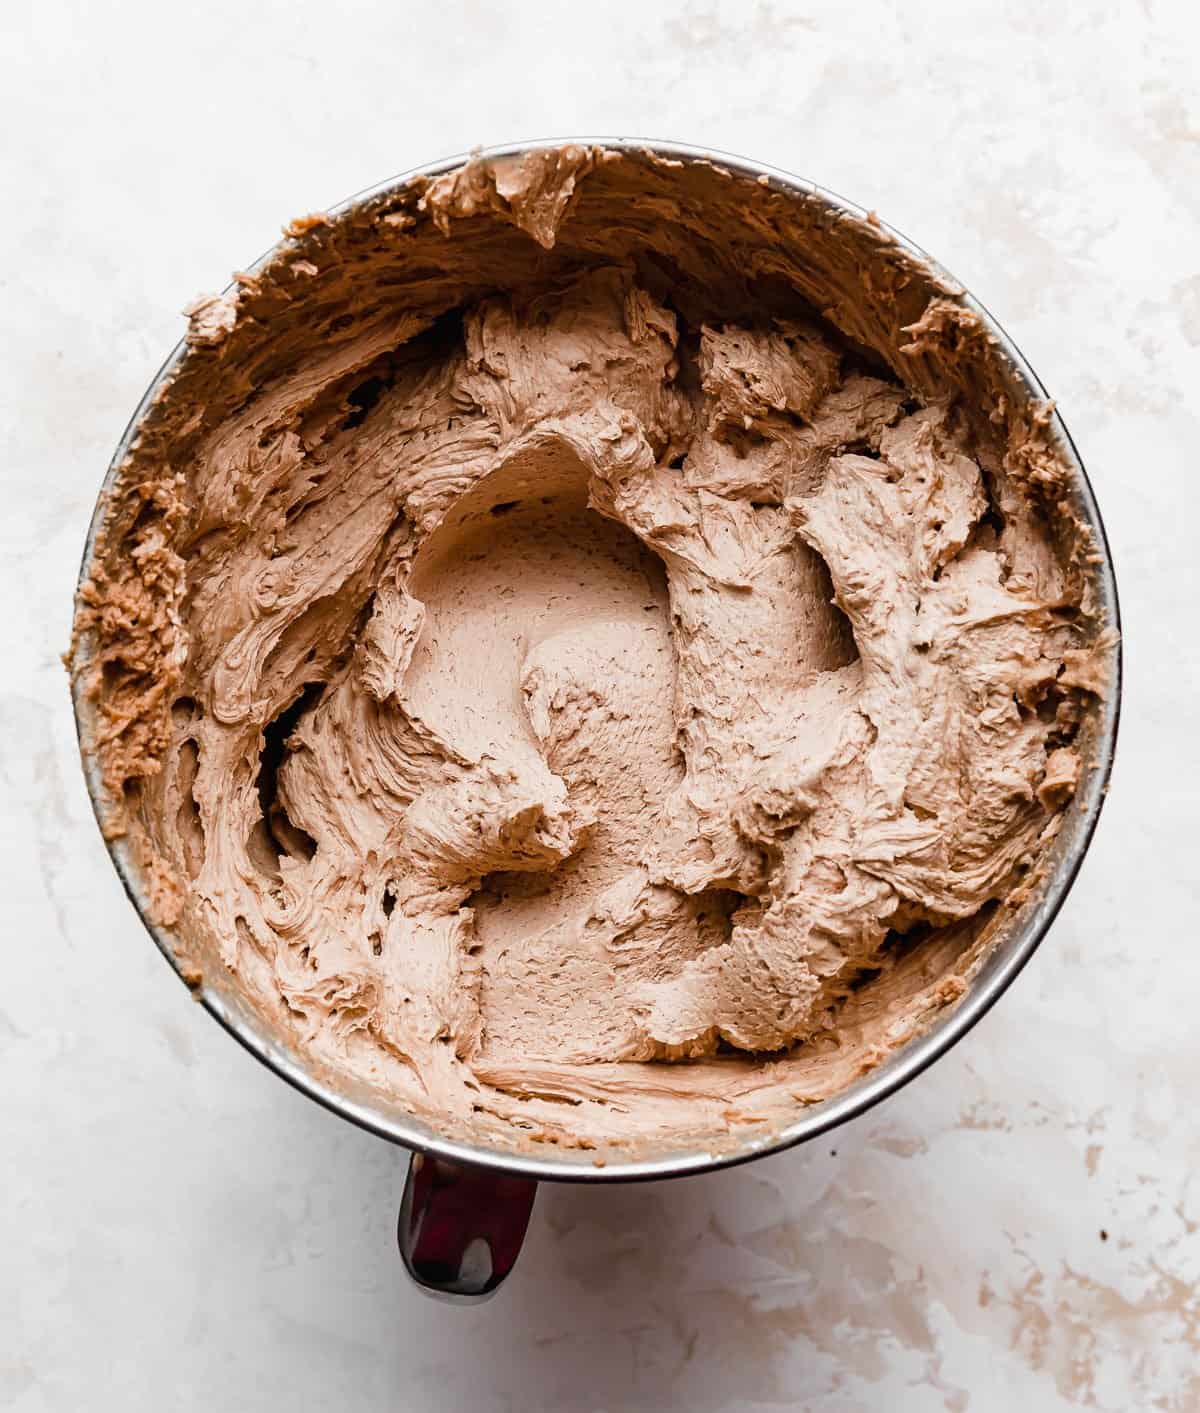
- Make the chocolate hazelnut buttercream. Toast the hazelnuts in the oven at 350° F for 6-12 minutes. After 6 minutes have passed, keep a close eye on them to ensure they don’t burn. Microwave the chopped milk chocolate and 6 tablespoons of heavy cream for 30-second intervals, mixing after each 30 seconds, until the mixture is smooth and even. Cool in the fridge until it reaches room temperature or just cooler than room temperature. Add 4 oz of the toasted hazelnuts to a food processor and process until a paste forms. Set aside. Cream the butter in a stand mixer (with paddle attachment) and mix until light and fluffy. Add the hazelnut paste and the chocolate/cream mixture and beat well, scraping the sides of the bowl as needed. Slowly add the powdered sugar, about a cup at a time. Add another tablespoon or two of heavy cream if needed and beat well. Once all of the ingredients have been added, beat on medium-high speed for 2 minutes.
- Make the whipped Nutella filling. Whip the heavy cream on high speed in a large bowl until stiff peaks form.Add the Nutella and whip again until smooth and well combined. Fold in the chopped hazelnuts. Cover and place in the fridge until ready to use. The filling will stiffen as it chills. Remove from the fridge 30-40 minutes prior to using it.
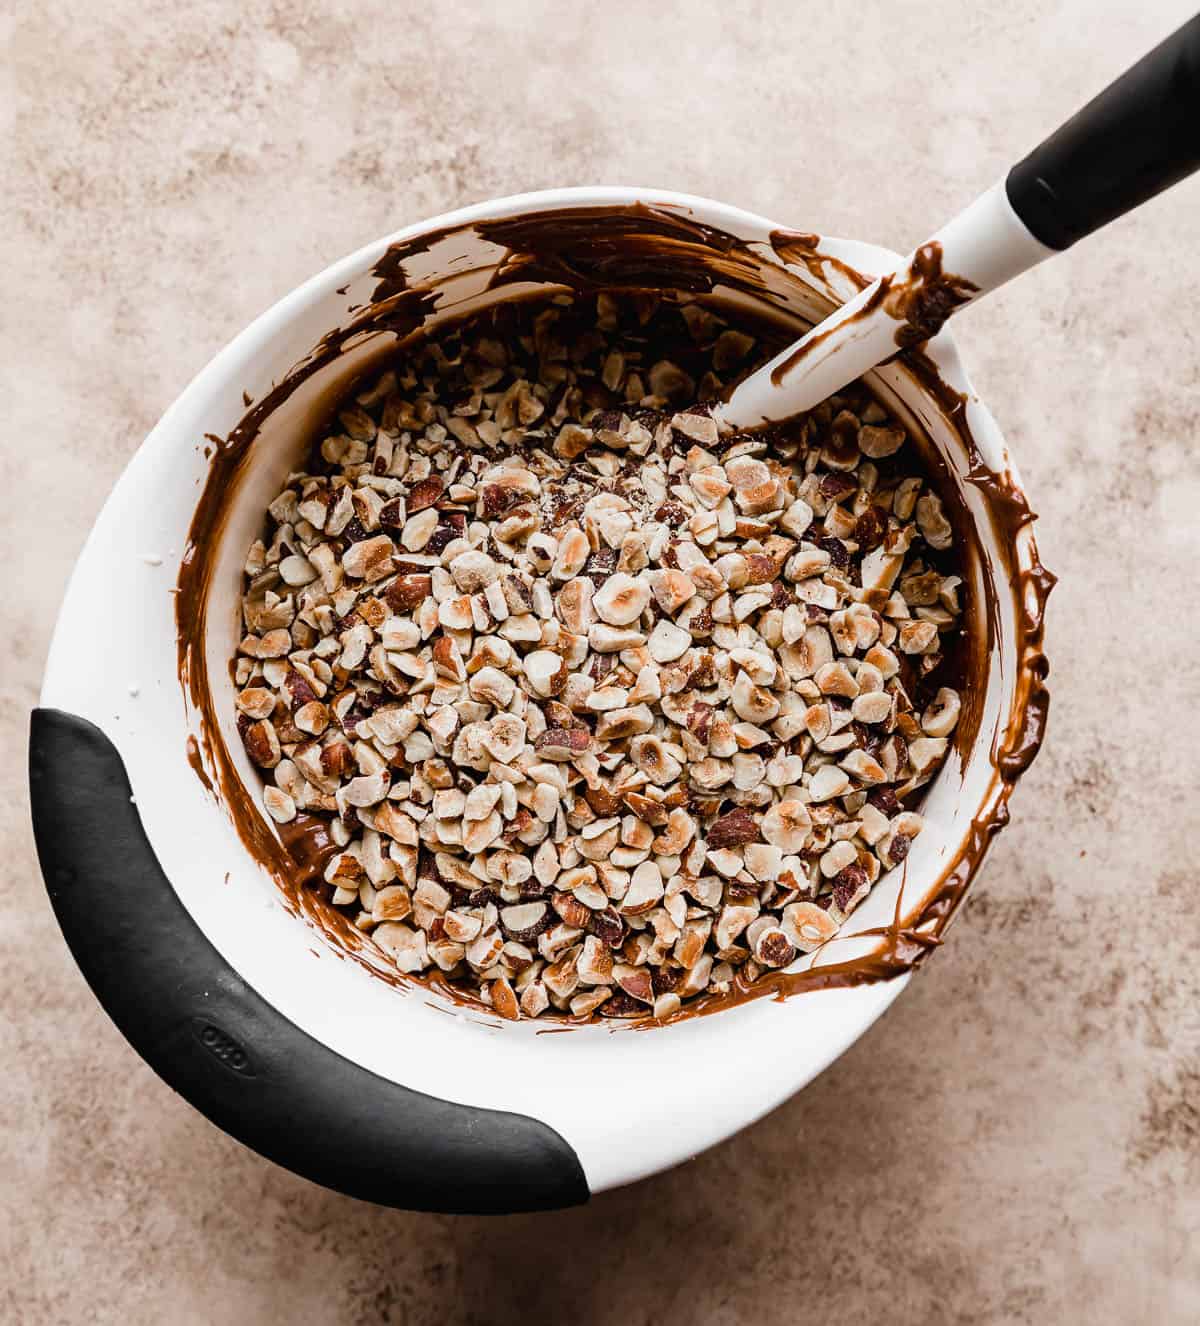
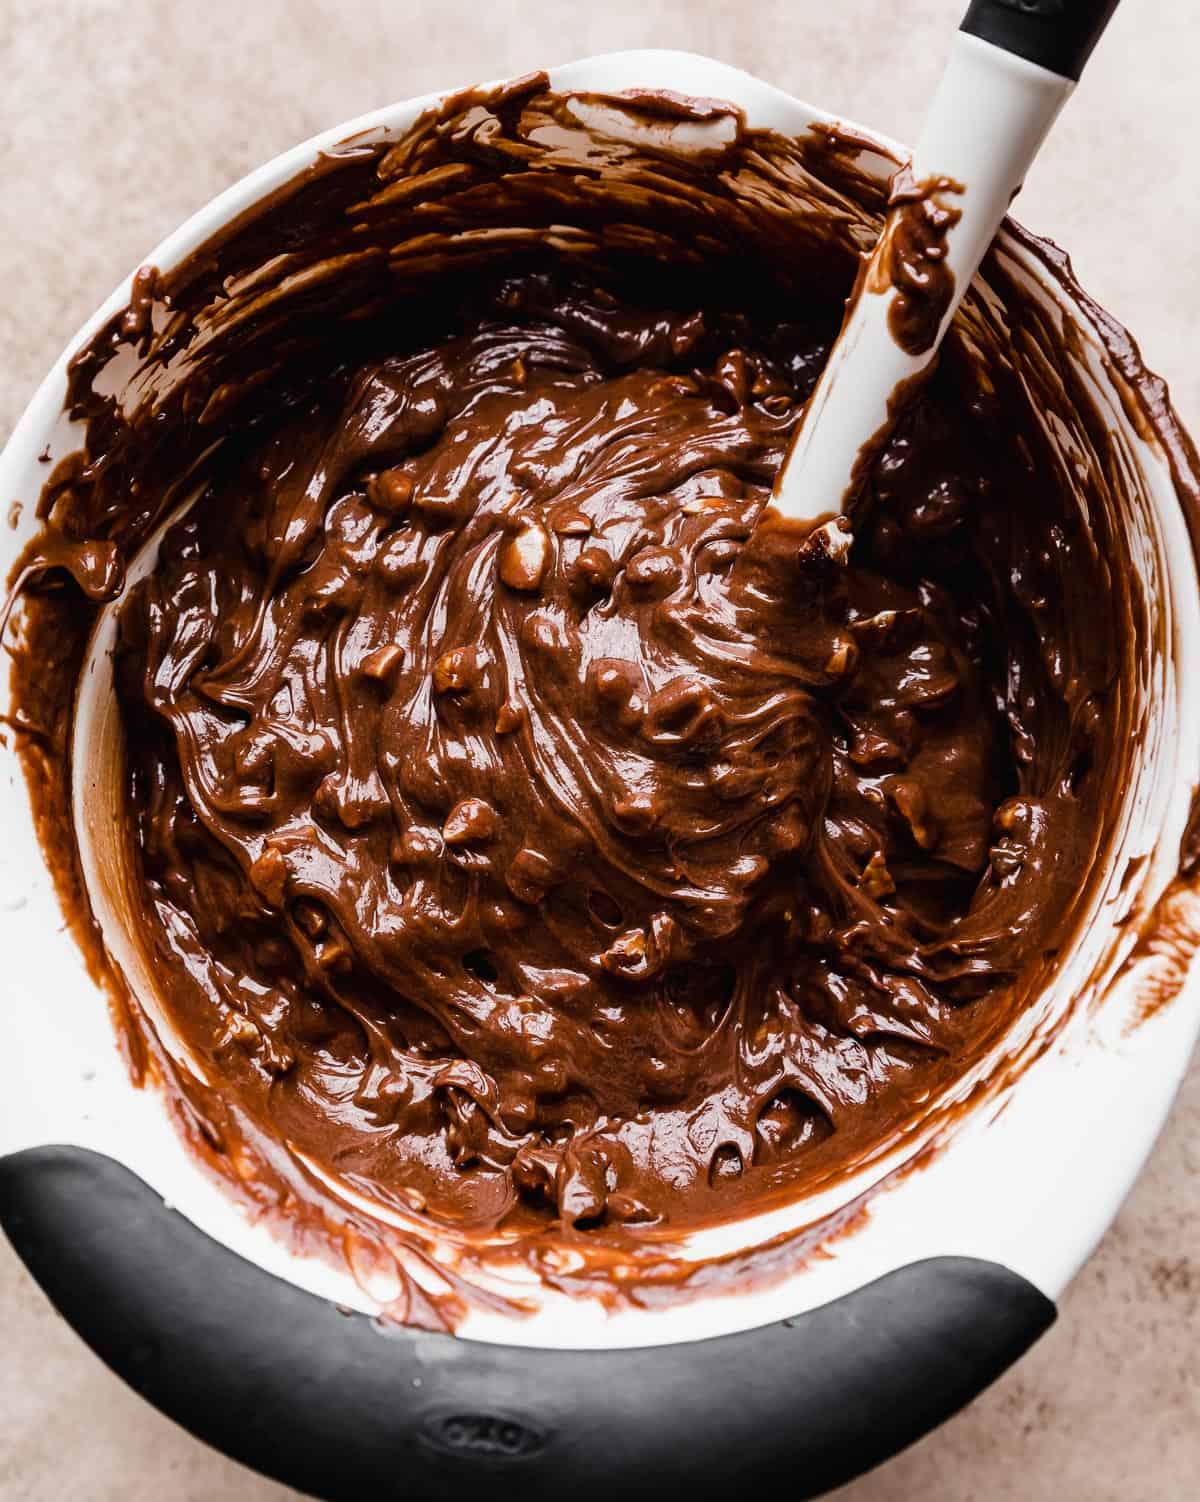
- Make the dark chocolate ganache drip. Heat the heavy cream in a microwave safe bowl in the microwave until hot, then pour over the chocolate chips and let sit for 2 minutes, then stir until smooth.
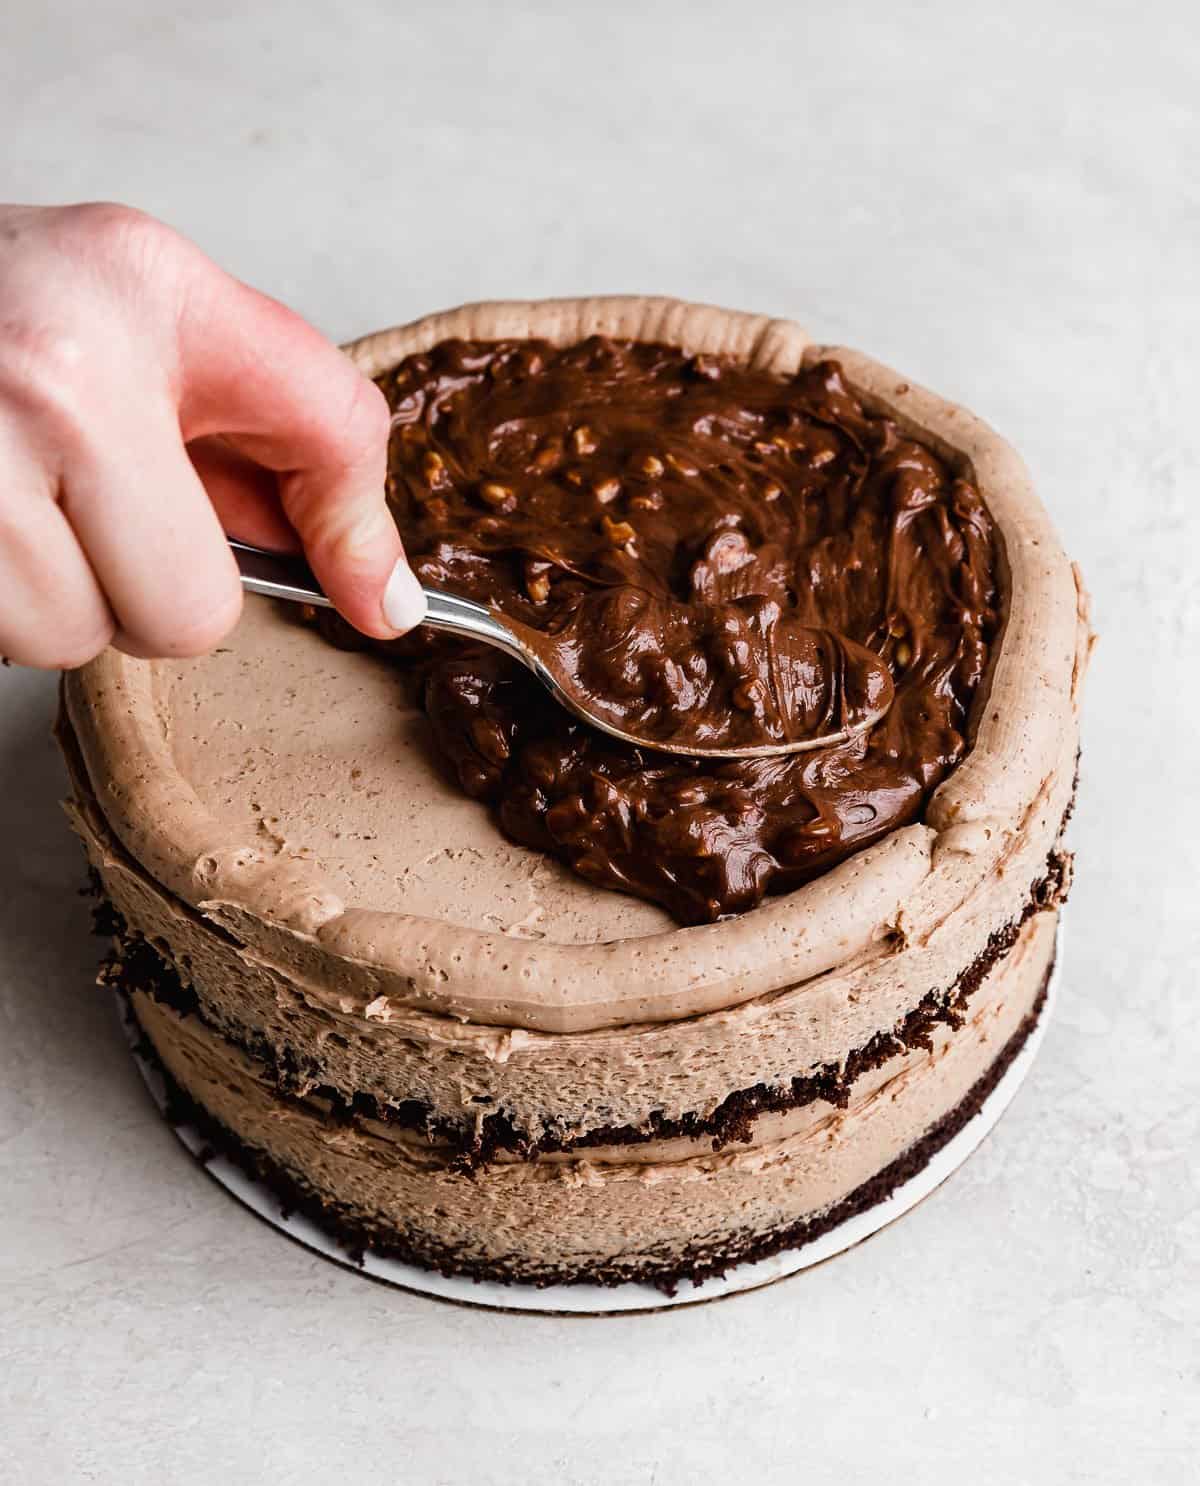
- Assemble the Ferrero Rocher cake. Spread a dollop of buttercream in the center of a clean cake board or stand. Place a cake layer on top of it. Spread a thin layer of chocolate hazelnut buttercream evenly over the cake. Pipe a rim of the buttercream around the top to create a dam, and add about ¾ cup of the whipped Nutella filling (should be about half the amount of the Nutella whipped filling). Repeat this with the next cake layer. Place the third cake layer on top and crumb coat the entire cake in a thin layer of chocolate hazelnut buttercream. Freeze for a few minutes until the buttercream is cold and firm.
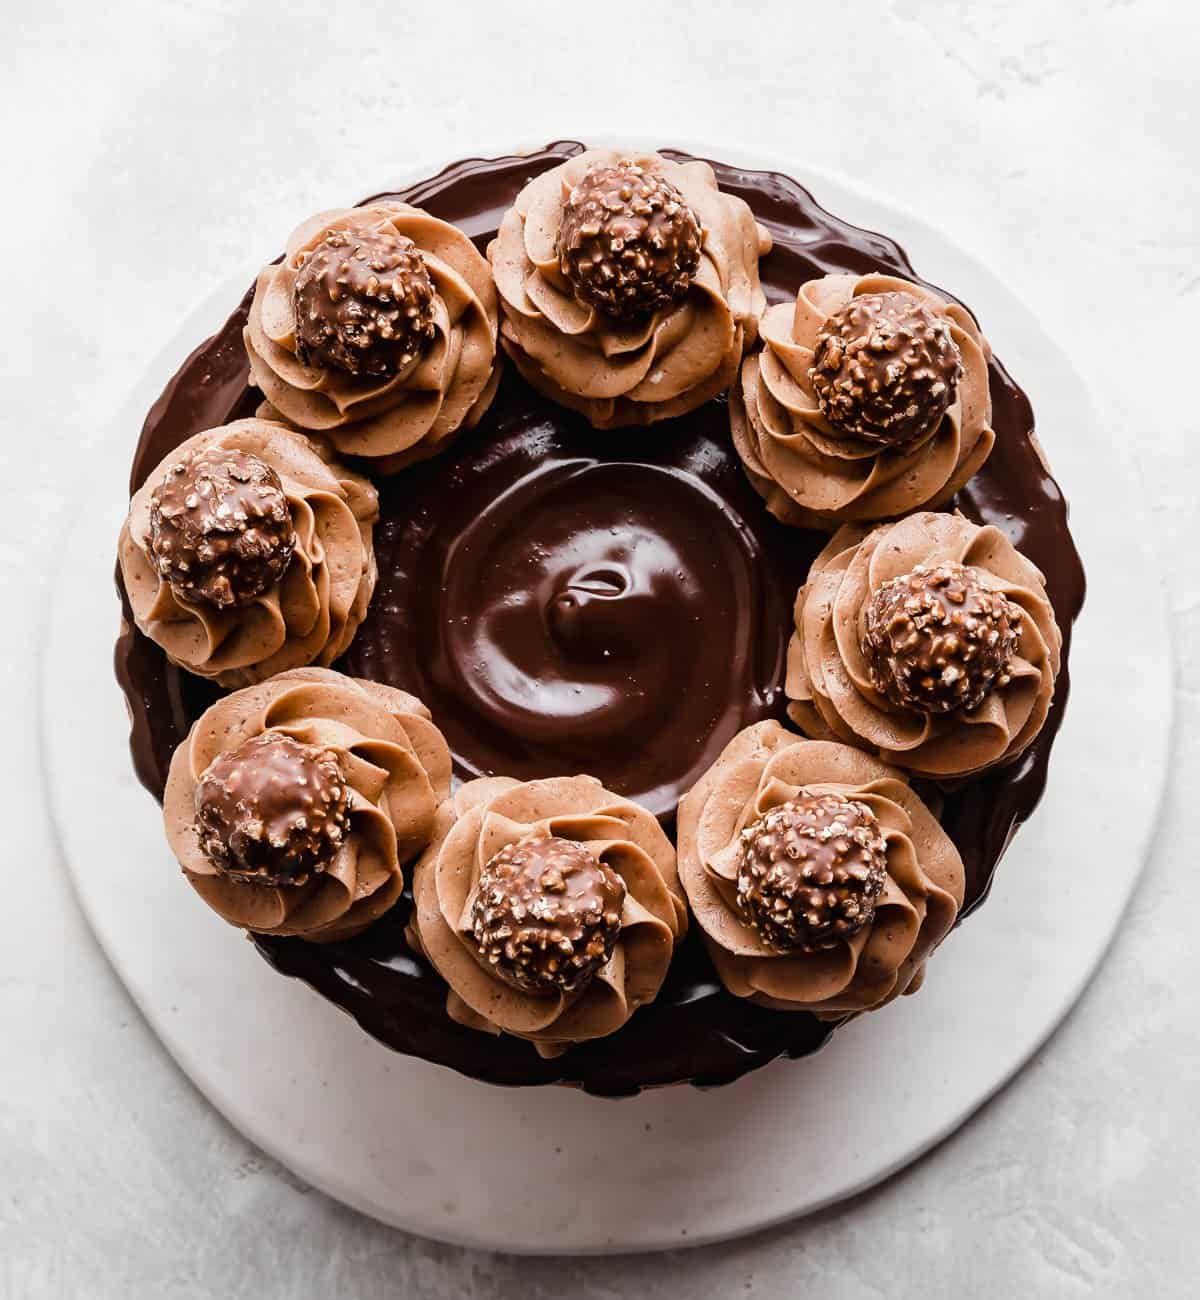
- Frost the entire cake. Add the chocolate ganache drip around the outside of the cake and top the cake with more ganache. Add additional decoration as desired.
Recipe Tips
When making the ganache for the drip, I like to do a test drip on the edge of a tall cup to see if it runs down the cup as far as I want it to. If it isn’t running down as much as I’d like, I’ll either add a tablespoon of cream or warm it up in the microwave for a few seconds if it’s gotten too cool. Getting the right consistency for a ganache drip takes patience because there are so many factors that play into it: temperature of the cake, temperature of the ganache, how much cream has been added, and the brand and percentage of cacao of the chocolate. When I’m ready to add my drip to the cake, I like to do a test drip on the back of the cake to make sure all of the factors are working together to make the perfect drip.
When combining the dry and wet ingredients for the cake, don’t over mix! Mix until just combined. Over mixing at this stage can cause the batter to get tough which can affect the cake’s rise.
You want the chocolate ganache for the buttercream to come to room temperature or just cooler than room temperature so that when you add it to the whipped butter you don’t melt the butter.
Store the chocolate hazelnut buttercream in the fridge if you’re not using it within a few hours. About 3 hours before decorating the cake, remove the buttercream from the fridge. Once the buttercream has softened, use a stand mixer and beat it on medium speed to make it smooth and spreadable.
The dollop of buttercream under the first layer of cake will help keep the cake from sliding around while you assemble and decorate it.
For decoration, we used Wilton tip 1M to make our swirls and topped each one with an unwrapped Ferrero Rocher chocolate.
Make Ahead, Storing, and Freezing
If making ahead of time, wrap the cake layers in plastic wrap after they’ve cooled completely and store flat in the fridge for 1 day to assemble and decorate the next day.
If making really ahead of time, wrap the cake layers in plastic wrap after they’ve cooled completely and store in the freezer for up to 1 week. If needing to store in the freezer for longer, wrap in an additional layer of aluminum foil and store in the freezer for up to 1 month. Remove the cake layers from the freezer and let thaw in the fridge overnight. Remove from the fridge and let thaw until just chilled and then assemble.
To freeze a completely decorated cake, flash freeze the cake in the freezer for about 30 minutes (or until the buttercream is completely set). Remove from the freezer and wrap the entire cake in plastic wrap and freeze for up to 1 week. If freezing for longer than 1 week, wrap in an additional layer of aluminum foil and store in the freezer for 1-2 months. Remove from the freezer and let thaw in the fridge overnight.
Store any cake leftovers in the fridge (covered) for 3-5 days.
For more information on storing and freezing cakes, check out my How to Store and Freeze Cakes guide!
FAQs
Yes you can. A three pan 8-inch cake recipe will work in four 6-inch cake pans.
Yes there is! The Nutella whipped cream filling has Nutella, cream and some chopped toasted hazelnuts. However, only one element of the cake uses Nutella. The remaining elements use real chocolate and real hazelnuts to bring out that delicious chocolate and hazelnut flavor combination!
This can be due to a few things: First, check your baking powder and baking soda. Make sure they aren’t expired. Second, make sure you aren’t over mixing your cake batter when combining the wet and dry ingredients. Third, make sure your oven is at temperature. I use an oven thermometer to make sure since some ovens can run cooler or warmer than what it says it is. Lastly, be sure not to open the oven door prematurely! This will make your cakes sink in the middle.
Extracts are alcohol-based. Due to the alcohol in extracts, the flavor evaporates more when heated. Emulsions are water-based, which means you won’t have as much of the flavor evaporating.
Related Recipes
- Chocolate Buttermilk Bundt Cake
- Oreo Red Velvet Cake
- Lemon Bar Cake
- Coconut Cookies and Cream Cake
- 7 Layer Bar Cake
Did you make this recipe? I’d love to hear about it! Click here to leave a rating and review, or scroll below the recipe card and do so there.
Stay up-to-date by following us on Instagram, Facebook, and Pinterest.
Ferrero Rocher Cake
Ingredients
- 6-8 Ferrero Rocher candies - optional, for topping and decorating the cake
Chocolate Hazelnut Cake
- 2 cups all purpose flour
- 2 cups granulated sugar
- 3/4 cups unsweetened cocoa powder
- 2 teaspoons baking soda
- 1/2 teaspoon baking powder
- 1 teaspoon salt
- 2 large eggs - at room temperature
- 1 cup buttermilk - room temperature
- 1 cup vegetable oil
- 2 teaspoons vanilla extract
- 1 tablespoon hazelnut emulsion
- 1 cup hot water
Whipped Nutella Filling
- 2/3 cup heavy cream
- 1 cup Nutella
- 3/4 cup hazelnuts - chopped
Chocolate Hazelnut Buttercream
- 10 oz milk chocolate baking bars - chopped
- 6-7 tablespoons heavy cream
- 2 1/2 cups unsalted butter - slightly softened
- pinch salt
- 1 tablespoon vanilla extract
- 6 1/2 cups powdered sugar - sifted
- 5 oz toasted hazelnuts - chopped (about 1 1/4 cups)
Dark Chocolate Ganache Drip
- 3/4 cup semi sweet chocolate chips
- 6 tablespoons heavy cream - You may need a couple tablespoons more to get it to the right consistency to be able to “drip” down the cake (see note)
Instructions
Chocolate Hazelnut Instructions
- Preheat the oven to 325° F. Prepare three 8-inch round cake pans by spraying well with non-stick spray and lining the bottoms with parchment paper. Set aside.
- In a medium bowl whisk the flour, sugar, cocoa, baking soda, baking powder, and salt.
- In the bowl of a stand mixer fitted with a paddle attachment mix the eggs, buttermilk, vegetable oil, hazelnut emulsion, and vanilla until combined.
- Add the dry ingredients to the stand mixer and mix until combined. Pour in the hot water and mix on medium speed until combined.
- Divide batter evenly between the cake pans and bake for 23-27 minutes or until a toothpick comes out with a few moist crumbs but no wet batter.
- Remove cakes from the oven and allow to cool for 10 minutes. Remove from the cake pans and allow cakes to cool on a cooling rack until completely cool.
Whipped Nutella Filling
- In a large bowl add the heavy cream. Whip on high speed until stiff peaks form.
- Add the Nutella and whip again until smooth and well combined.
- Fold in the hazelnuts with a rubber spatula. Cover and place in the fridge until ready to use. This will stiffen as it chills. Remove it from the fridge 30-40 minute prior to using it.
Chocolate Hazelnut Buttercream
- To toast the hazelnuts, preheat oven to 350° F. Add the hazelnuts to a sheet pan in a single layer. Toast for 6-12 minutes, or until the hazelnuts are fragrant and turn a light golden brown. After 6 minutes have passed, keep a close eye on them to ensure they don’t get burnt.
- In a microwave-safe bowl, add the chopped milk chocolate and 6 tablespoons of heavy cream. Microwave for 30 second intervals, mixing well after every 30 seconds, until all the chocolate has melted and the mixture is smooth and even. Place in the fridge until it comes to room temperature or a little cooler.
- To a food processor, add 4 oz of toasted hazelnuts and process until a paste forms. Scrape the sides of the food processor as needed. Set aside.
- To the bowl of a stand mixer add butter and mix until light and fluffy. Add the hazelnut paste and the chocolate/cream mixture and beat well, scraping the sides of the bowl as needed.
- Slowly add the powdered sugar, about a cup at a time. If the buttercream gets too stiff, add another tablespoon or two of heavy cream and beat well.
- Once all of the ingredients have been added, beat on medium-high speed for 2 minutes.
- Store in the fridge if not using within a few hours. About 3 hours before decorating the cake, remove the buttercream from the fridge. Once the buttercream has softened, use a stand mixer and beat it on medium speed to make it smooth and spreadable.
Dark Chocolate Ganache Drip
- Heat the cream in a microwave safe bowl in the microwave until hot, then pour over the chocolate chips and let sit for 2 minutes, then stir until smooth.
Assembly
- Spread a dollop of buttercream in the center of a clean cake board or stand. Place a cake layer on top of it. This will help keep the cake from sliding around while you assemble and decorate it.
- Spread a thin layer of chocolate hazelnut buttercream evenly over the cake.
- Pipe a rim of the buttercream around the top to create a dam, and add about ¾ cup of the whipped Nutella filling (should be about half the amount of the Nutella whipped filling).
- Repeat steps 1-3 with the second layer of cake, placing the second cake layer on top of the first layer.
- Place the third cake layer on top and crumb coat the entire cake in a thin layer of chocolate hazelnut buttercream. Refrigerate or freeze for a few minutes, until the buttercream is cold and firm.
- Add the final layer of frosting around the entire cake. Add the chocolate ganache drip around the outside of the cake and fill in the top with more ganache. Add additional decoration as desired. We used Wilton tip 1M to make our swirls and topped each one with an unwrapped Ferrero Rocher chocolate.
Notes
- When making the ganache for the drip, I like to do a test drip on the edge of a tall cup to see if it runs down the cup as far as I want it to. If it isn’t running down as much as I’d like, I’ll either add a tablespoon of cream or warm it up in the microwave for a few seconds if it’s gotten too cool. Getting the right consistency for a ganache drip takes patience because there are so many factors that play into it: temperature of the cake, temperature of the ganache, how much cream has been added, and the brand and percentage of cacao of the chocolate. When I’m ready to add my drip to the cake I like to do a test drip on the back of the cake to make sure all of the factors are working together to make the perfect drip.

 Welcome to this delicious corner of the internet! Here I share the recipes my family loves.





15 Comments on “Ferrero Rocher Cake”
I half the recipe of the butter cream frosting . Full recipe would and definitely been too much. I did the full recipe of whipped Nutella which was too much.
I did 3 layers of 8 inch size cakes
Thanks for sharing your experience, Nalini! Super helpful for people who prefer less frosting.
Looks gorgeous. Love it all 🫶🏻
Thank you!
I consider myself a seasoned baker and I’ve never heard the term hazelnut emulsion? Is this the same as hazelnut paste (not Nutella). I re-read the recipe several times and did not see a note of explanation. I am surprised I am the first to ask this question.
Despite the multiple comments on pan sizes, I am looking forward to trying this recipe.
Thanks
Hi Steven, sorry for the confusion. Emulsions are flavorings, not pastes. While flavoring extracts have an alcohol base, so they evaporate quickly, emulsions have a water base. Because they don’t evaporate quickly when exposed to heat, emulsions help provide a stronger flavor to baked goods. If you search online for “hazelnut emulsion,” you can find several available to purchase. You can still use hazelnut extract – the flavor just won’t be as strong.
Thank you for your comment. I hope you make this cake!
So very moist and delicious! Perfect size and came out identical to the photo, the recipe was super easy to follow and super easy to make. Absolutely incredible flavor and was a big hit!
Kyla, thanks for your great review! I’m glad this turned out so well for you and was a hit.
This cake was so delicious, every single component was easy to make and fantastic! Such a moist cake, and easy enough that an amateur like me was able to pull it off!! Amazing recipe!!
Lindsay, I’m so glad you enjoyed this cake! Glad it wasn’t overwhelming for you either!
After spending 6hrs (start to finish, toasting hazelnuts etc) making this, it’s extremely apparent you in fact did NOT use (3) 8″ pans. From previous experience and looking at the photos…I suspected they were 6″, but followed the recipe. This cake is extremely heavy…far too heavy for 8″ layers and they slough off the whipped Nutella mixture and do not stay straight. Incredibly disappointed in the time invested in this for a poor result.
I’m not sure what could have gone wrong in your making of this cake. But I can assure you, this cake is made in 3 – 8 inch round cake pans.
You didn’t…I literally re-made it in 6″ pans and it came out looking identical to yours. You have 8 ferrero rocher’s around the top for the decorations. It took me 15 to get around the top on an 8″ cake.
Your pictures are of a 6″ cake. Also, 3/4 a cup of the filling between layers is way too much (many other recipes state 1/4C filling between layers if using a 6″ cake). And I also cut your buttercream in half and still ended up having leftover. You really need to make this from start to finish following your recipe to a ‘T’, and you will see there are many adjustments that need to be made.
Feel free to reach out if you’d like to see my 8″ vs 6″ cake, just to see how a 6″ matches yours.
Hi Ray. I’m glad you had great success making this recipe in 6 inch cake pans! That’s fantastic! I don’t want to confuse other readers who might be reading these comments though. This recipe was in fact written for and made in 8 inch cake pans. The photographs you see on my website of this Ferrero Rocher Cake are in fact made in an 8 inch cake pan.
Thanks again for your feedback. I really appreciate it!
This cake is one of the best i’ve ever had. Tastes just like a Ferrero Rocher, but in cake form. Very impressed with each component of the cake.