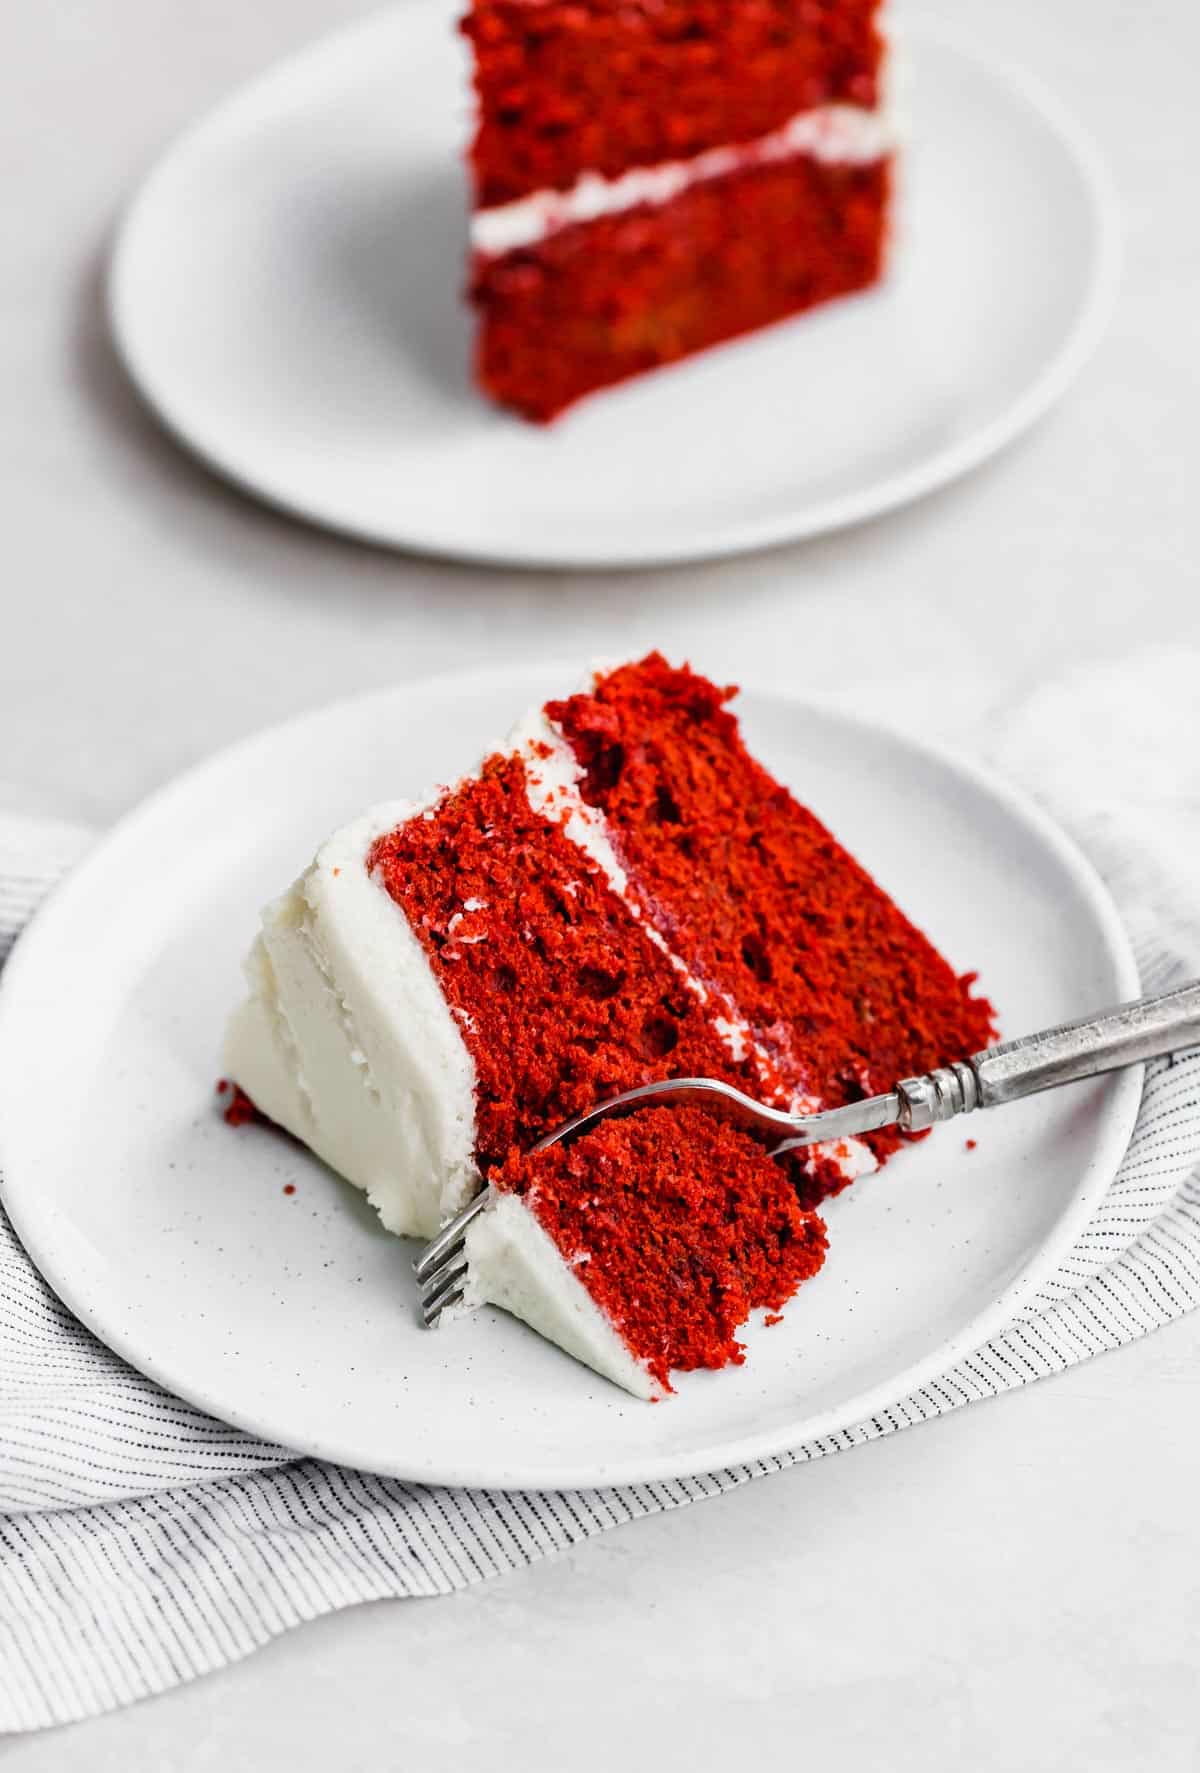
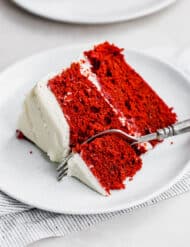
Old Fashioned Red Velvet Cake
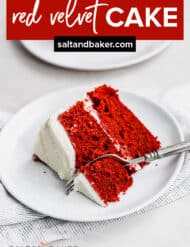
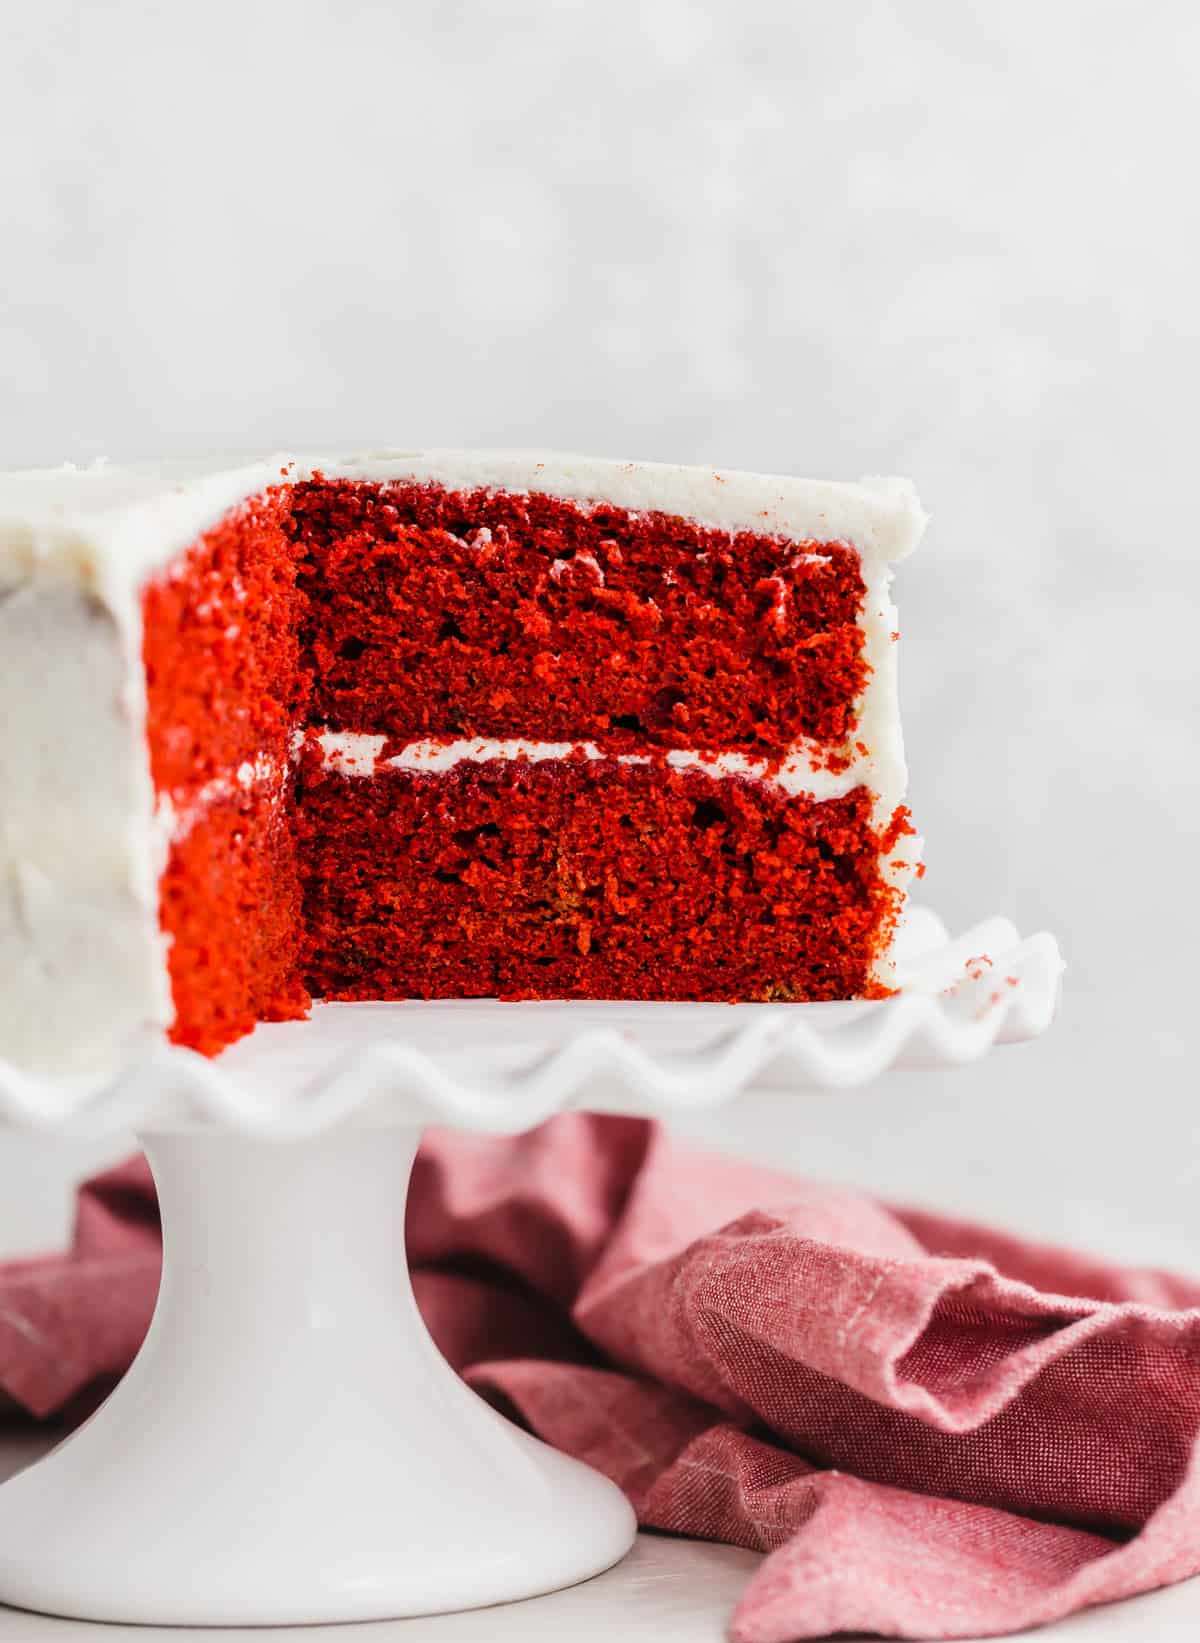
This Old Fashioned Red Velvet Cake is the perfect cake to make for Valentine’s Day, birthdays, or holidays! The cake layers are light and fluffy thanks to the whipped egg whites folded into the cake batter, and the old fashioned icing is the perfect balance of sweetness to complement the cake.
Whenever I see a red velvet dessert, like red velvet macarons, I immediately think of Valentine’s Day. The beautiful red color just screams “L-O-V-E.” So, if you are looking for a few red-colored desserts for your Valentine’s Day celebrations, be sure to try my Red Velvet Waffles, Red Velvet Popcorn, and my Strawberry Chex Mix (this one is technically pink and not red, but still perfect for the holiday!)
Why This Recipe Works
- Light and fluffy cake. Anyone who eats this cake will surely appreciate just how light, fluffy, and moist this cake is! I, like some of you, would get overwhelmed when I had to bake a cake. I
used tostill fear that my cakes will sink in the center. There’s nothing worse than going through the trouble of baking a cake, to find the center has sunk. To ensure a light and fluffy cake, we separate the eggs and whip the whites. Once the batter is made, the egg whites are gently folded in. This simple yet profound step (if done correctly) will guarantee a fluffy cake and delicate crumb. - Super moist red velvet cake. The key to a deliciously moist cake is vegetable oil! And this cake has an entire cup of vegetable oil in it. Using vegetable oil helps keep cakes super moist because the oil is a liquid at room temperature. You’ll notice there is also butter in the recipe as well. This provides additional fat (which does help add moisture as well) including a nice butter flavor.
- Best red velvet cake recipe from scratch. There are many elements that make this cake the best, including using cake flour instead of all-purpose flour, using butter and vegetable oil, and most especially, the frosting! This isn’t a cream cheese frosting, and the amount of sugar in the frosting is perfect! An overly sweet frosting on top of a sweet cake can be a lot! So leave the red velvet cake mix for the red velvet cake mix cookies and make this cake from scratch!
Ingredient Notes
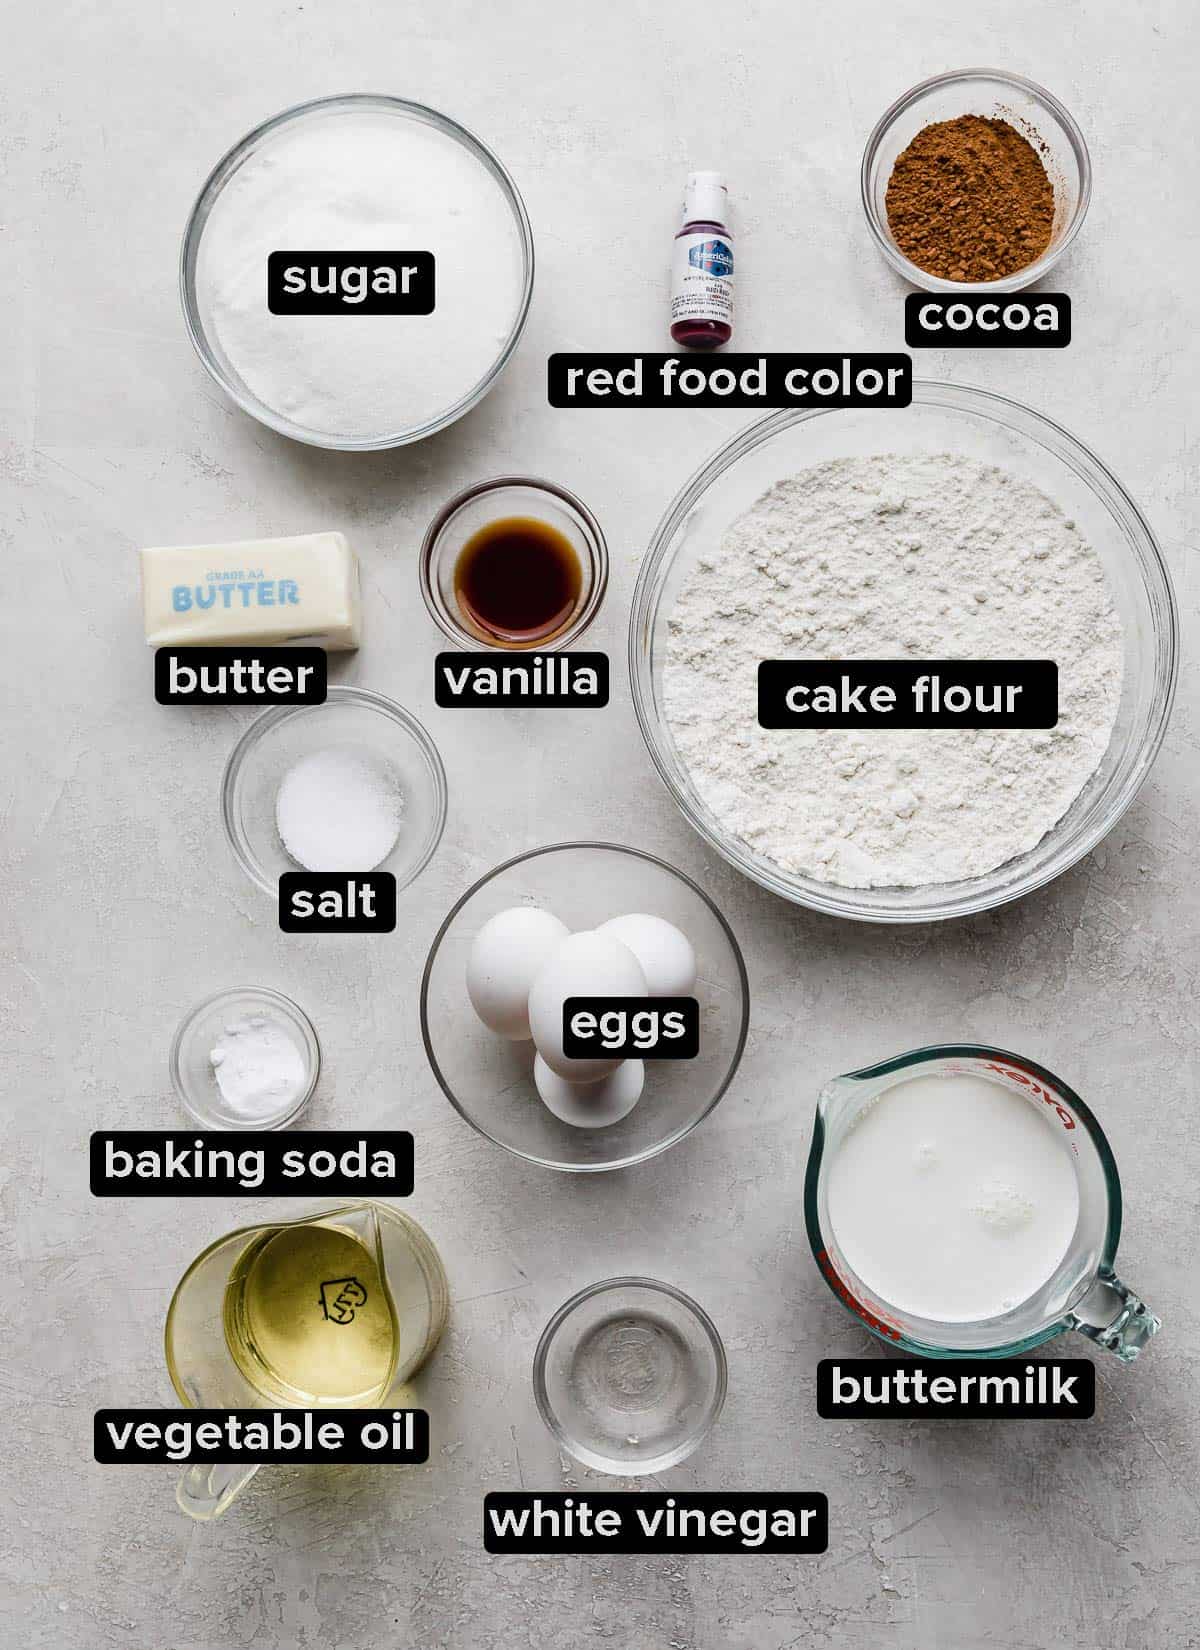
- Cake Flour: I’ve seen plenty of cake recipes using all purpose flour. I prefer cake flour for this recipe because it’s lighter and gives the kind of cake structure and texture that really works for this old fashioned red velvet cake recipe.
- Baking Soda: This leavening agent is an alkaline compound that creates carbon dioxide gas once it reacts with an acid. In this recipe the baking soda will react with the white vinegar and the buttermilk. This reaction gives the cake it’s volume and lift, making the cake fluffy rather than dense.
- Unsweetened Cocoa Powder: Red velvet cake has a subtle chocolate flavor. The amount of cocoa powder we use gives us just enough of the chocolate flavor to contribute to the red velvet flavor without becoming an overwhelming chocolate flavored cake.
- Unsalted Butter: Using butter, vegetable oil, and buttermilk should tell you just how moist this cake will be!
- Vegetable Oil: This recipe calls for 1 cup of vegetable oil, perfect for a super moist cake!
- Eggs: Separate the eggs. The yolks will go into the cake as is, but the whites we will whip up until they reach stiff peaks. This additional step will create another level of rise in the cake.
- Buttermilk: The acidity in the buttermilk breaks down the gluten in the cake, making the cake very tender.
- Gel Red Food Coloring: I haven’t made this cake with liquid red food coloring, but you definitely can! If you do just know you’ll need to use a lot of food coloring to achieve a deep red color. I use this red gel food coloring.
Step-by-Step Instructions
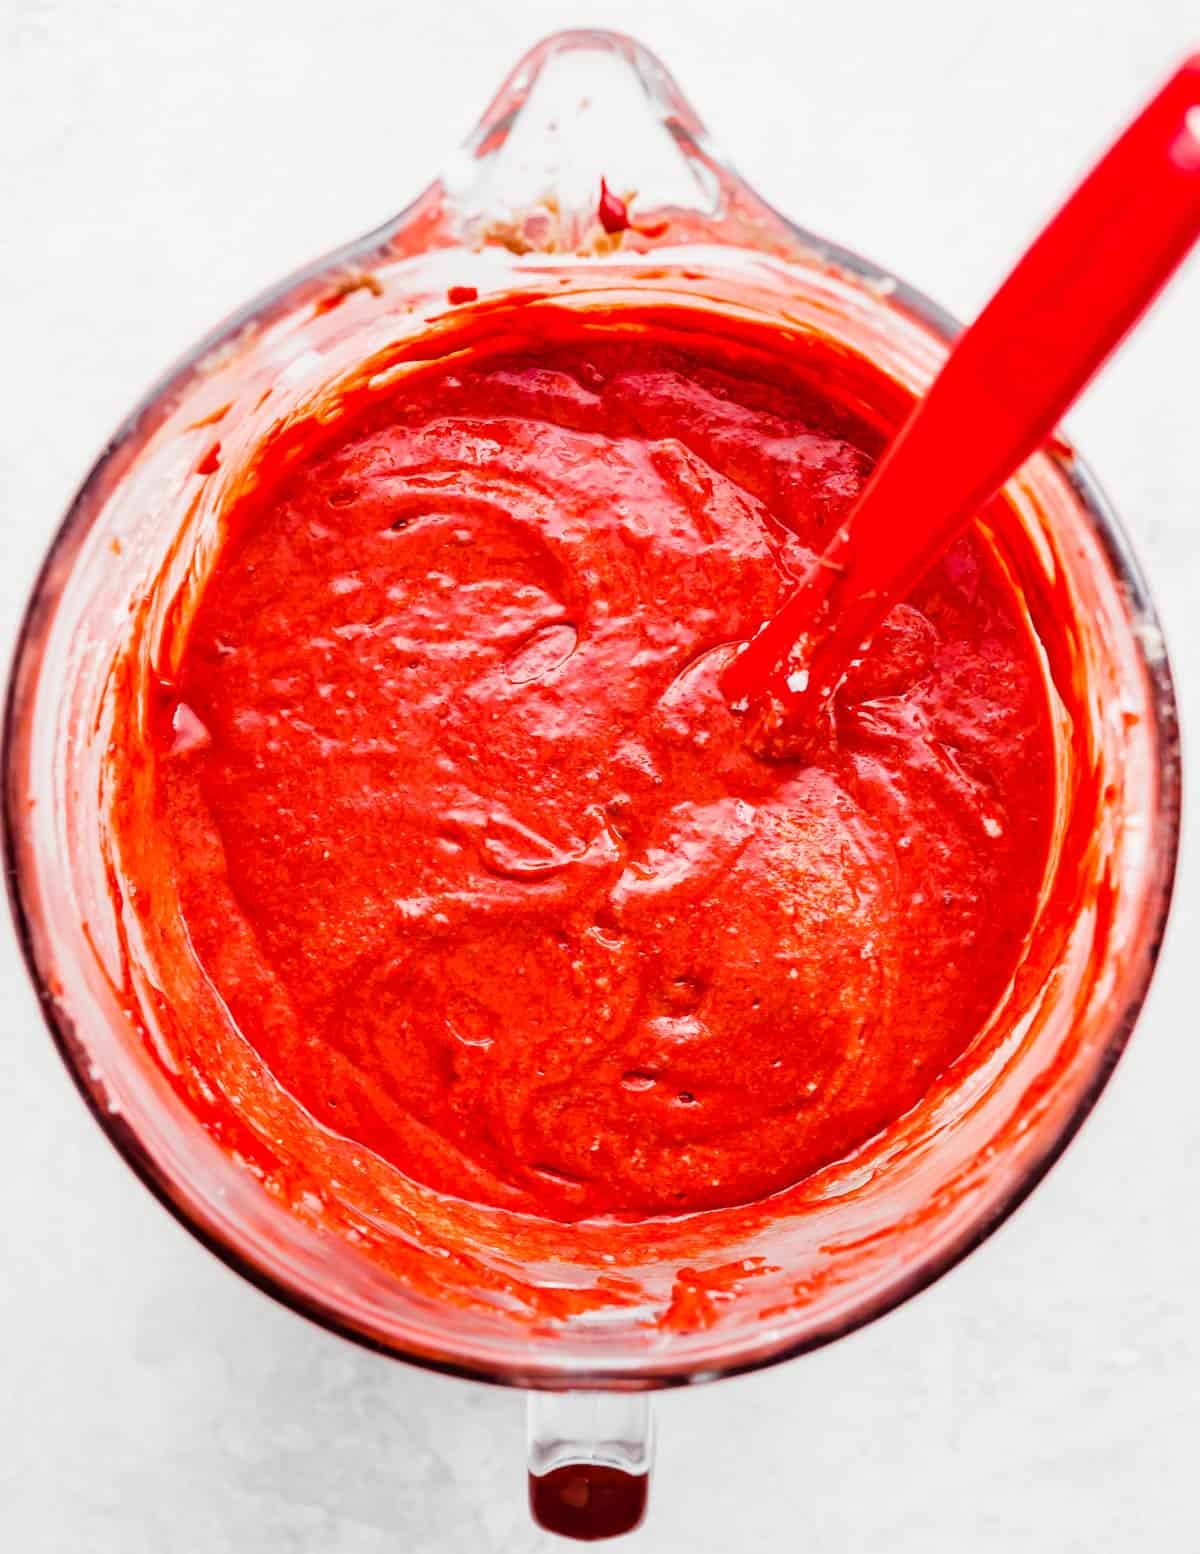
- Make the cake batter. Whisk the dry ingredients until combined and set aside. Cream the butter and sugar on medium speed for 2-3 minutes, then add the oil, egg yolks, vanilla, and vinegar. Turn the mixer on low/medium low and mix until combined. Alternate adding the dry ingredients with the buttermilk, starting and ending with the dry ingredients.
- Add the red food coloring. Once you’ve added the red food coloring to the cake batter, mix it until just combined.
- Fold in the whipped egg whites. Using a rubber spatula, gently fold the egg whites into the batter.
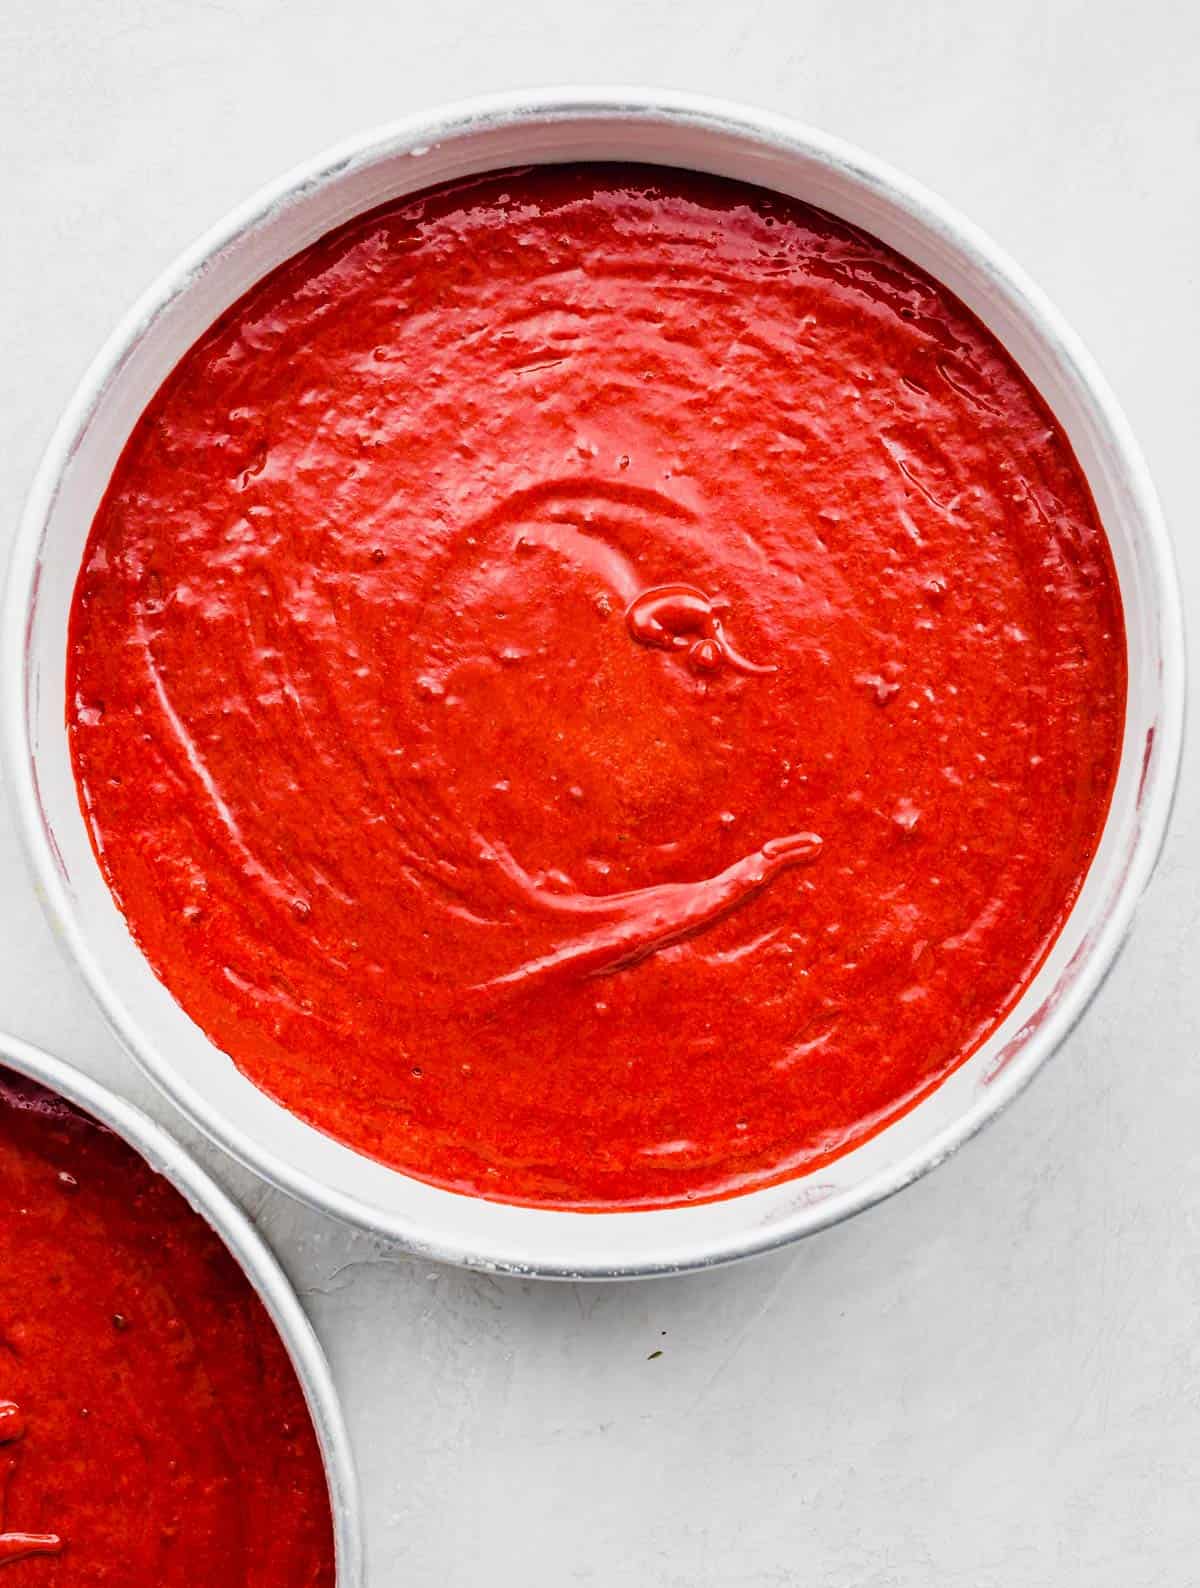
- Bake. Divide the batter evenly between two greased and floured 9-inch cake pans. Bake at 350°F for 29-33 minutes or when a toothpick inserted in the center comes out with a few moist crumbs. Remove the cakes from the oven and let cool in the pans for 10 minutes then turn them out onto a cooling rack to cool until slightly warm to the touch.
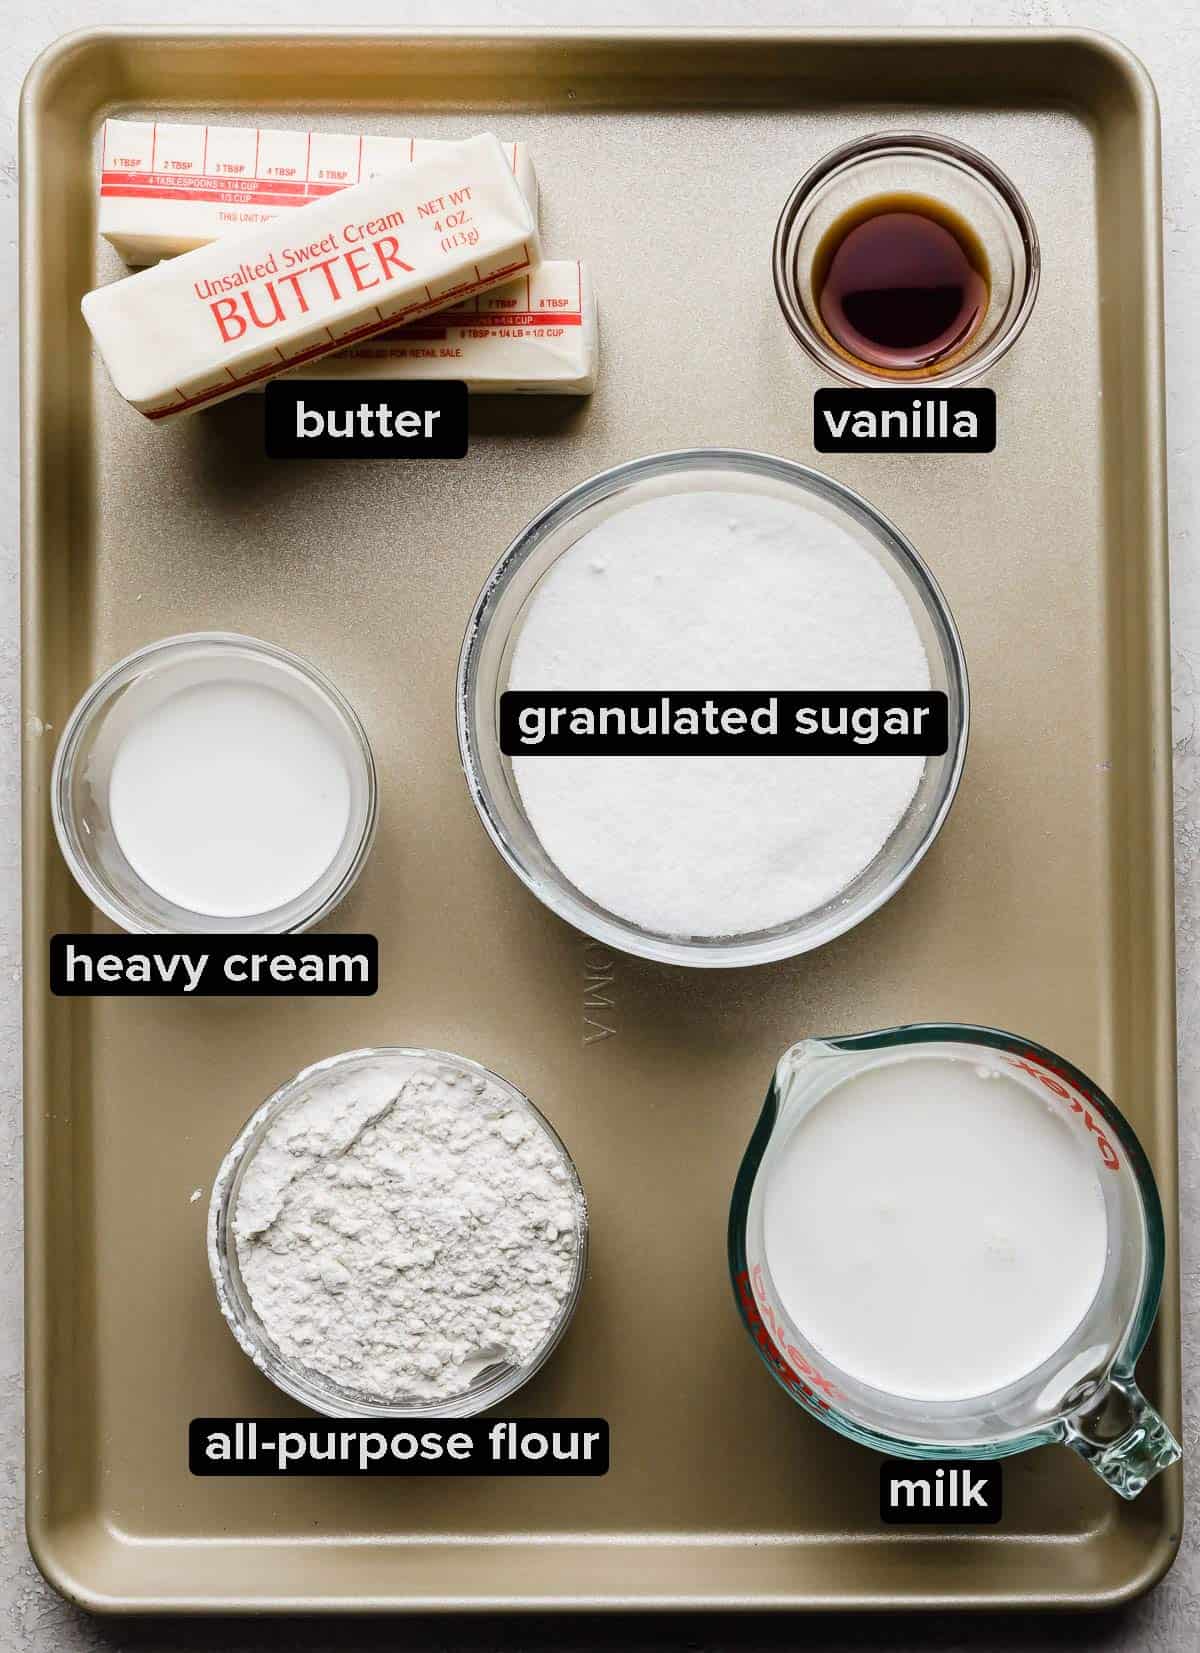
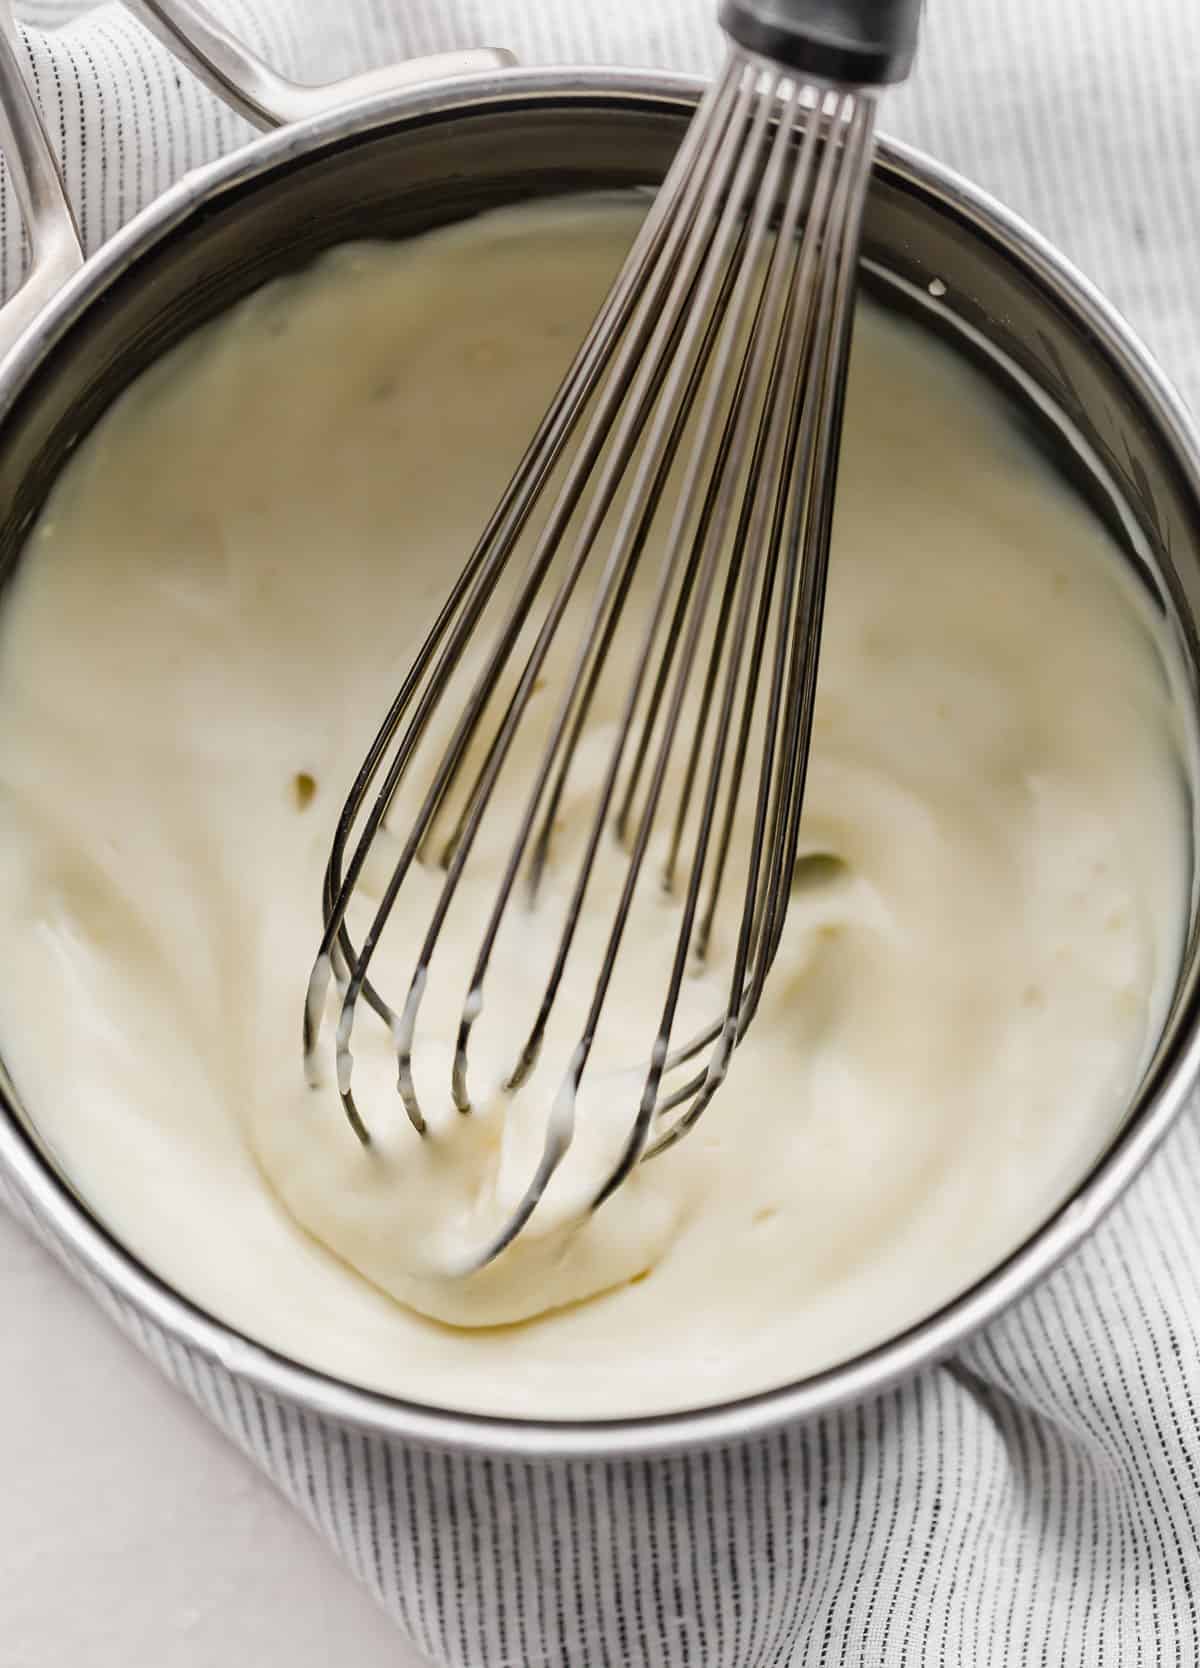
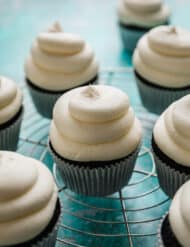
- Make the frosting. Place the granulated sugar in a food processor for 2 minutes to make super fine sugar. Then, in a small saucepan, whisk the flour and milk over medium heat stirring constantly. Bring to a simmer and cook until thickened. Remove from heat to let cool slightly. Once it’s not so hot, cover and place it in the fridge to chill (about 2 hours). Once chilled, beat the butter, sugar, and vanilla on medium speed for 2 minutes in the bowl of a stand mixer. Add the flour and milk mixture, a little at a time. Beat on medium speed for 4-5 minutes or until no longer grainy. Add milk or heavy cream a tablespoon at a time until it reaches your desired consistency. (I added 1 tablespoon of heavy cream.)
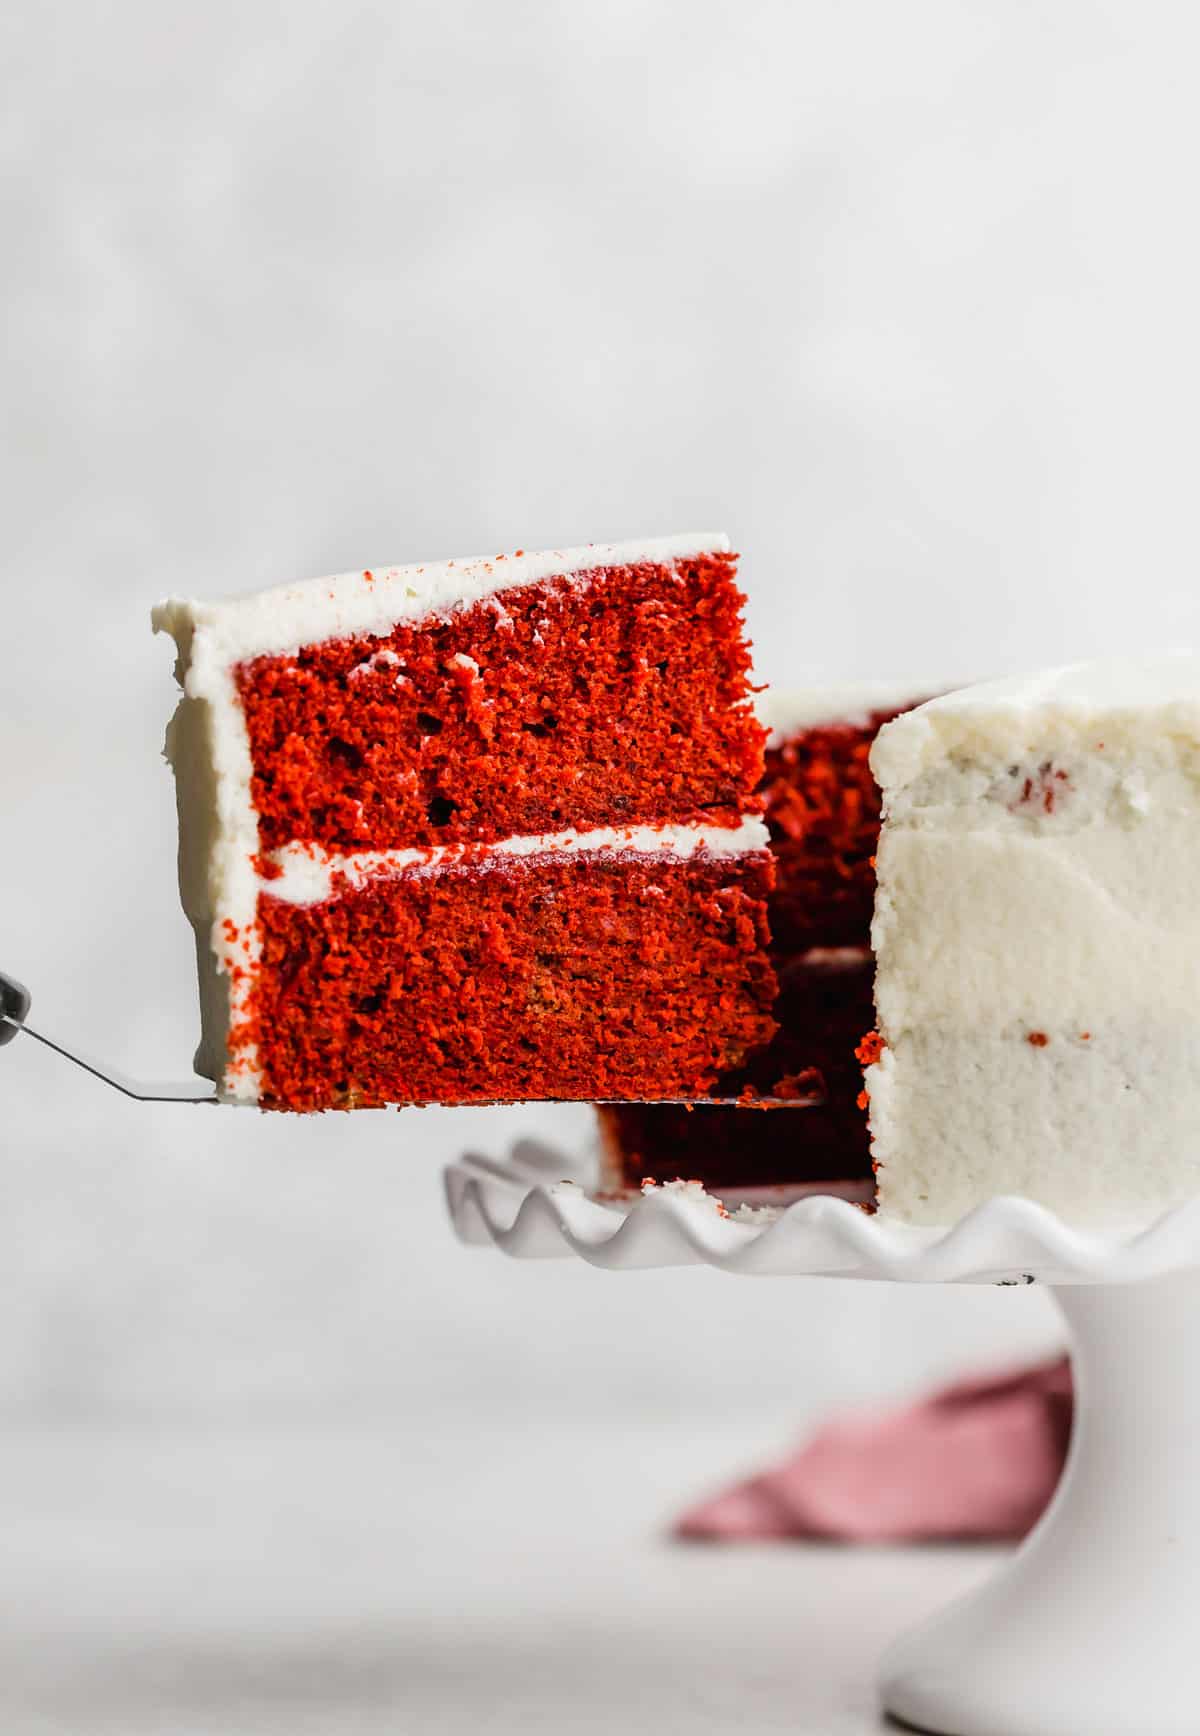
- Frost the red velvet cake. Once the cake is completely cool, you can frost the cake. (Level the cakes if needed). Place the bottom cake layer on a cake stand. Spread almost (but not quite) half of the frosting on the cake. Spread into an even layer. Place the second cake layer on top of the frosting. Use the remaining frosting to frost the top and sides of the cake.

Recipe Tips
If you open up your oven door before the cakes are done, regardless of using the whipped eggs whites in the batter, the cakes will sink in the center.
If you don’t have cake flour, this article is a great resource explaining how to substitute all-purpose flour for cake flour.
Use room temperature wet ingredients. This will help them incorporate into the batter better, resulting in a better bake.
I use a kitchen scale to ensure I get equal amounts of cake batter in each cake pan. This ensures even cake layers.
Make sure your oven is calibrated correctly. My oven runs 10°F cooler than what’s noted on the dial. I have an oven thermometer so that I know exactly what temp my oven is at. The tops of the cake should lightly spring back when touched.
Once the cakes are slightly warm to the touch, double wrap each cake layer in plastic wrap until you are ready to frost. This prevents the cakes from drying out.
The super fine sugar helps get a really smooth frosting consistency, so I would recommend taking the extra step. If you don’t, just know the frosting may be grittier than normal.
Make Ahead, Storing, and Freezing
Store cake covered in the fridge for 3-5 days. (It needs to be stored in the fridge because of the cream in the frosting.
If making ahead of time, let the cake layers cool completely and then wrap in plastic wrap. Store in the fridge for 1-2 days prior to frosting. Then the frosted cake will last another 3-4 days in the fridge.
To freeze, let the cake layers cool completely and wrap in plastic wrap and store in the freezer for up to 1 week. If freezing for longer than 1 week, wrap in an additional layer of aluminum foil. Freeze the plastic- and aluminum-wrapped cake layers for up to 3 months. Remove from the freezer and let thaw in the fridge overnight.
To freeze a completely decorated cake, flash freeze the cake in the freezer for 20-30 minutes or until the frosting is completely set. Remove from the freezer and wrap completely in plastic wrap, and store in the freezer for up to 1 week. If freezing for longer than 1 week, wrap in an additional layer of aluminum foil and freeze for up to 2 months. Remove from the freezer and let thaw in the fridge overnight. Remove from the fridge the next morning and uncover. Let come to room temperature to serve.
For more information on storing and freezing cakes, check out my How to Store and Freeze Cakes guide!
FAQs
Red velvet cake is a chocolate layer cake with a deep red interior. This striking cake is topped with a white frosting, usually a cream cheese frosting or old fashioned type frosting. Achieving the signature deep red color takes but a few drops of red gel food coloring, however, during World War II bakers used beets to color red velvet cakes. So if you’d like to use a natural coloring agent for your next southern red velvet cake, use beetroot. (Granted, I’ve never tried it with beetroot and don’t know if it would affect the flavor, so there you go hah!)
Yes, but you’ll need to use a lot in order to achieve a deep red color. I use gel food coloring because you can use less and still achieve a potent and striking color.
Red velvet cake has a subtle chocolate flavor with notes of tangy flavors attributed to the buttermilk and vinegar that is typically found in the cake.
More Cake Recipes
- Funfetti Cake
- German Chocolate Cake
- Moist Chocolate Cake Recipe
- Coconut Cookies and Cream Cake
- Biscoff Caramel Cake
- Yellow Cake with Chocolate Frosting
Did you make this recipe? I’d love to hear about it! Click here to leave a rating and review, or scroll below the recipe card and do so there.
Stay up-to-date by following us on Instagram, Facebook, and Pinterest.
Old Fashioned Red Velvet Cake
Ingredients
- 3 cups cake flour
- 1 teaspoon baking soda
- 4 tablespoons unsweetened natural cocoa powder
- 1/2 teaspoon salt
- 1/2 cup unsalted butter - at room temperature
- 2 cups granulated sugar
- 1 cup vegetable oil
- 4 large eggs - separated
- 1 tablespoon vanilla extract
- 1 teaspoon white vinegar
- gel red food coloring - I used about 2 teaspoons worth
- 1 cup buttermilk - at room temperature
Old Fashioned Frosting
- 1 1/2 cups milk
- 1/2 cup all purpose flour
- 1 1/2 cups butter - salted or unsalted at room temperature
- 1 1/2 cup super fine granulated sugar
- 1 1/2 teaspoon vanilla extract
- 1 1/2 tablespoon milk - or heavy cream
Instructions
- Preheat oven to 350°F. Grease and flour 2-9 inch cake pans.
- In a medium bowl whisk the cake flour, baking soda, coca powder, and salt.
- In a medium bowl mix the egg whites until stiff peaks form (be careful not to overbeat the whites).
- In the bowl of a stand mixer fitted with the paddle attachment cream the butter and sugar on medium speed for 2-3 minutes. Scrape down the sides of the bowl as needed. Add the oil, egg yolks, vanilla, and vinegar. Mix until combined.
- Alternate adding the dry ingredients with the buttermilk, starting and ending with the dry ingredients. Scrape down the sides of the bowl as needed. Add 2 (or more) teaspoons of gel red food coloring. Mix to combine.
- Using a rubber spatula, fold the egg whites into the cake batter.
- Divide the batter amongst the 2 cake pans. Tip: use a kitchen scale to ensure even amounts of batter are in each pan.
- Bake for 29-33 minutes or until a toothpick inserted in the center comes out with a few moist crumbs, but no wet batter. See note #1. (The tops of the cake should lightly spring back when touched). Remove from the oven and let cool in the pans for 10 minutes then turn out on a cooling rack to cool before frosting.
Frosting
- To make super fine sugar, place the granulated sugar in a food processor. Process for 2 minutes. Ta-da! Super fine sugar.
- In a small saucepan whisk the flour and milk over medium heat until thickened (be sure to whisk constantly to prevent clumping). The mixture should come to a simmer, at this point you'll notice the mixture thickening. Once thick, remove from heat to let cool slightly. Place plastic wrap directly on the flour/milk mixture and place in the refrigerator to chill, about 2 hours.
- Once it's fully chilled continue… In the bowl of a stand mixer beat the butter, sugar, and vanilla on medium speed for 2 minutes. Add the flour and milk mixture, a little at a time. Beat on medium speed for 4-5 minutes or until no longer grainy. Add milk or heavy cream a tablespoon at a time until it reaches your desired consistency. I added 1-2 tablespoons of heavy cream.
- Frost the cooled cake. Place a cake on a cake stand or serving platter, top side up. Spread about 1/3 of the frosting over the top of the cake. Place the other cake layer over the frosting, bottom side up. Frost the top of the cake with 1/2 of the remaining frosting. Use the last of the frosting to frost the edges of the cake.
 Welcome to this delicious corner of the internet! Here I share the recipes my family loves.


One Comment on “Old Fashioned Red Velvet Cake”
LOVE the frosting on this cake. Definitely a winner. And a great, easy red velvet cake from scratch. Filing this recipe in my favs.