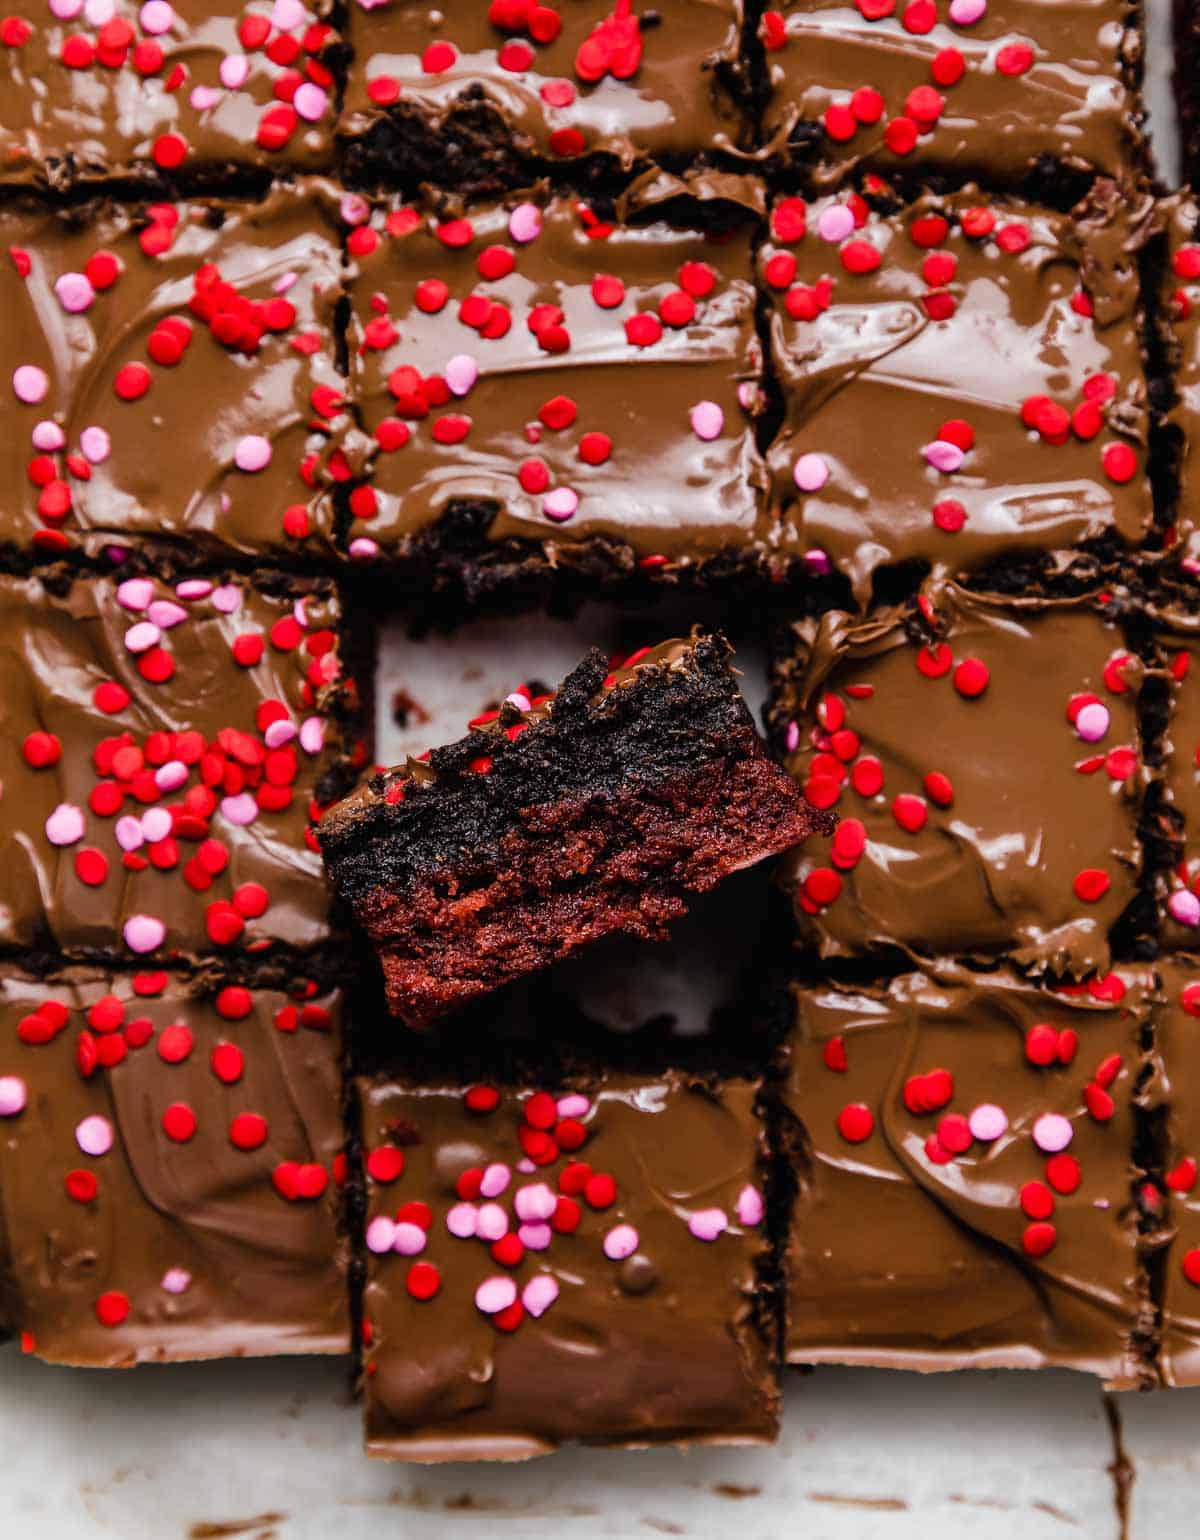
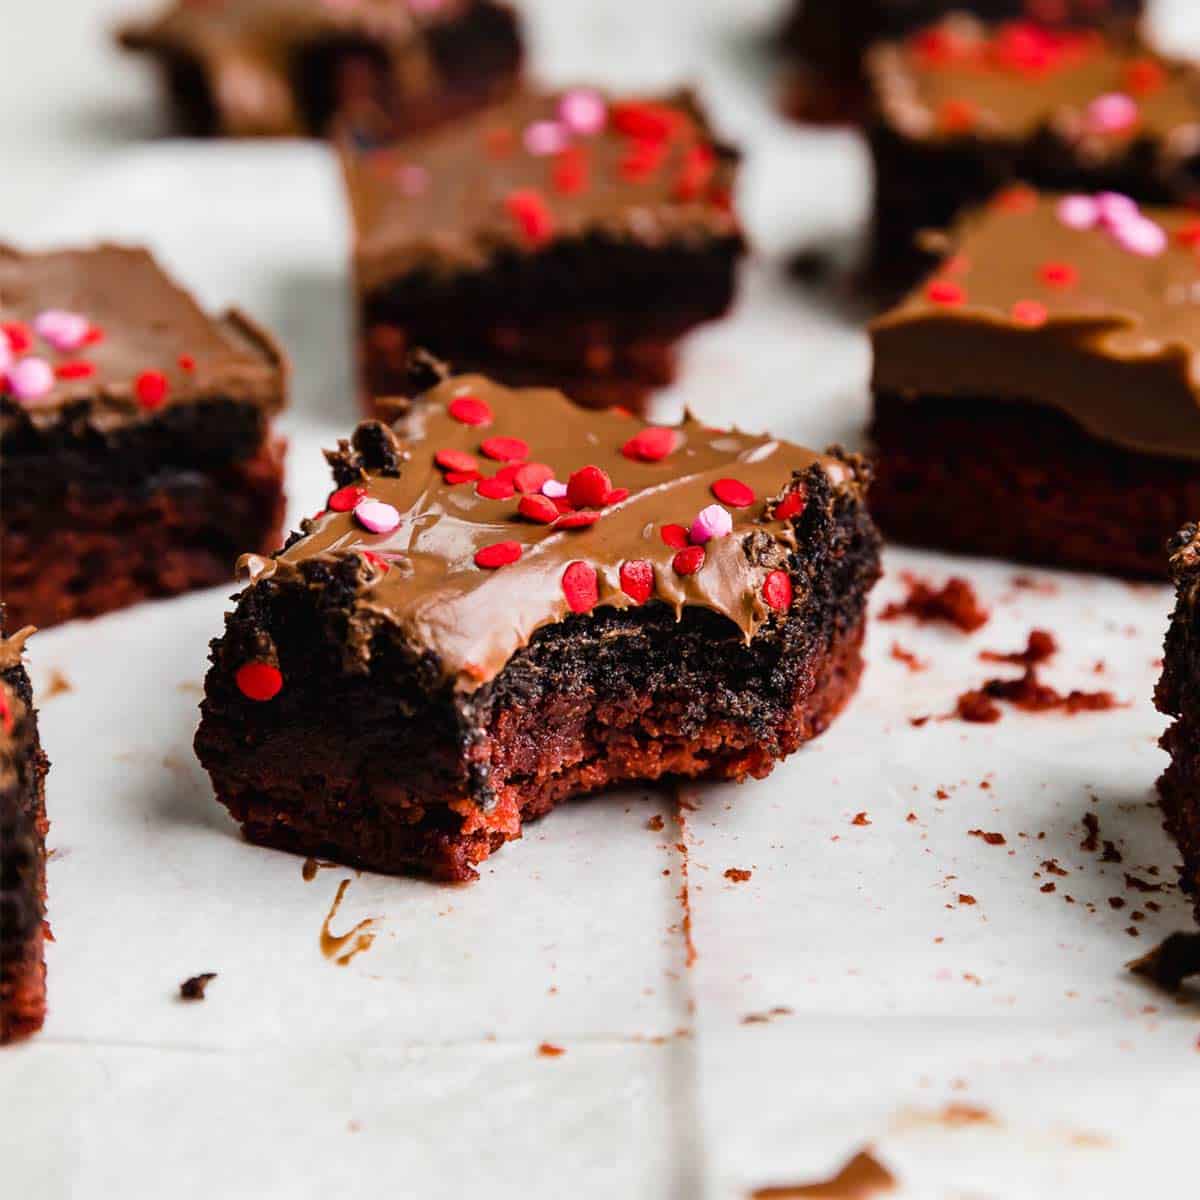
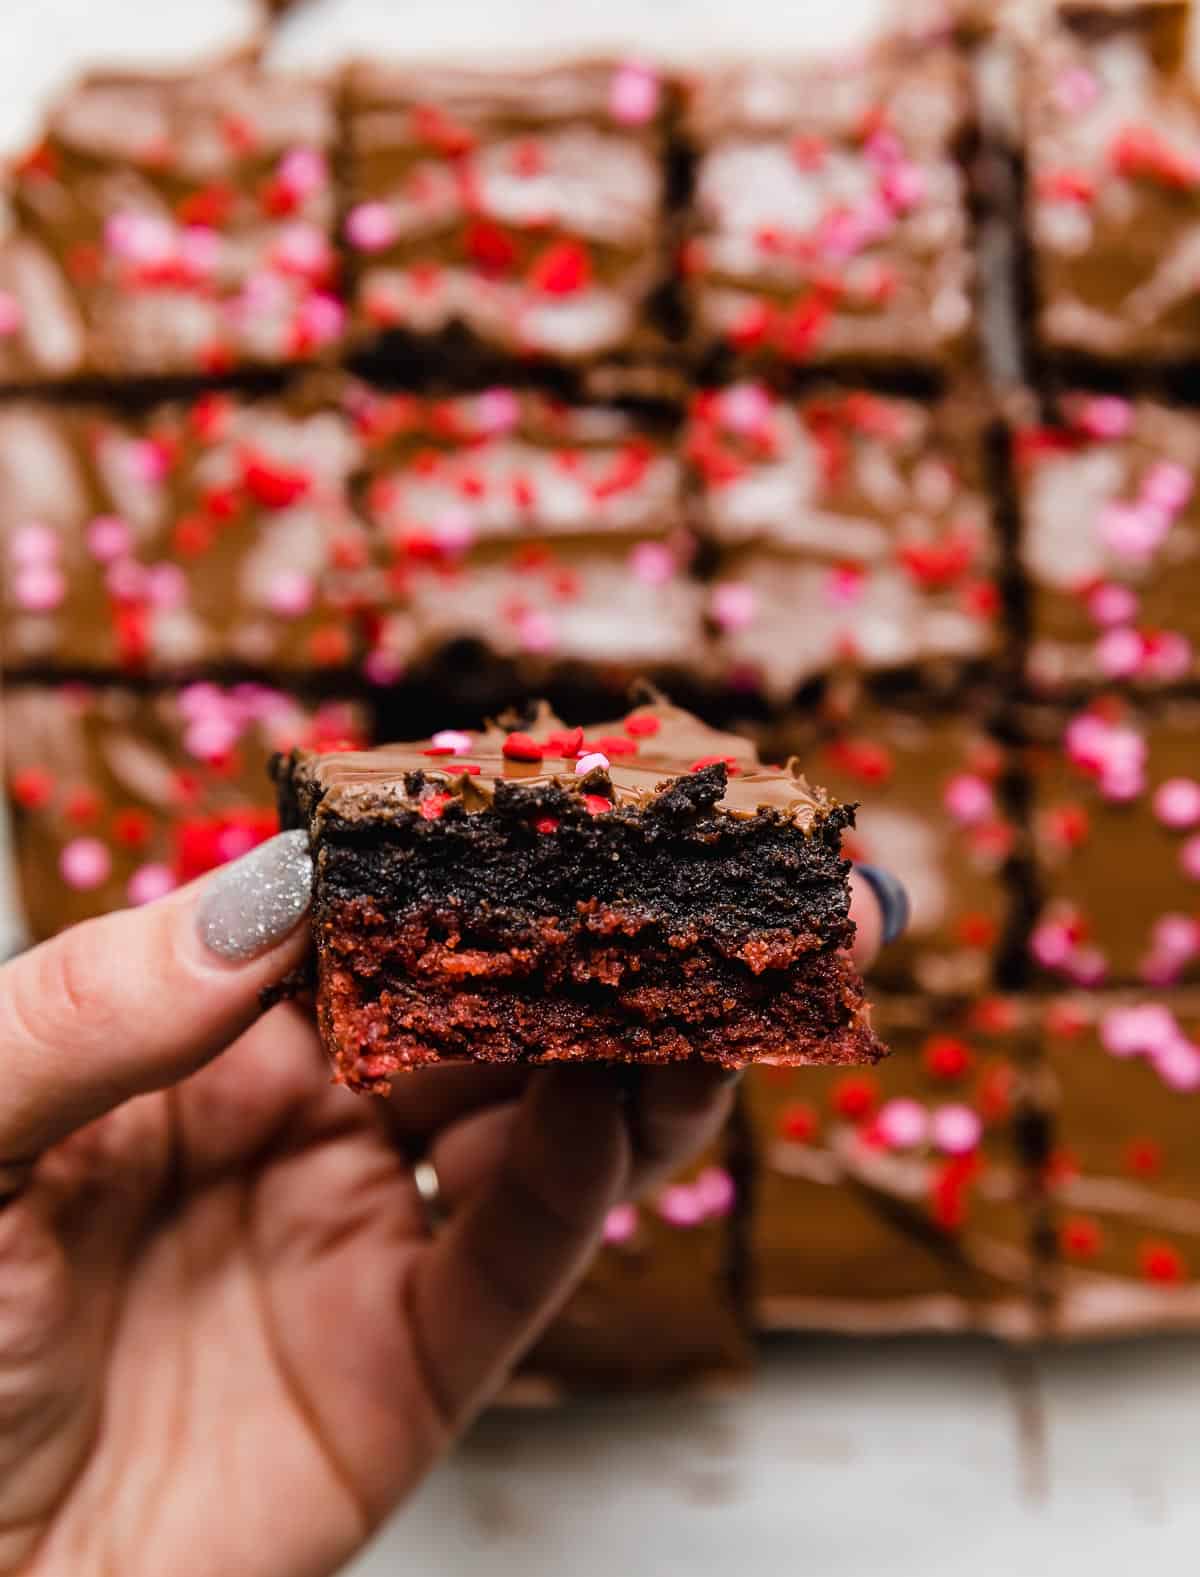
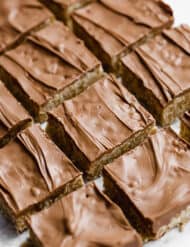
Red Velvet Oreo Truffle Brownies

Red velvet is one of my favorite desserts, and these red velvet Oreo truffle brownies are next level! This fudgy red velvet brownies recipe is topped with an Oreo truffle and melted chocolate for the ultimate decadent chocolatey treat. I love to eat these when the chocolate isn’t fully set on top, but letting the chocolate harden also makes for a delicious bite!
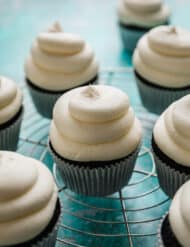
I love a good red velvet recipe. If you love these Oreo red velvet brownies, you’ll love my Oreo red velvet cake! Or, enjoy the classic pairing of red velvet with cream cheese, check out my original recipe for red velvet brownies and my red velvet cupcakes.
Why This Recipe Works
- Homemade red velvet brownies. Red velvet is one of those things that can seem kind of mysterious and maybe too fancy to be made at home, but it’s actually quite simple, and this easy brownie version is even simpler. I’ll walk you through how to make red velvet brownies from scratch, without a cake mix.
- Perfect holiday treat. Now, naturally, I think red velvet is perfect for Valentine’s Day. But frankly, these red velvet Oreo brownies are so delicious, that they should be enjoyed all year long! Bake them for another holiday where red is a main color (Fourth of July, Christmas), other special occasions, or just bake them anytime because they’re that good!
- Easy dessert recipe. I love to bake brownies because as baked goods go, they’re one of the simpler ones to put together. No separating eggs, softening butter, or portioning into individual servings. Just mix, pour, and go. And the Oreo truffle top? Just crushed Oreos and cream cheese. Easy!
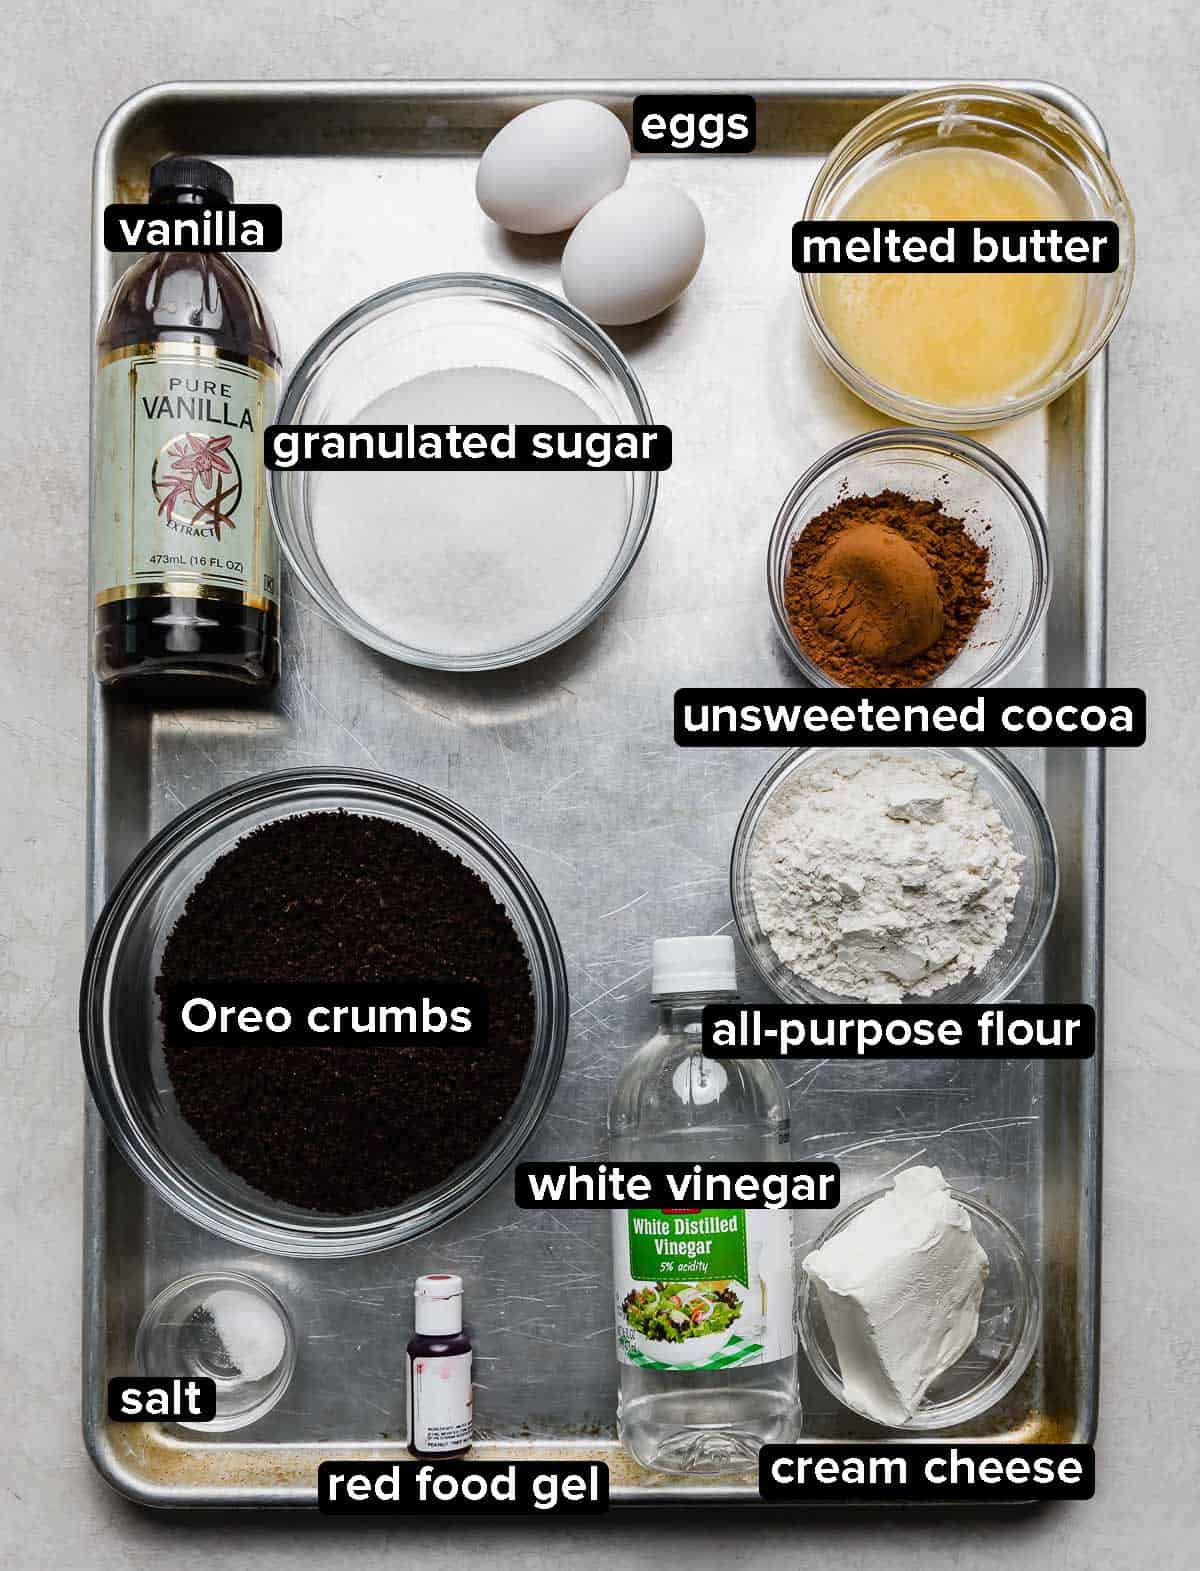
Ingredient Notes
- Unsweetened cocoa powder: Did you know that the flavor of red velvet is chocolate? But it’s only *lightly* chocolate flavored, so we use a pretty small amount of cocoa powder, and we’re using unsweetened or “natural” cocoa powder so the flavor isn’t intensely chocolatey.
- Vanilla extract: To enhance flavor.
- White vinegar: The other secret for perfect red velvet flavor.
- Red gel food color: You can use a natural ingredient like beets to turn red velvet Oreo brownies red, but we’re just going to use red food coloring. I do recommend using gel food dye because it provides more intense color so you don’t have to use as much.
- All-purpose flour: For fudgy brownies.
- Unsalted butter: My preferred fat for brownies to give them the best flavor and texture.
- Oreo cookies: Crushed into fine crumbs. To get the amount needed for this recipe, I used 20 Oreos. You can use double stuffed or regular, and leave the cream in.
- Cream cheese: To mix with your Oreo crumbs for the truffle layer.
- Milk chocolate chips: These chocolate chips are simply melted and poured on top to complete the Oreo truffle layer. You can substitute semi sweet if you prefer!
Step-by-Step Instructions
- Prep oven and pan. Preheat your oven to 350°F and line an 8×8 square baking pan with parchment paper. Lightly spray the parchment paper with cooking spray, then set aside.
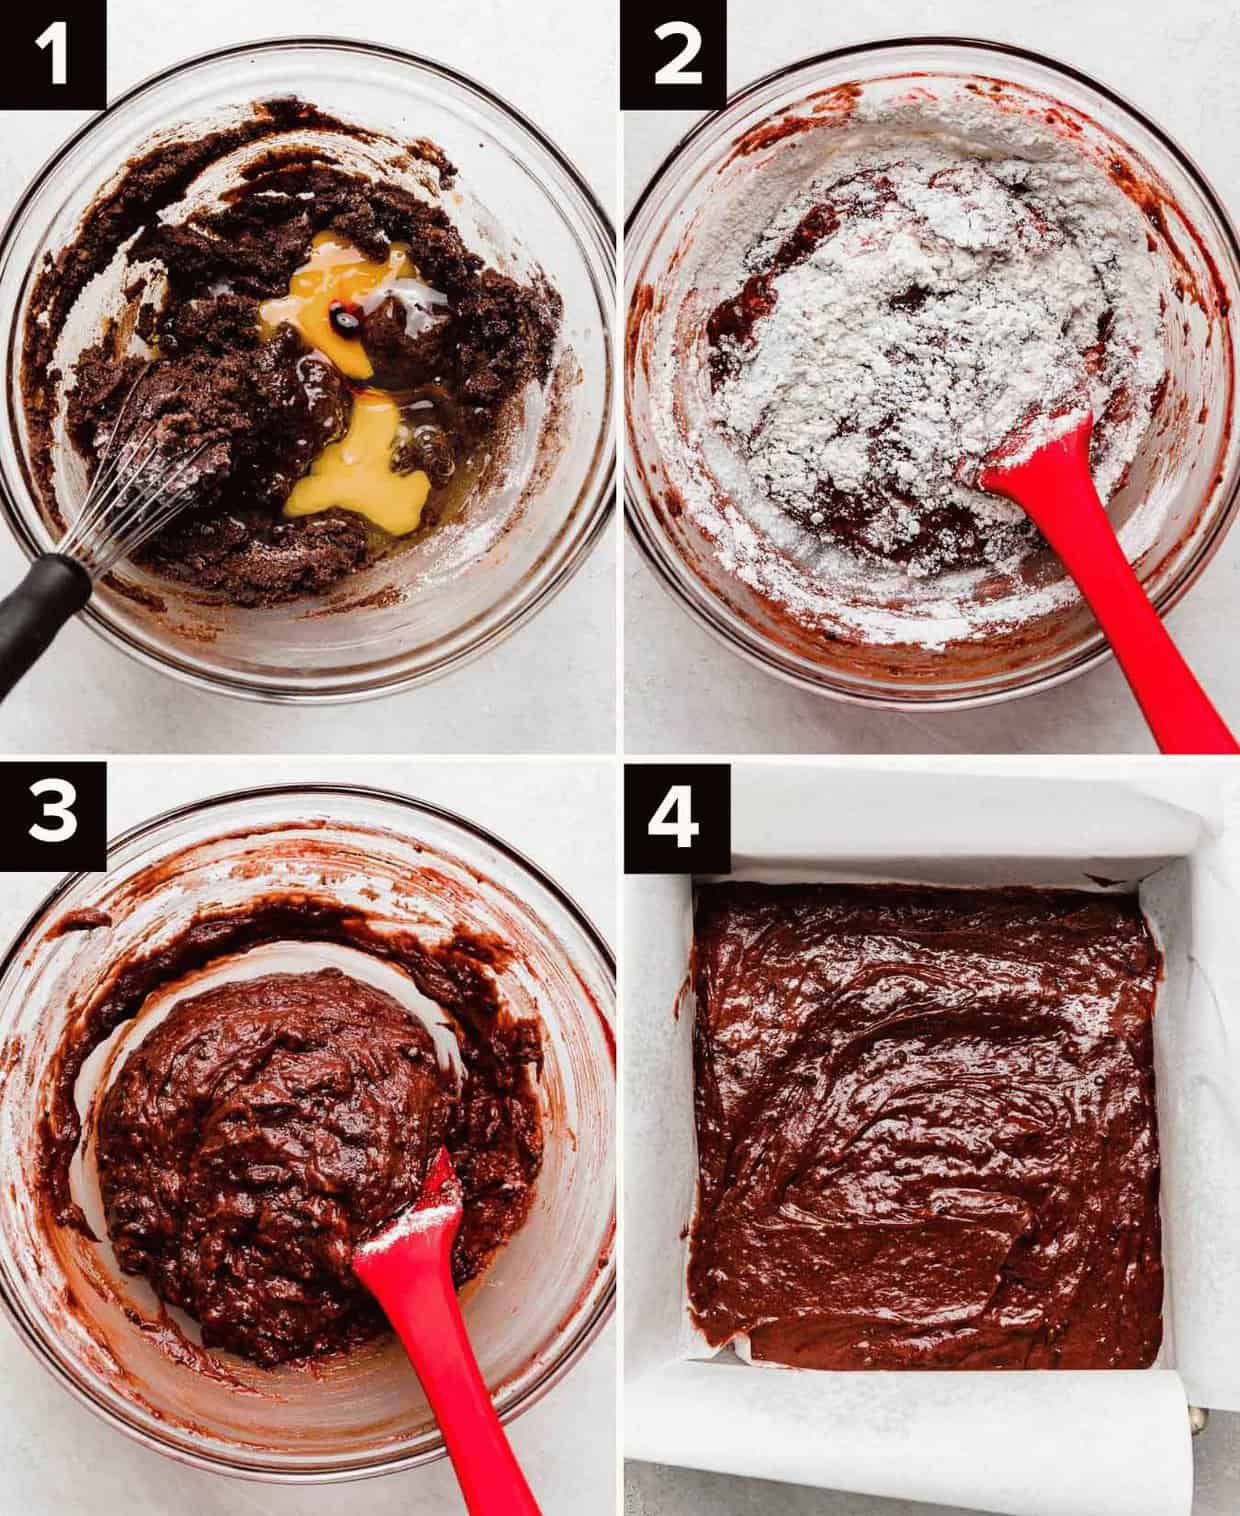
- Mix butter, cocoa, and sugar. Melt ½ cup of unsalted butter and allow it to cool slightly. Add still-warm melted butter to a medium bowl, then stir in ¼ cup of unsweetened cocoa powder. Finally, add 1 cup of white sugar and whisk to combine.
- Add remaining wet ingredients. To the butter-sugar mixture, add 2 large eggs, 1 teaspoon of vanilla extract, 1 teaspoon of red gel food color, and ½ a teaspoon of white vinegar. Whisk to combine.
- Add flour. Add ⅔ cup of all-purpose flour and a ½ teaspoon of salt to the bowl. Use a rubber spatula to gently stir in the flour until just combined—don’t overmix!
- Bake. Pour brownies into the prepared baking dish and spread it into an even layer. Bake for 22-24 minutes, or until a toothpick inserted into the center comes out with a few moist crumbs clinging to it, but no batter.
- Crush Oreos. While the brownies bake, crush 20 whole Oreos into fine crumbs. A food processor makes quick work of this, but you can also put the Oreos in a resealable plastic bag and crush them with a rolling pin. Leave the cream in. You need enough crumbs for 2-2¼ cups.
- Make Oreo truffle layer. Add your Oreo crumbs to a medium sized bowl and mix them with 4 oz of softened cream cheese until thoroughly combined. Place the Oreo cream cheese mixture in between two sheets of parchment paper or wax paper, and use your hands or a rolling pin to squish the truffle mixture into an 8×8 square. Chill the truffle layer in the fridge or freezer for 10 minutes while the brownies cool. This makes it easier to layer it over the cooled brownies.
- Add truffle layer. Let baked brownies cool for 10 minutes before adding the truffle layer on top.

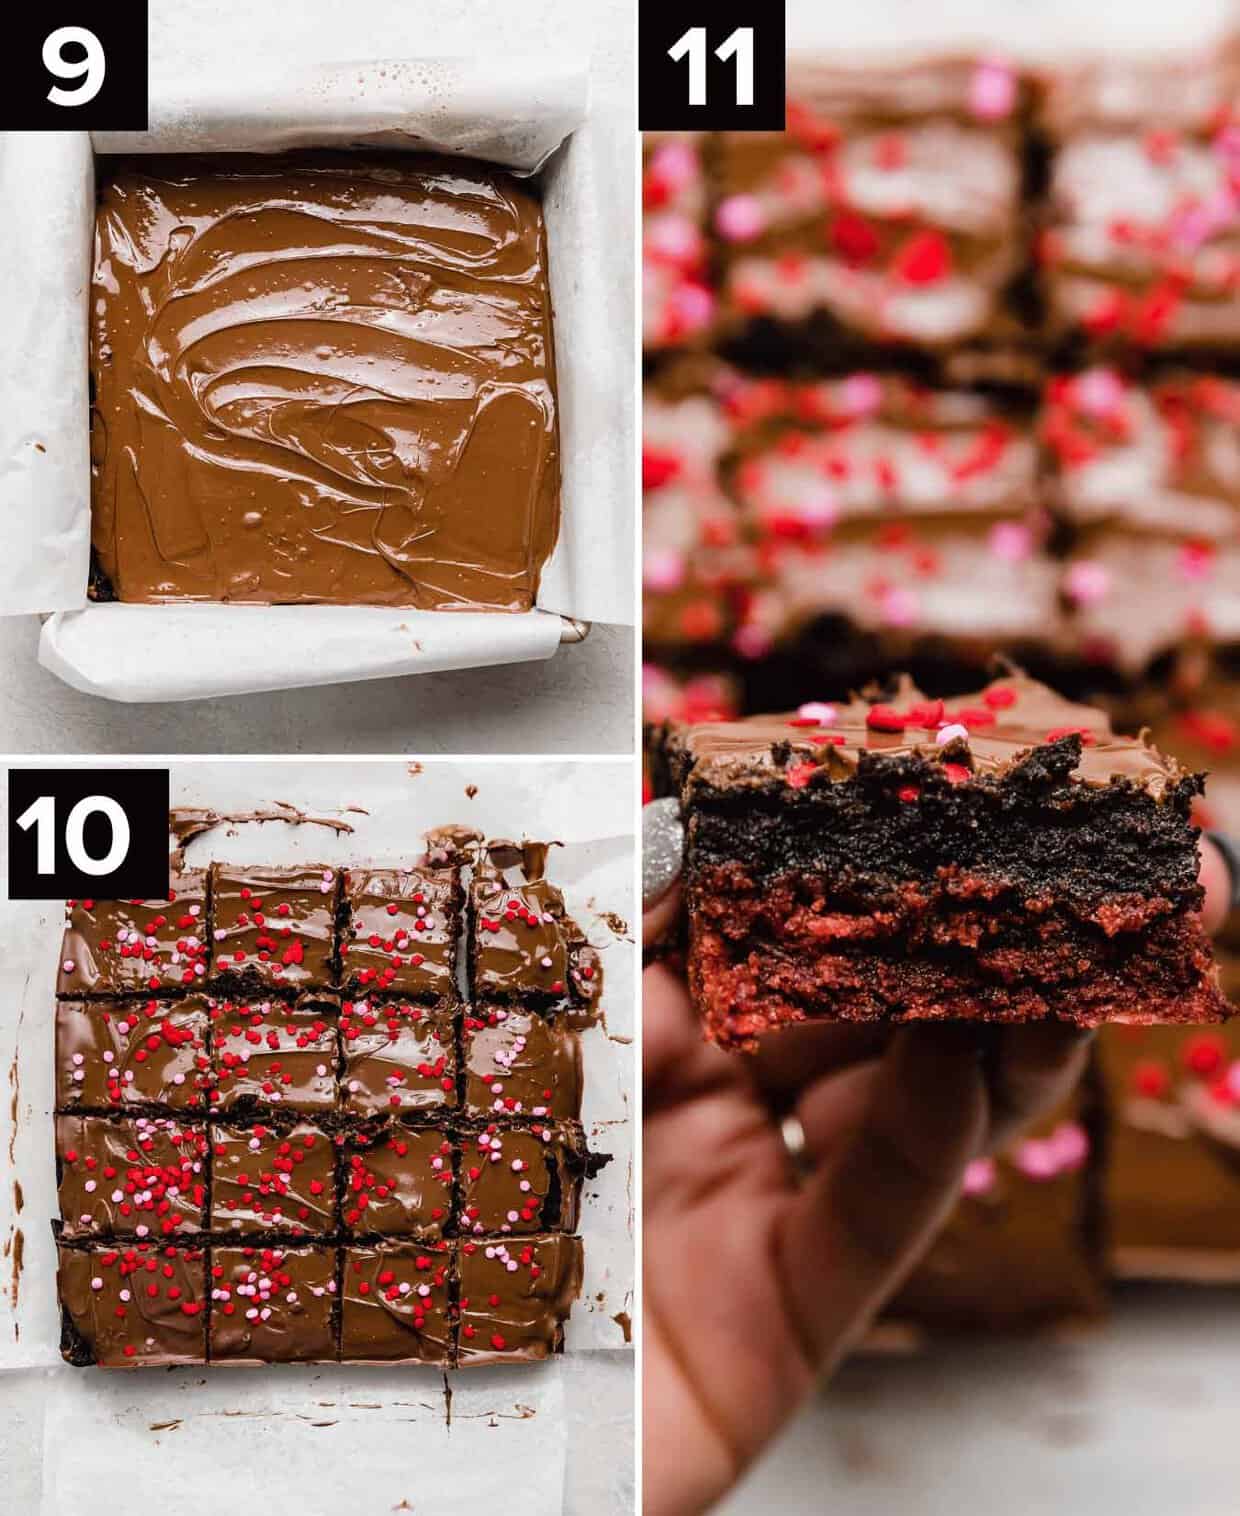
- Melt chocolate chips. Add 1 cup of milk chocolate chips to a small microwaveable bowl and melt in the microwave in 30-second bursts, stirring in between, until fully melted. Pour on top of the truffle layer and spread it evenly across the top. If you’d like, add decorative sprinkles as well.
- Serve and enjoy. Enjoy immediately while the chocolate is still gooey and melted, or let the let the chocolate set before slicing and enjoying. Either way, they’re delicious!
Recipe Tips
Decorative sprinkles are fun, and a great way to make this red velvet brownie recipe appropriate for any holiday! Or, add even more Oreo goodness to these red velvet Oreo brownies by sprinkling additional Oreo pieces on top.
Use another kind of chocolate on top! Semi-sweet or white chocolate are both great options.
Careful not to overmix the batter. These chewy red velvet brownies are meant to be fudgy and dense, and overmixing puts more air into the batter. It’s also crucial not to overbake the brownies so they stay moist and tender.
Do not skip the chilling the Oreo truffle layer! It’s so much easier to lay it on top of the brownies when it’s a little more solid.
Make Ahead, Storing, and Freezing
Make Ahead: These brownies are good for up to 5 days, so they can be made several days in advance. You can also make the Oreo truffle layer a day or two in advance before making the brownies.
Storing: Store leftover red velvet Oreo truffle brownies in an airtight container in the fridge for up to 5 days.
Freezing: In theory I think these brownies would freeze well. You can freeze the entire pan by wrapping it tightly in plastic wrap, or slice and freeze individually wrapped brownies. I have not tested this, however, and I’m not sure how the brownie texture might be affected after thawing.
Recipe FAQs
I believe you can freeze these brownies. You can either wrap and freeze the entire pan or wrap and freeze individual brownies.
Not quite! Red velvet does contain some chocolate flavor, but it’s more of a hint, and it also has white vinegar to provide a unique taste.
You can, but you will have to use more. The additional liquid may also affect the bake and texture of your brownies.
White vinegar is a critical part of the classic red velvet flavor. Don’t skip it! I promise it doesn’t taste like vinegar. Don’t use a different kind of vinegar though, as it will affect the flavor.
More Red Velvet Recipes

Red Velvet Oreo Truffle Brownies
Ingredients
Red Velvet Brownies
- 1/2 cup unsalted butter - melted and still warm
- 1/4 cup unsweetened cocoa powder
- 1 cup granulated sugar
- 2 large eggs
- 1 teaspoon vanilla extract
- 1 teaspoon red gel food color
- 1/2 teaspoon white vinegar
- 2/3 cup all-purpose flour
- 1/2 teaspoon salt
Oreo Truffle Layer
- 20 Oreo cookies - finely crushed! (regular or double stuffed… leave the cream filling inside of the cookies) this should equate about 2 – 2 1/4 cups
- 4 oz cream cheese - softened
Topping
- 1 cup milk chocolate chips
Equipment
Instructions
Make the Red Velvet Brownies
- Preheat oven to 350°F. Line an 8"x8" square pan with parchment paper. Lightly spray the parchment with nonstick cooking spray. Set aside.
- In a medium sized bowl add the warm melted butter. Stir in the cocoa powder. Next add the sugar and whisk to combine.
- Whisk in the eggs, vanilla, vinegar, and red food coloring. Using a rubber spatula, stir in the flour and salt until just combined. Spoon the batter into the prepared pan, spread into an even layer.
- Bake for 22-24 minutes or until toothpick inserted in center comes out with moist crumbs. Remove from the oven and let brownies cool for 10 minutes before adding the Oreo truffle layer on top.
Make the Oreo Truffle Layer
- While the brownies are cooling make the Oreo truffle layer. In a medium sized bowl mix the crushed Oreos and cream cheese until combined. Place the oreo truffle mixture between two sheets of parchment or wax paper. Use a rolling pin, or your hands, to press the oreo truffle into an 8"x8" square. Chill in the fridge or freezer for 10 minutes to help the oreo truffle be easier to transfer to the brownies. Once slightly chilled remove the parchment paper and transfer the oreo truffle to the top of the baked and slightly cooled brownies.
Melt, and add the topping
- Melt the milk chocolate chips in the microwave until fully melted. Pour overtop of the oreo truffle layer. Spread into an even layer. Add festive sprinkles overtop (if desired). Let set before slicing and serving. (Or slice and eat them while the top is still melty.. that's what I like to do!)
 Welcome to this delicious corner of the internet! Here I share the recipes my family loves.


2 Comments on “Red Velvet Oreo Truffle Brownies”
I’d like to make this but I worry the oreo/cream cheese won’t adhere to the brownie part. How does it stay in place or stick onto the brownie without separating when cutting into pieces?
Hi Jody, I would recommend just cutting them carefully. As you can see from the photos, Whitney didn’t have issues with the two pieces staying together after being cut, but there is nothing adhering them together. It’s possible that putting the layer on while the brownies are still slightly warm helps the cream cheese stick to them better.