Red Velvet Rice Krispies
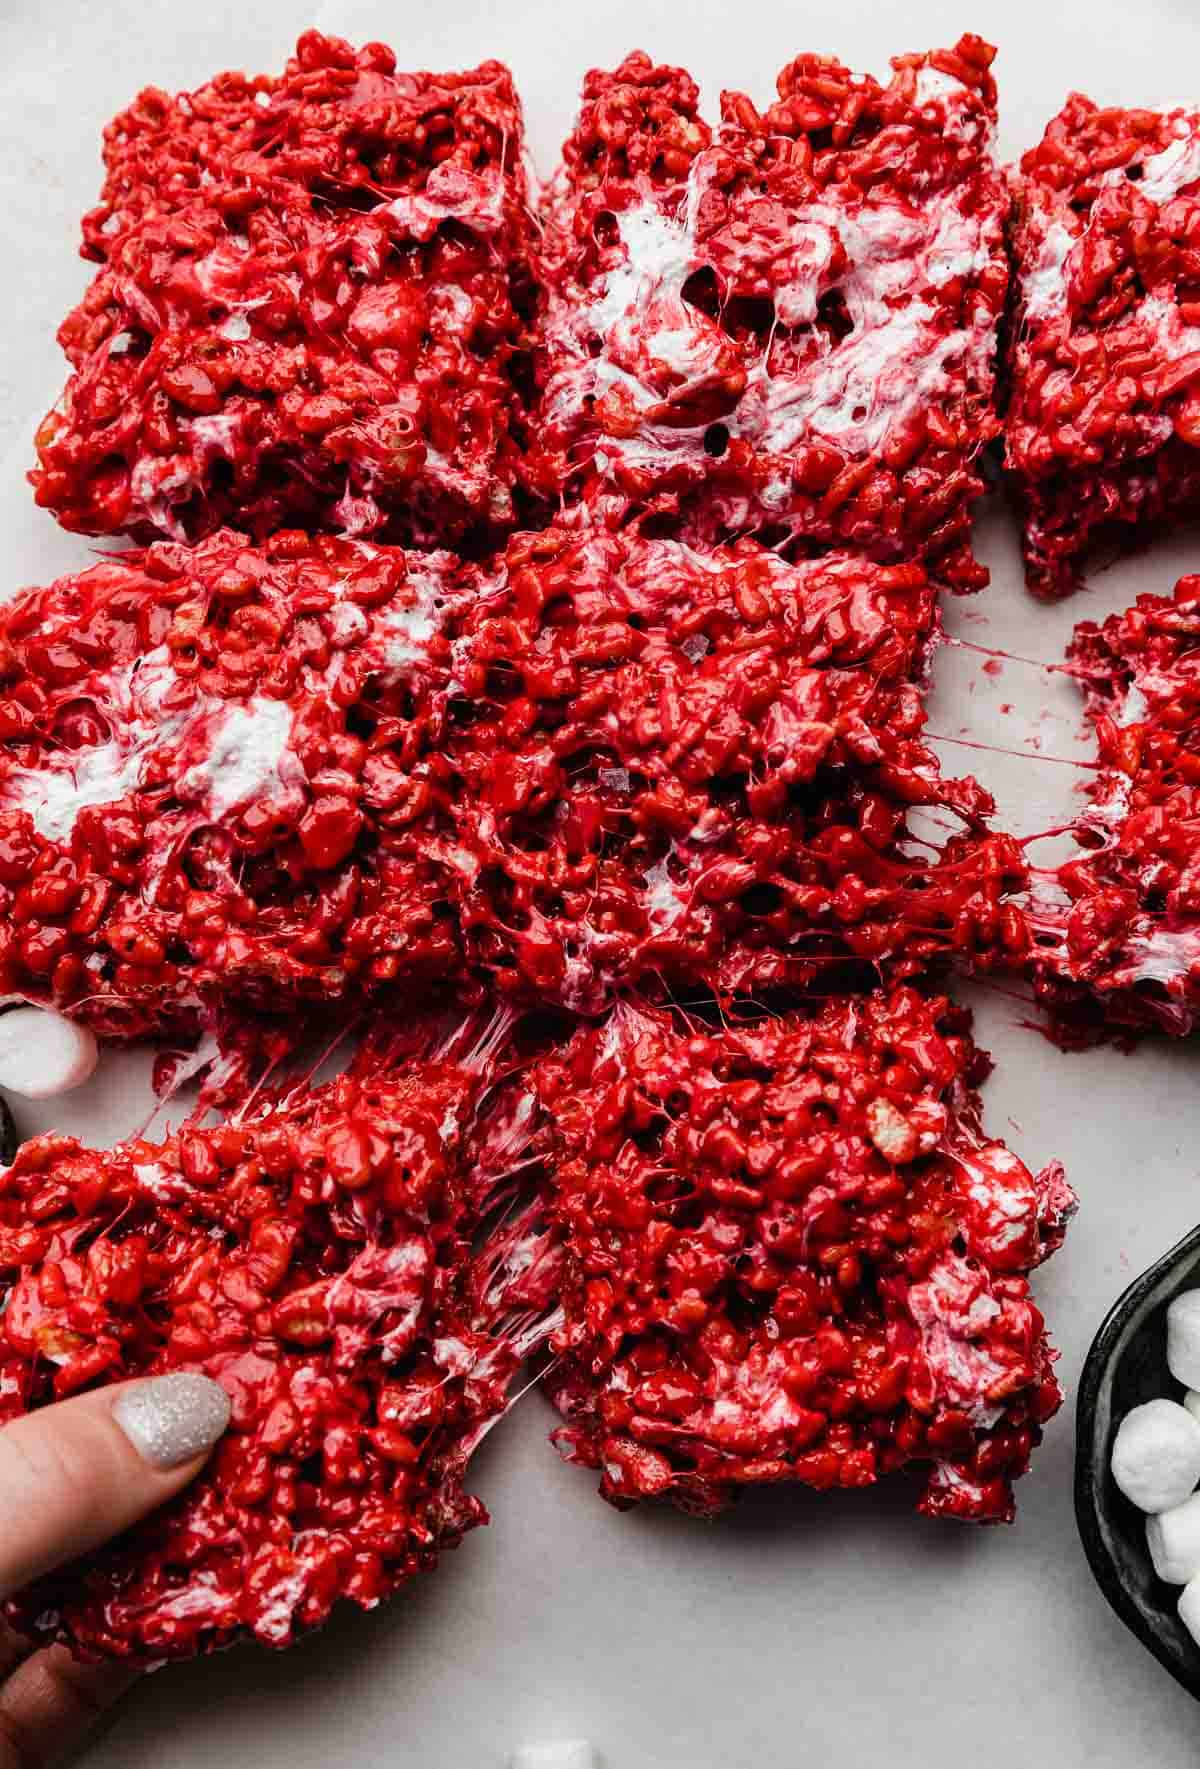
Need a quick and easy Valentine’s Day treat? These red velvet rice krispie treats are just the thing! Homemade rice krispie treats get a delicious upgrade with the addition of some red velvet cake mix for just a hint of chocolatey red velvet flavor, and the stunning red color is so festive!
Rice Krispies treats are the perfect easy treats for any occasion. From classic recipe Rice Krispies Treats to the slightly more grown-up Salted Brown Butter Rice Krispie Treats, colorful Fruity Pebble Rice Krispie Treats and M&M Rice Krispie Treats, and my newest twist, Cookies and Cream Rice Krispies!, there’s really a rice krispie recipe for every event—now including Valentine’s Day!
Why This Recipe Works
- Holiday rice krispie treats. While I made these rice krispie treats with Valentine’s Day in mind, I’ve seen people use similar recipes to make Halloween rice krispie treats and pretend they’re “raw meat.” Pretty gross, but definitely a fun twist. I think the red color would also make these great Christmas rice krispie treats or July 4th rice krispie treats—just throw on some green, or white and blue sprinkles!
- Gooey rice krispie treats. There is nothing worse than a hard rice krispie treat. For the best soft and chewy rice krispie treats, the secret is not to let them cook too long! Especially these red velvet cake rice krispie treats, which use a boxed cake mix to get that red velvet flavor.
- Quick and easy dessert. Need a last-minute dessert? Rice krispies to the rescue! This no-bake dessert recipe is typically pretty allergy-friendly. Note that brand-name rice crispy cereal is NOT certified gluten-free, and of course cake mix isn’t either. But, rice krispie treats are egg-free! And if you use certified gluten-free crispy rice cereal and gluten-free cake mix, they can be made gluten-free as well.
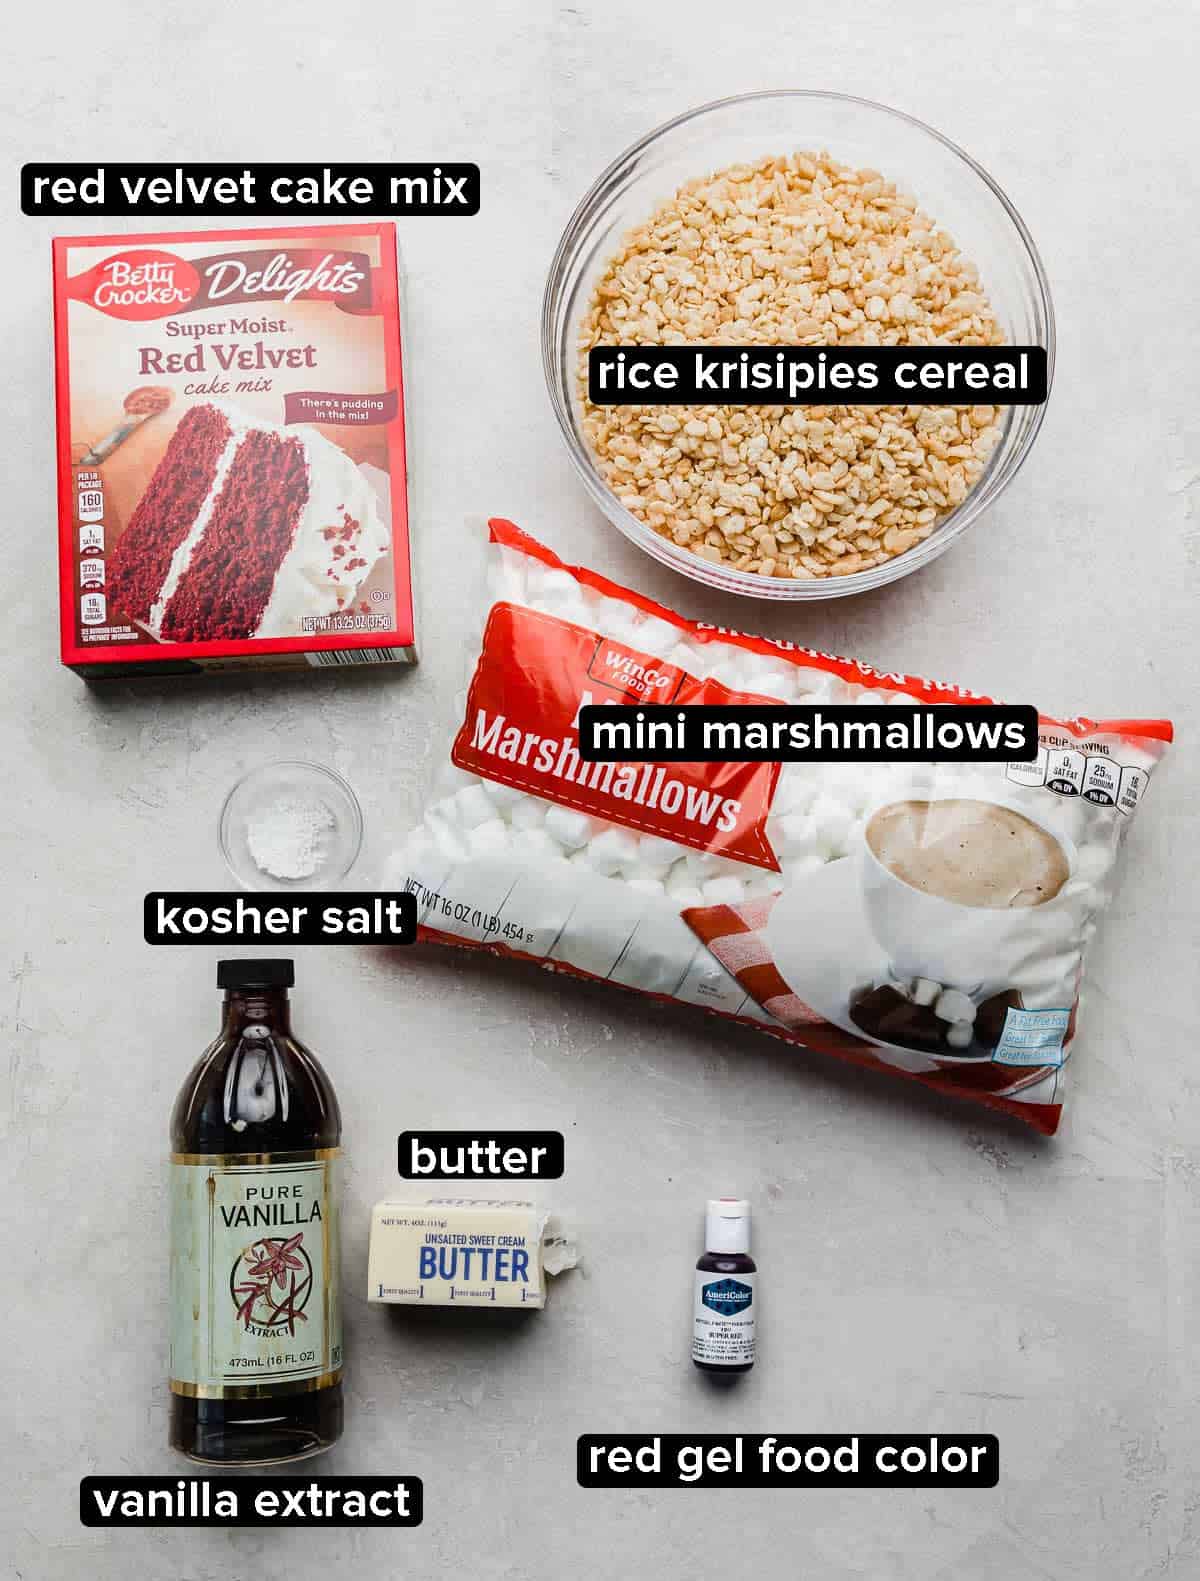
Ingredient Notes
- Butter: You can use salted or unsalted butter here. Butter is key to helping the marshmallows melt and stay soft.
- Mini marshmallows: You need 11 cups of mini marshmallows. A 16-ounce bag typically contains around 8-9 cups. You can use regular-sized marshmallows if that’s all you have, but they may take longer to melt, and I wouldn’t recommend adding additional large marshmallows at the end of the recipe because they are so big.
- Red velvet box cake mix: You just need a cup of dry red velvet cake mix to add a subtle red velvet cake flavor to these red velvet rice krispies treats.
- Vanilla extract: My favorite ingredient for enhancing flavor.
- Kosher salt: To balance the sweetness of the cake mix and the marshmallows.
- Red gel food color: The red velvet cake mix doesn’t give much of a red color to these rice krispie treats, so I use red food coloring to make the color more vivid. I prefer to use gel food color because it’s more saturated and you don’t need to use as much.
- Rice Krispies cereal: You can’t have rice krispie treats without rice krispies cereal! That being said, if you wish to make these treats gluten-free, look for another certified gluten-free crispy rice cereal.
Step-by-Step Instructions
- Prepare your pan. Line an 8×8 inch square pan with aluminum foil. Spray the foil with nonstick cooking spray. You can also use parchment paper, but I find aluminum foil is easier to press into the pan. You have to grease it, though, otherwise your red velvet rice krispie treats will stick to the foil!
- Melt butter. Add 7 tablespoons of salted or unsalted butter to a large pot over medium or medium-low heat. Allow butter to melt fully.
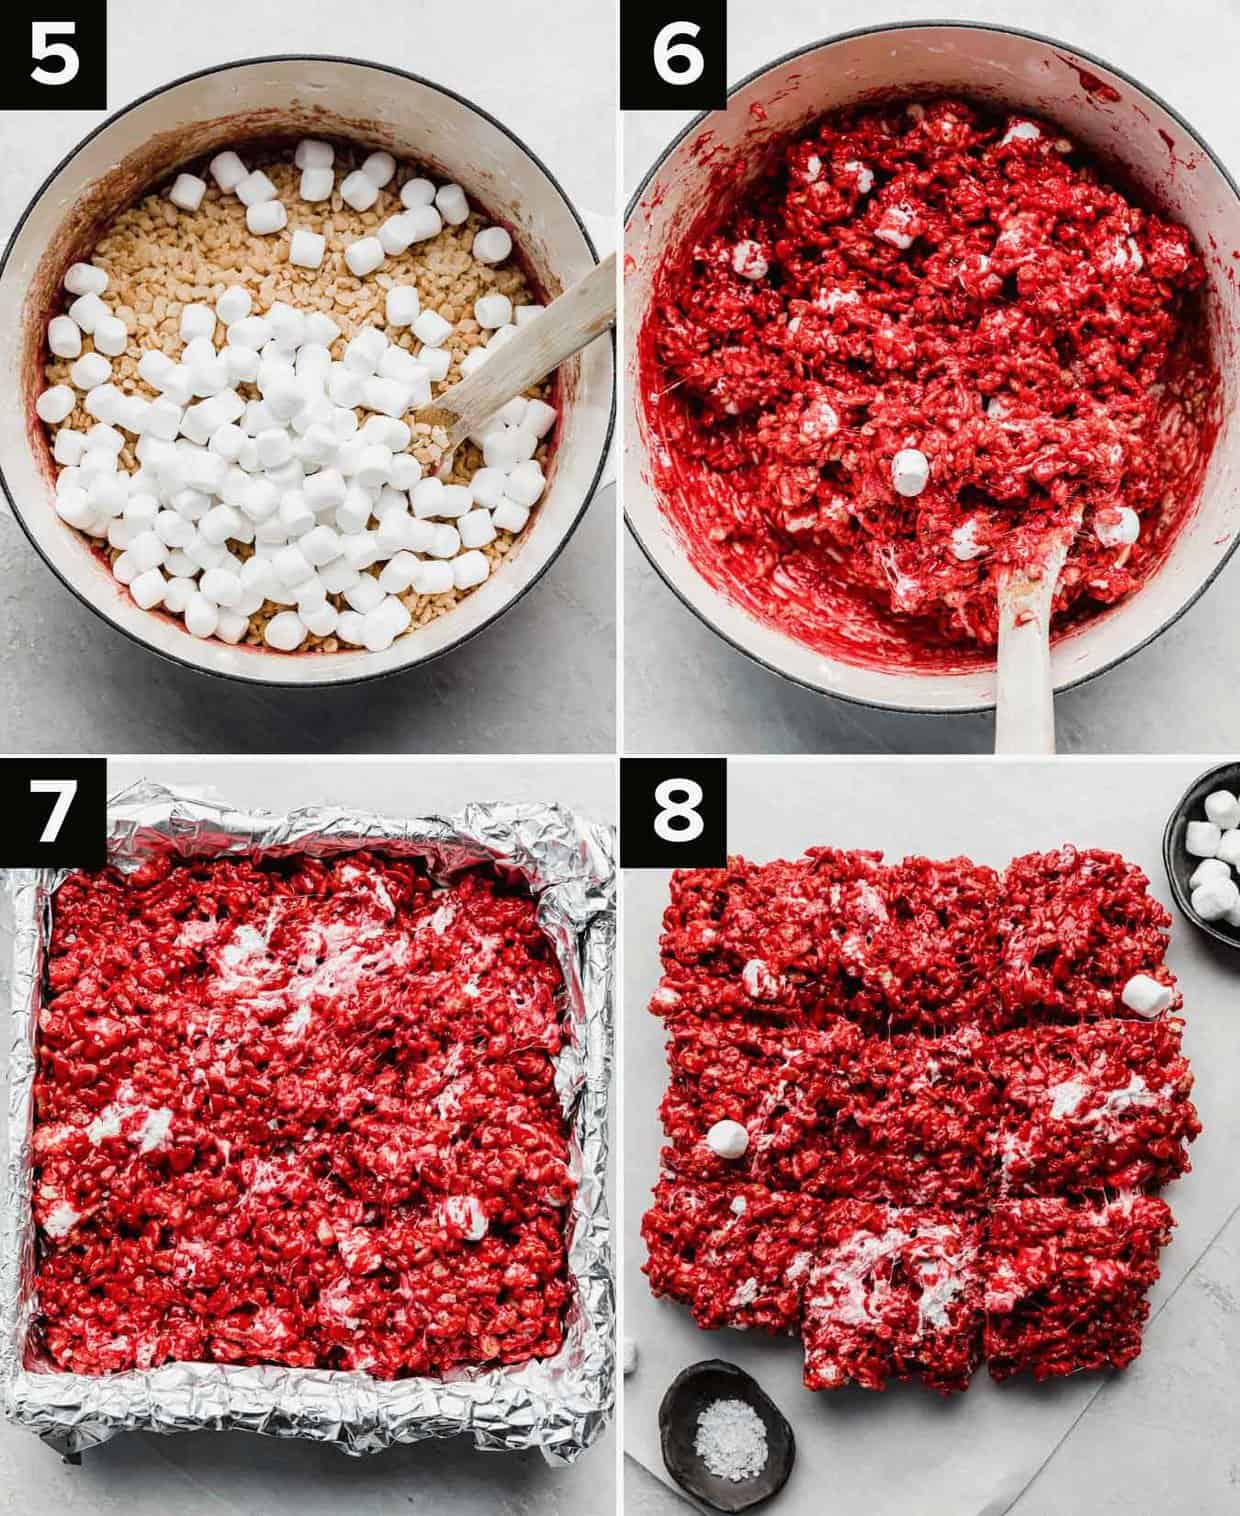
- Add marshmallows. Add 7 cups of mini marshmallows to the melted butter and stir until melted.
- Add everything but the cereal. Once the marshmallows are JUST melted, add 1 cup of dry red velvet cake mix, ½ teaspoon of vanilla extract, ¼ teaspoon kosher salt, and 2 drops of red gel food color. Stir to combine, then remove the melted marshmallow mixture from the heat. Don’t let it cook too long!
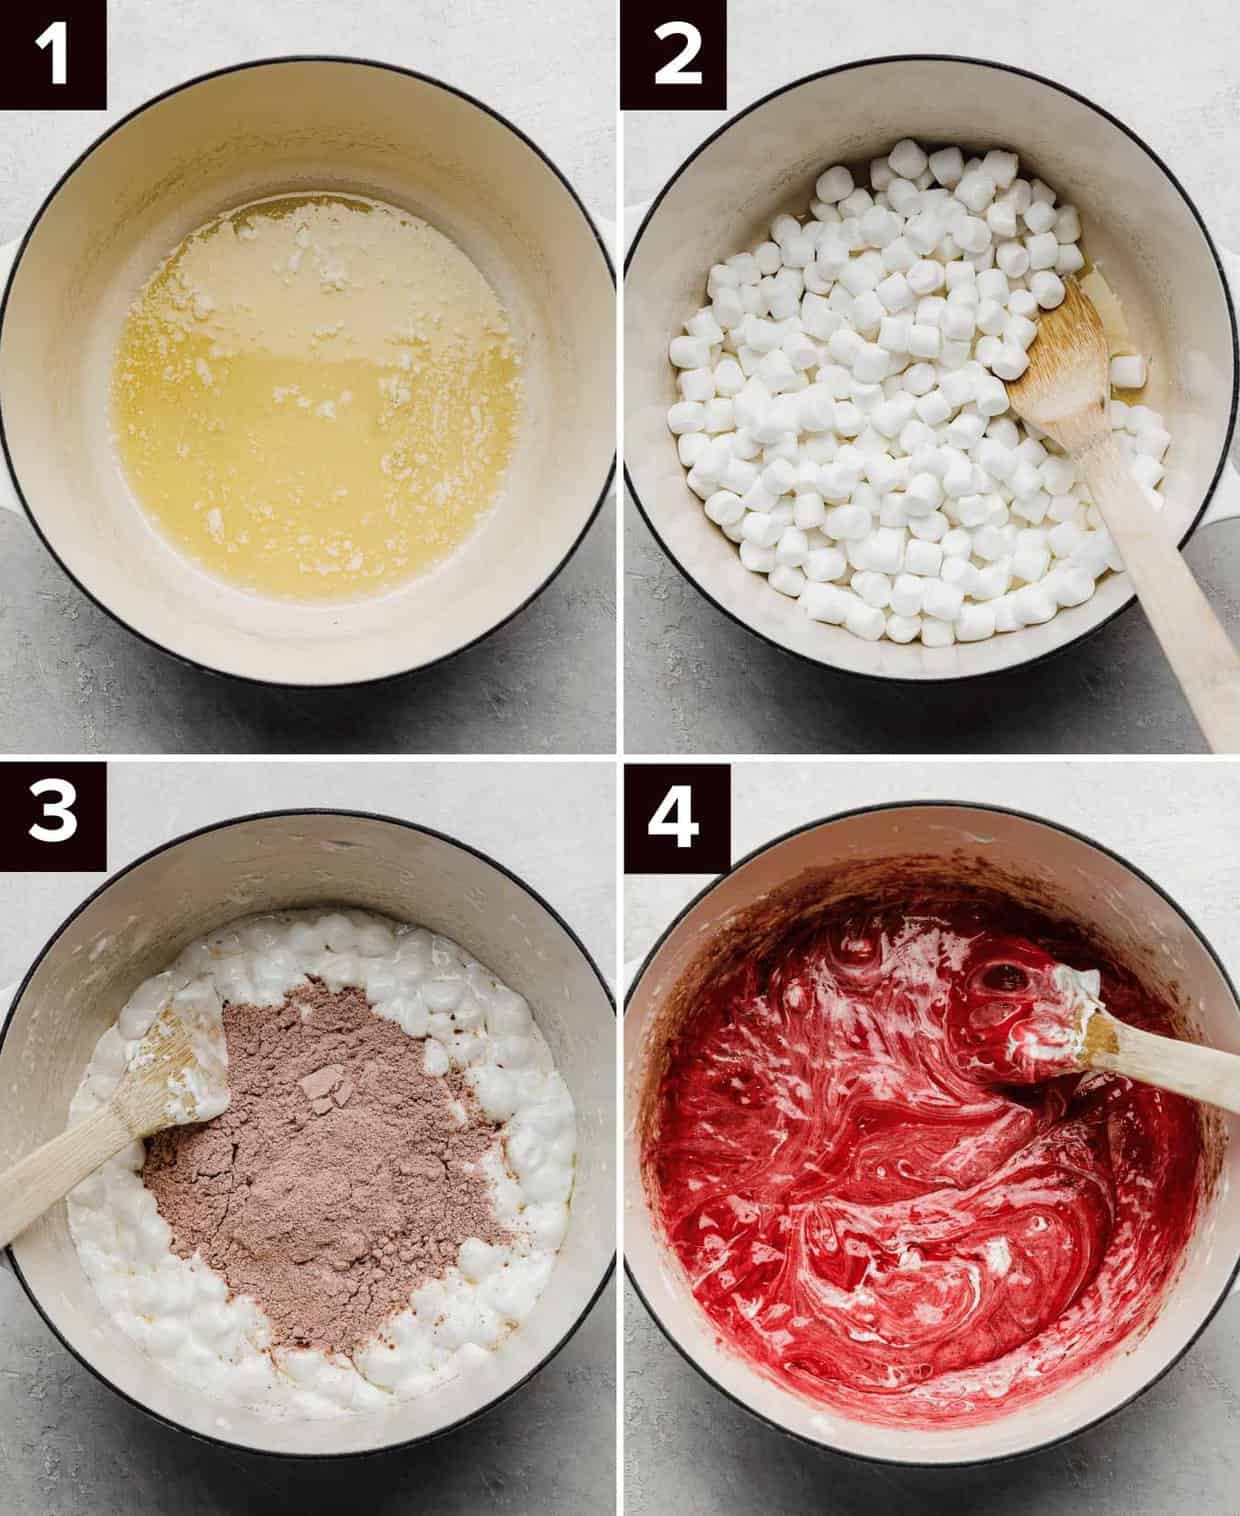
- Add cereal and remaining marshmallows. Stir in 5-6 cups of crispy rice cereal and 4 additional cups of mini marshmallows. Mix until thoroughly combined. Because of the red color, it will be easy to see when the cereal and marshmallows are evenly distributed.
- Press into prepared pan. Transfer the red velvet cake rice krispie treats to your greased and lined pan. If you have heart-shaped molds, you can also press the rice krispie mixture into those for an even more festive treat. Careful not to press too hard on your rice krispies, as this can make them hard.
- Let set and enjoy. Allow your rice krispie treats to cool and set for 30-60 minutes. Then, use the foil to remove them from the pan. Slice into squares and enjoy!
Recipe Tips
Don’t press too hard when you’re transferring the rice krispie mixture to your pan. If the rice krispie treats are too compact, they become hard and dry. It is especially critical to keep this in mind if you’re pressing your rice krispie treats into any kind of shape.
To prevent the rice krispie mixture from sticking to your hands or spatula, simply rub some oil or butter on the spatula or your hands. Alternatively, you can grease a sheet of wax paper or parchment paper and use that to press the treats flat.
Make these colorful rice krispie treats even more festive with sprinkles! Simply sprinkle them on and gently press the sprinkles on while the treats are still warm. Use green sprinkles to make Christmas rice krispie treats, white and blue sprinkles for the fourth of July, and of course, pink and white sprinkles for Valentine’s Day!
To make heart shaped rice krispie treats without a heart-shaped muffin tin or molds, you can use cookie cutters! You can press them into the pan, but this creates a lot of scraps. To not waste any rice krispie treats, just gently pack sticky cereal mixture into the cookie cutter. You may want to grease your cookie cutters to prevent sticking. If you make heart shaped rice krispie treats, you can make them extra special by dipping one side of the hearts into melted white chocolate, milk chocolate, dark chocolate, or even red candy melts. Yum!
For neat cuts in your rice krispie treats, grease a knife before using it to cut the marshmallow treats.
Feel free to experiment with different cake mix flavors! I think Funfetti would be really yummy, or strawberry cake mix, or another chocolate cake mix.
Make Ahead, Storing, and Freezing
Make Ahead: Stored properly, rice krispie treats stay soft for 3-5 days, so you can easily make these a day or two in advance.
Storing: Store leftover red velvet rice krispie treats at room temperature in an airtight container or ziptop bag with all the air pressed out of it. Do NOT put rice krispie treats in the fridge, as they will harden.
Freezing: Unfortunately, rice krispie treats cannot be frozen. While many baked goods can be frozen, thawed, and still be tender and tasty, rice krispie treats never get soft again after being chilled or frozen.
Recipe FAQs
The best and easiest way to cut rice krispie treats is to grease the blade of your knife. That way, the ooey gooey rice krispie treats won’t stick to it.
No. Once rice krispie treats are chilled or frozen, they become hard. Thawing unfortunately does not restore their softness.
Brand-name Rice Krispies are not certified gluten-free, and neither is red velvet cake mix. To make these treats gluten-free, use a different crispy rice cereal and gluten-free cake mix.
Yes, but table salt is generally considered to be “saltier” because of it’s more fine texture (basically, you get more salt per pinch), so you’ll want to reduce the amount of table salt from ¼ teaspoon to ⅛ teaspoon.
Rice Krispie cereal first hit shelves in 1928. Just over a decade later, in 1939, Kellogg recipe testers Mildred Day and Malitta Jense invented the treats, inspired by popcorn balls sold at county fairs. I, for one, am extremely grateful!
More Red Velvet Recipes
Red Velvet Rice Krispies
Ingredients
- 7 tablespoons butter - salted or unsalted is fine
- 11 cups mini marshmallows - divided (7 cups and 4 cups)
- 1 cup red velvet cake mix - dry
- 1/2 teaspoon vanilla extract
- 1/4 teaspoon kosher salt
- 2 drops red gel food color
- 5-6 cups Rice Krispies cereal
Equipment
Instructions
- Line an 8"x8" inch square brownie pan with aluminum foil. Spray the foil with nonstick cooking spray.
- Melt butter in a large pot. Once melted stir in 7 cups of mini marshmallows.
- Once the marshmallows have *just* melted stir in the red velvet cake mix, kosher salt, vanilla extract, and red gel food color. Mix to combine. Remove from heat and stir in the Rice Krispie cereal and 4 cups of remaining mini marshmallows.
- Transfer mixture to the prepared pan and lightly press into an even layer. Don’t press too hard as this makes for hard Rice Krispies treats!
- Let set. Slice and enjoy!
 Welcome to this delicious corner of the internet! Here I share the recipes my family loves.


2 Comments on “Red Velvet Rice Krispies”
These sound really good!
Im wondering though about the cake mix. It’s raw. Isn’t that a concern since it’s not really cooked in this recipe. 🤔
Hi Jody, we haven’t had issues with this but if you are concerned about it you can toast/cook the cake mix before using it in this recipe! Baking it at 350°F for 5 minutes should do the trick.