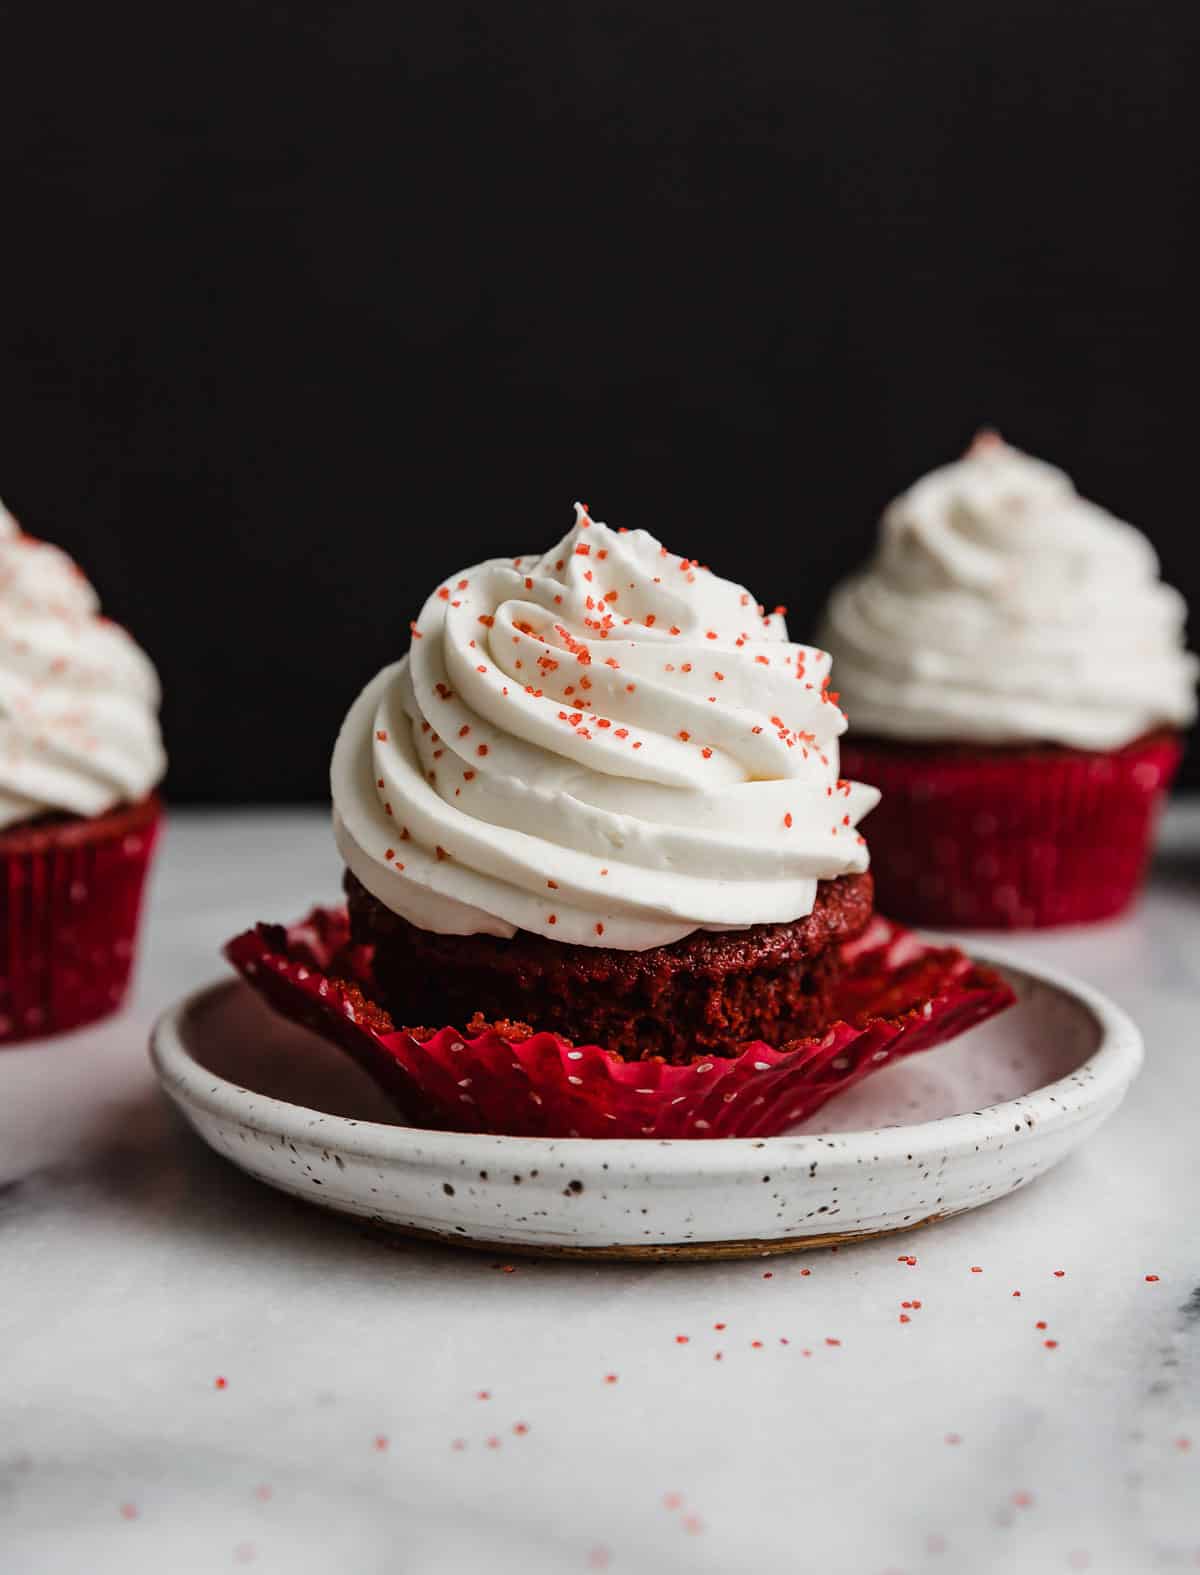
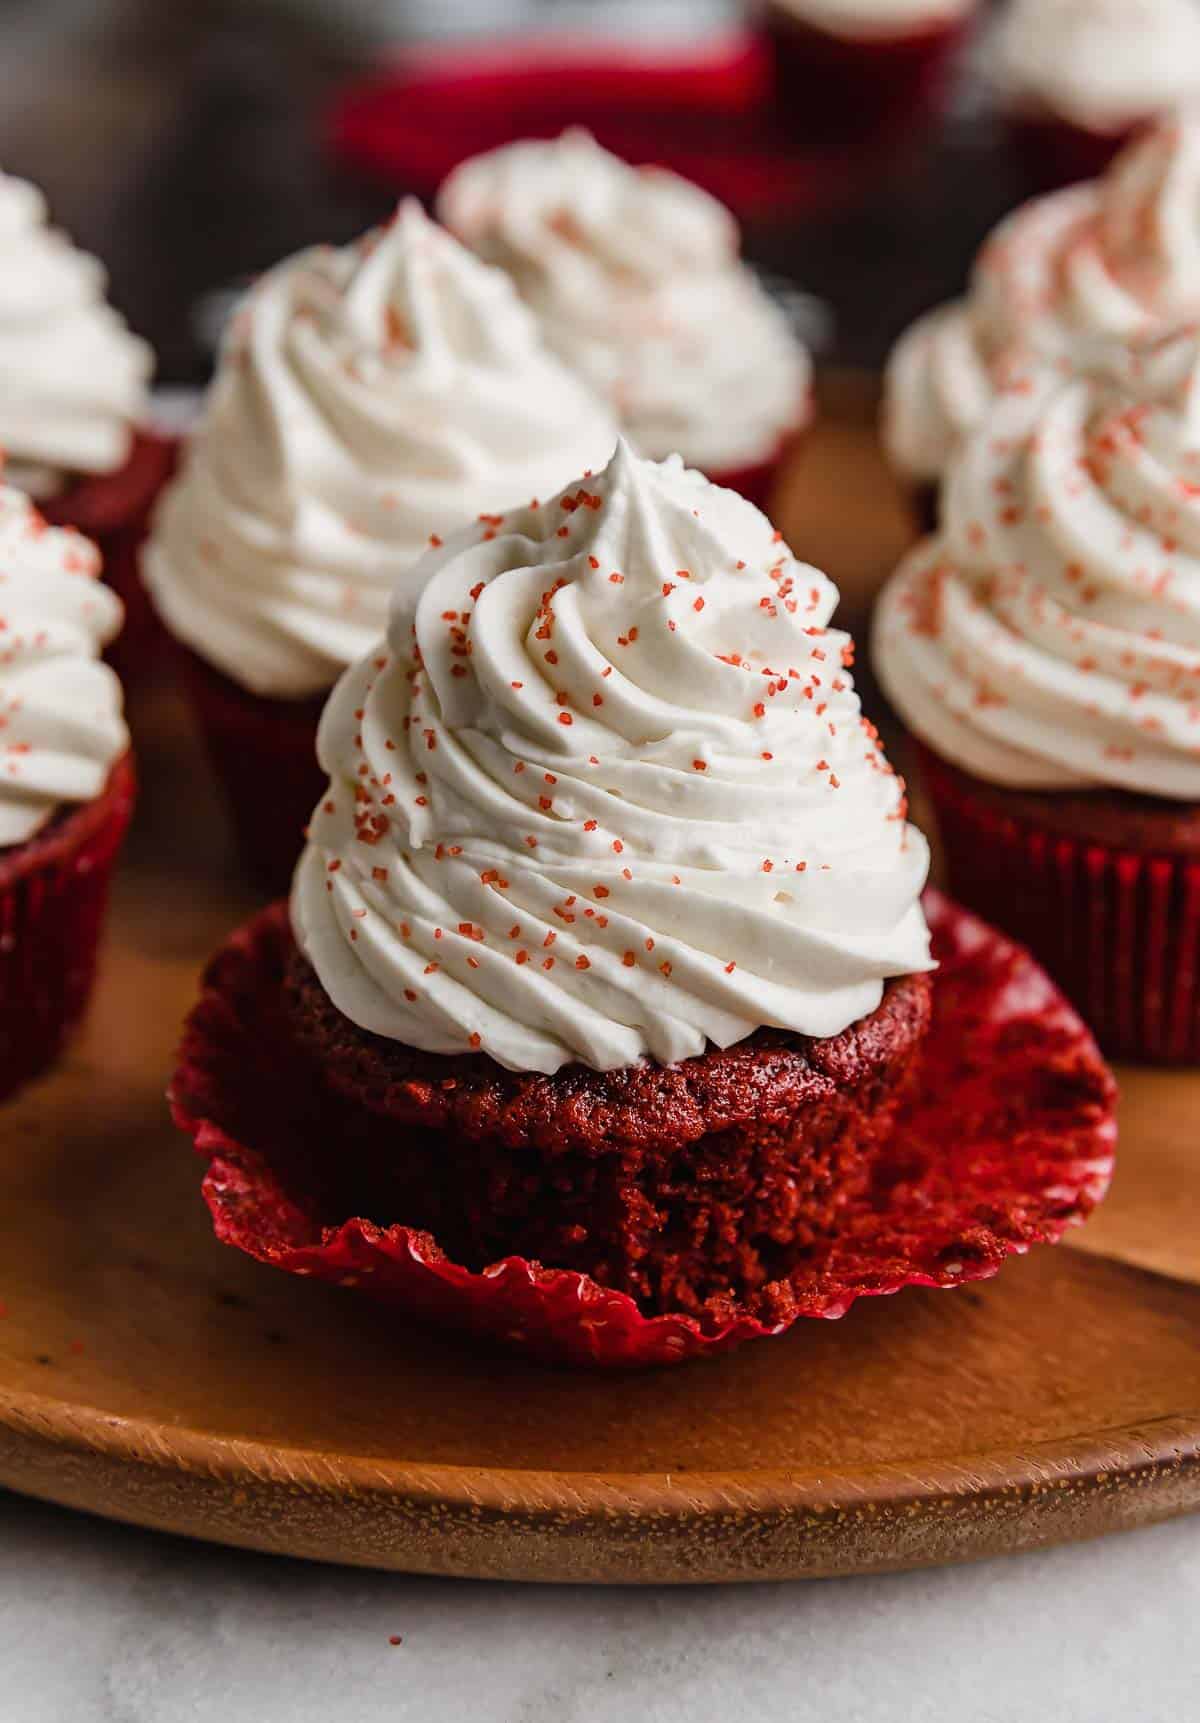
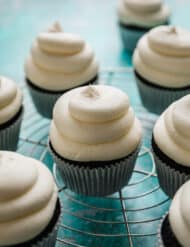
Red Velvet Cupcakes

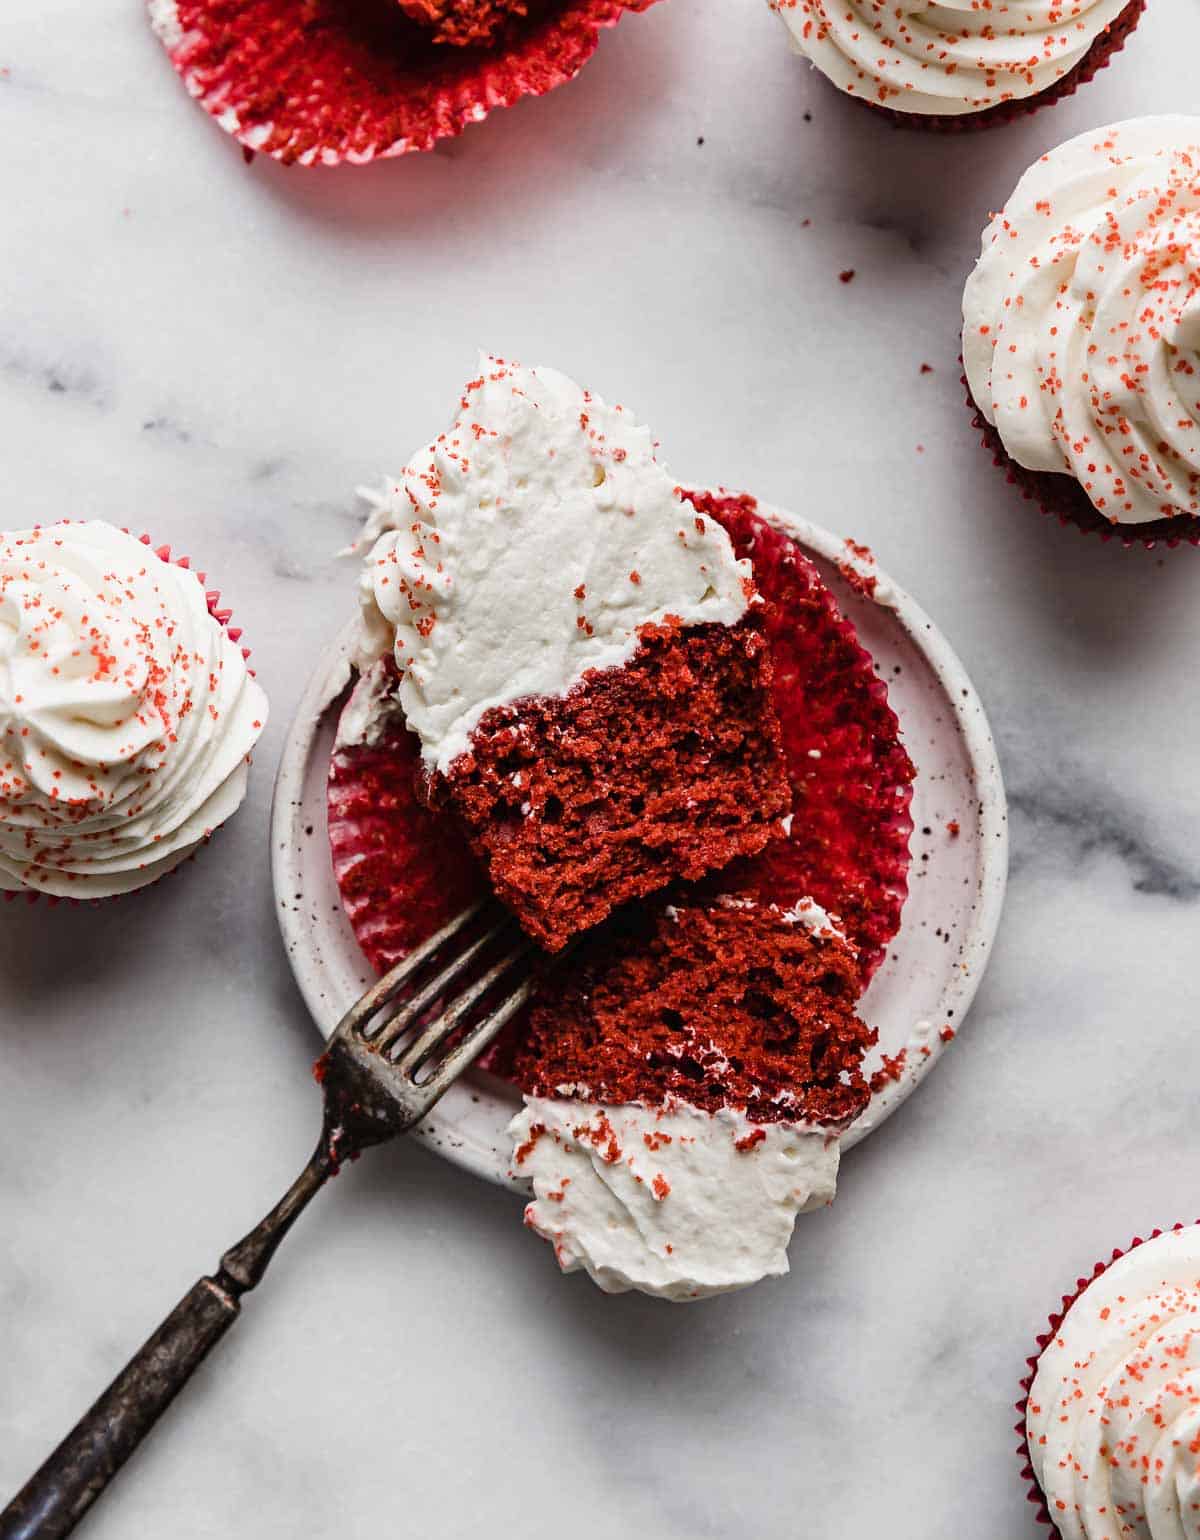
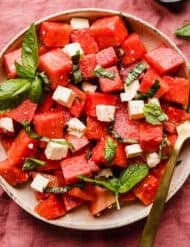
These Red Velvet Cupcakes have a moist red velvet cake texture made with extra cocoa powder and a deep red color! This provides a more prominent chocolate flavor. They are topped with a smooth and luxurious Cream Cheese Whipped Cream Frosting. The combination is light, fluffy, and indulgent!
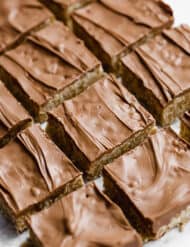
I’m totally in love with red velvet recipes this time of year! My Red Velvet Brownies are also topped with the light whipped cream frosting with cream cheese and I’m equally obsessed with them! If you’re one for the classics, then you’ll love my Old Fashioned Red Velvet Cake Recipe and Red Velvet Bundt Cake. One my kids get a kick out of are my fun and delicious Red Velvet Waffles, which make Valentine’s Day breakfast a real treat!
Why This Recipe Works
- Moist red velvet cupcakes. This homemade red velvet cupcakes recipes uses buttermilk and oil to get a moist and delicate cake texture.
- Added cocoa powder. Most red velvet cupcake recipes online will have just a hint of cocoa (anywhere from 2-4 tsp of cocoa powder. TEASPOONS. That’s not enough in my opinion!) This recipes uses 2 T to amp up that chocolate flavor.
- Topped with a light, less sweet frosting. Are you the type to scrape half the frosting off of cupcakes? That will be hard to do with this whipped cream frosting recipe! This tangy cream cheese frosting only has 1/2 cup powdered sugar so it is light not only in texture but in sweetness. It’s the perfect complement to the sweet cupcakes.
Ingredient Notes
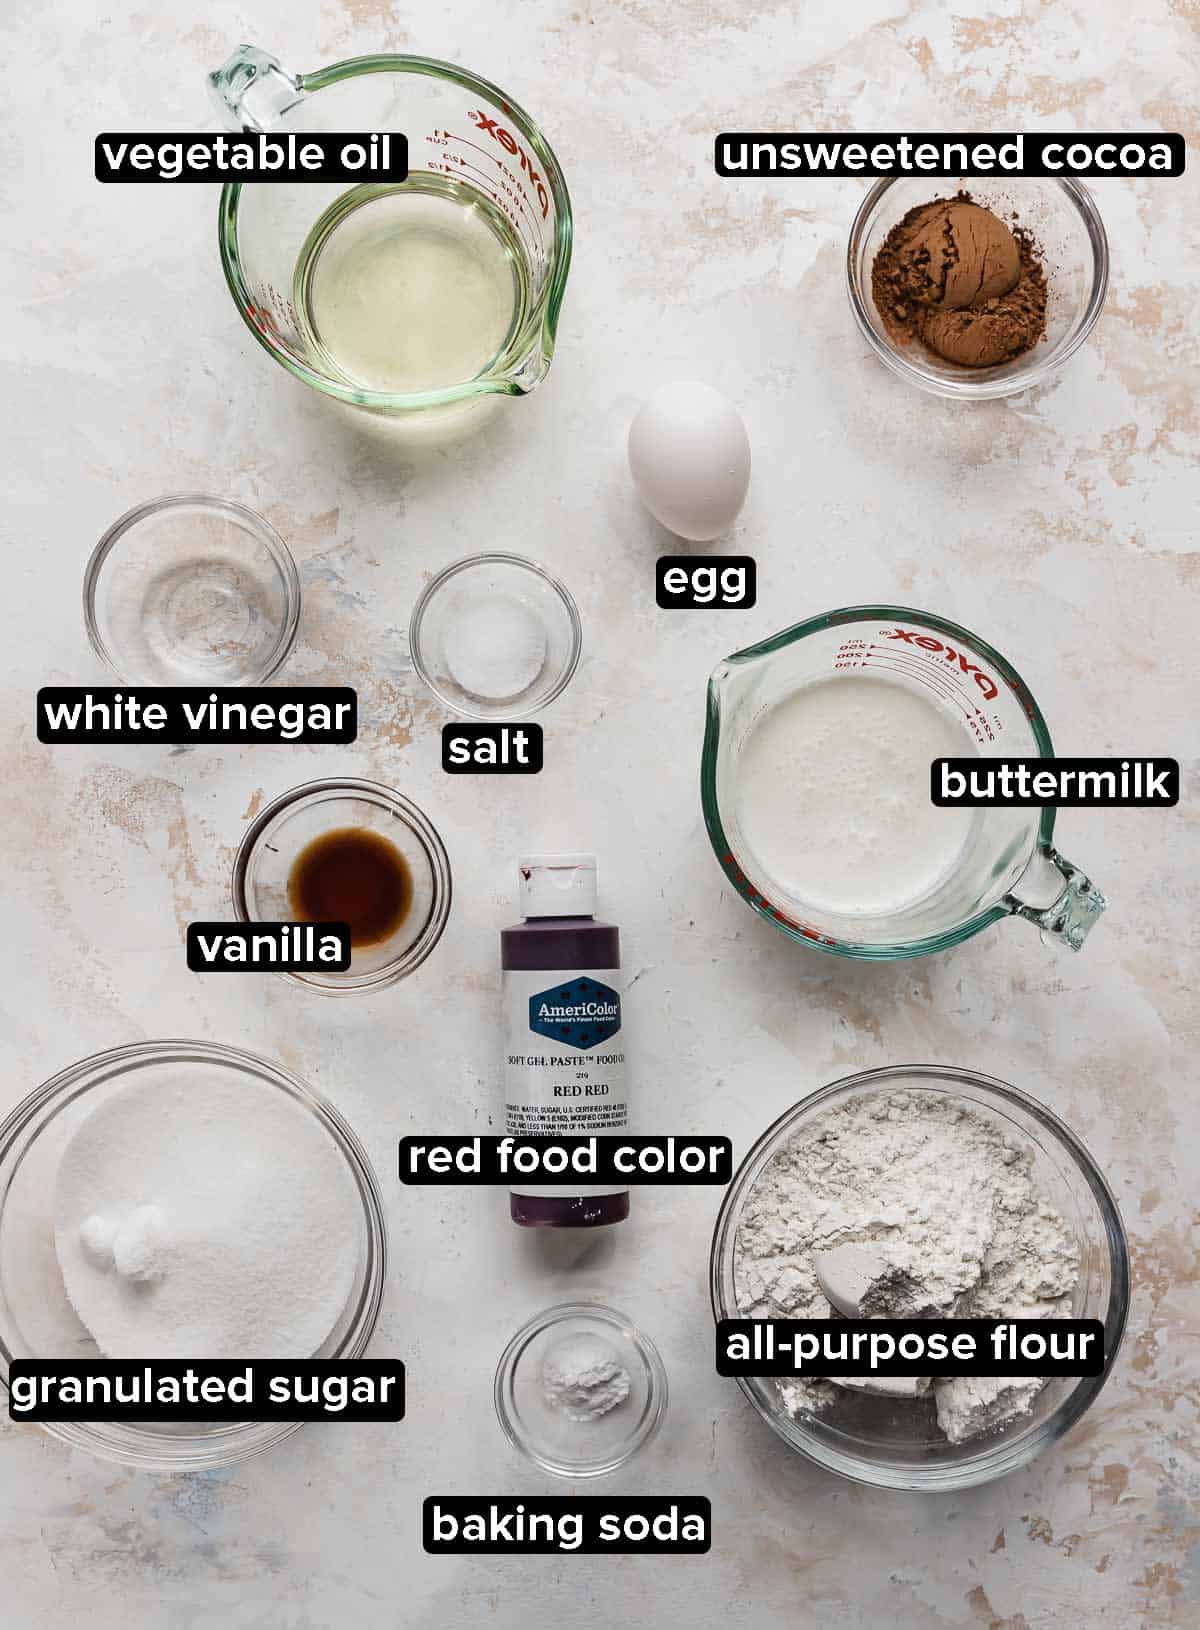
- Unsweetened Cocoa Powder: I added a tad extra cocoa powder to this red velvet cupcake recipe because I want the chocolate flavor to not get lost. You’ll really love the extra cocoa!
- Buttermilk: The buttermilk (acid) will react to the baking soda (base) to provide a light and fluffy texture.
- Vegetable Oil: Using oil at the fat gives the cake texture a moistness to it since oil is a liquid at room temperature.
- White Vinegar: One simple but important ingredient for red velvet flavor is white vinegar. It adds a touch of acidity to the cake and provides that iconic flavor we love!
- Red Gel Food Coloring: I recommend using gel food coloring because it’s a more concentrated color. This means you don’t have to add as much to get a bright color — which can help since you aren’t adding extra liquid to the batter.
- Cream Cheese: You want the cream cheese cold for the frosting!
- Powdered Sugar: Only 1/2 cup! That’s amazing considering regular frosting recipes will call for anywhere from 5 to 7 cups of powdered sugar. This frosting recipe is light and sweet – but not too sweet!
- Heavy Cream: Our frosting is a Whipped Cream Frosting, which means the base is heavy cream. This makes the texture of the frosting light and delicate! But don’t worry, it holds its shape well. If you do prefer a classic cream cheese frosting, double the recipe for my Small Batch Cream Cheese Frosting for just the right amount!
Step-by-Step Instructions
- Combine the dry ingredients. Preheat the oven to 325ºF. To the bowl of a stand mixer, add 1 1/4 cups all-purpose flour, 3/4 cup granulated sugar, 2 T unsweetened cocoa powder, 1/2 tsp baking soda, and 1/2 tsp salt. Whisk to combine.
- Combine wet ingredients. To a liquid measuring cup add 1/2 cup buttermilk, 1/2 cup vegetable oil, 1 large egg, 1 tsp white vinegar, and 1/2-1 tsp red gel food coloring. Mix to combine.
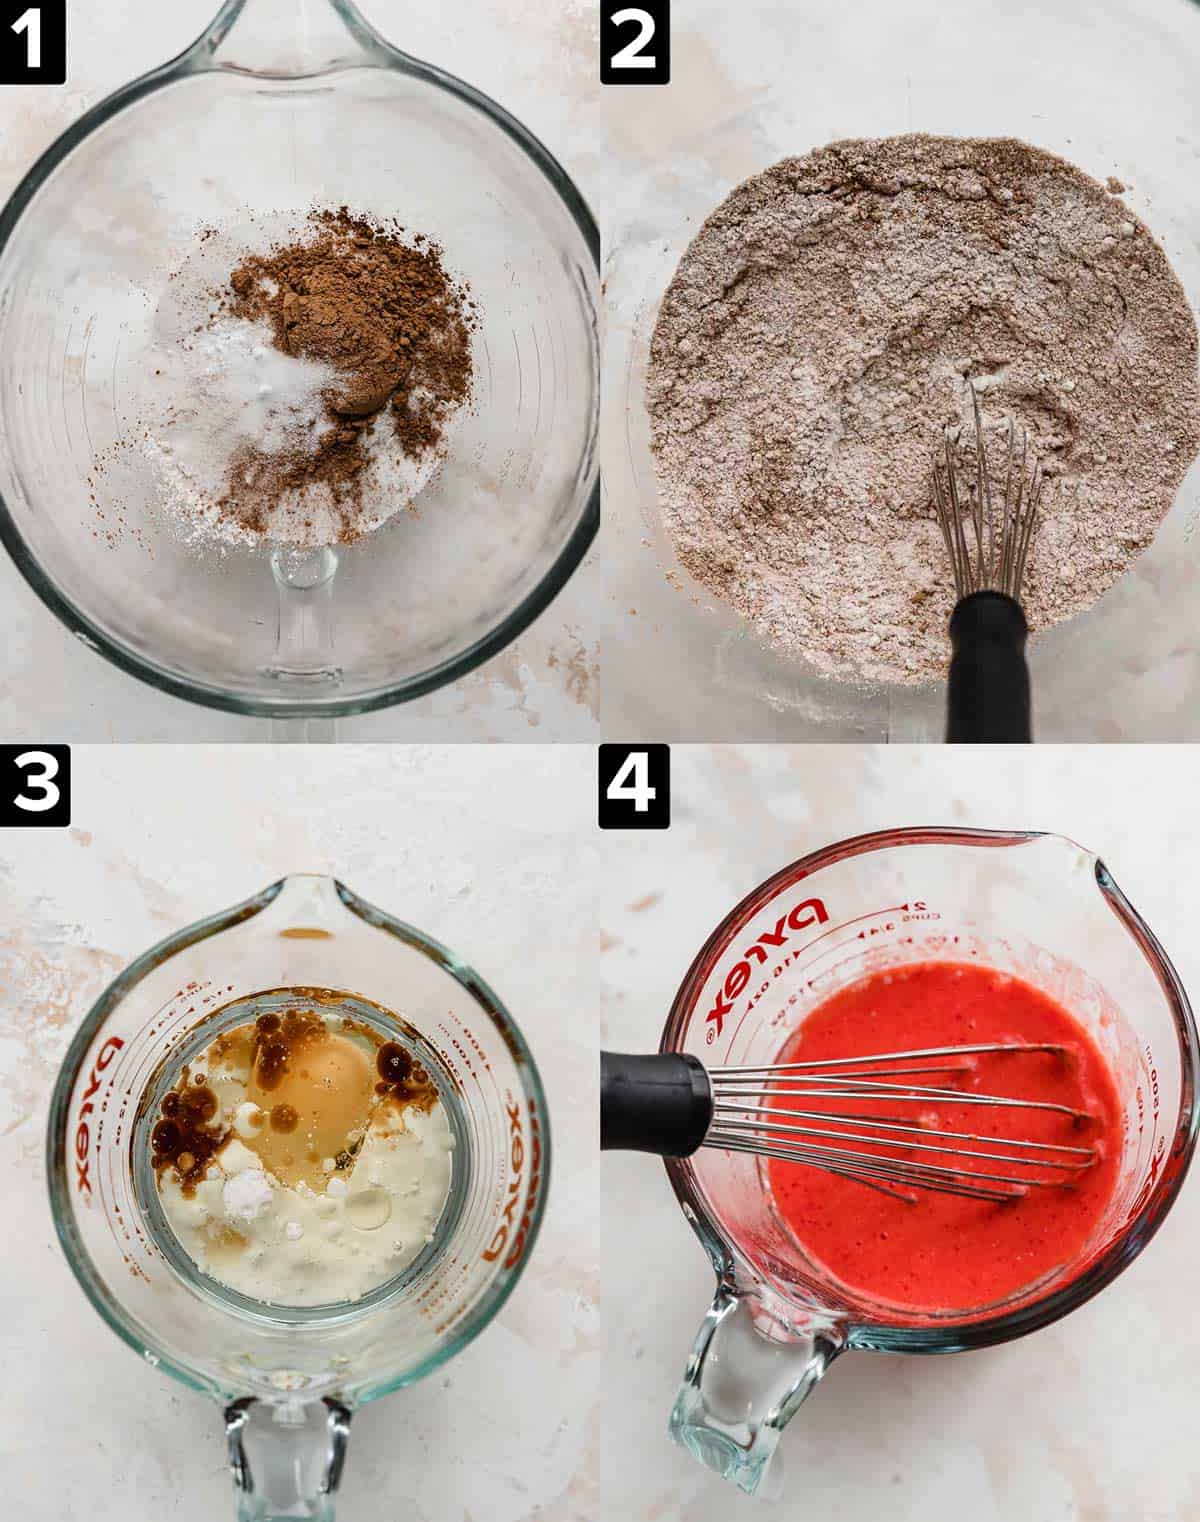
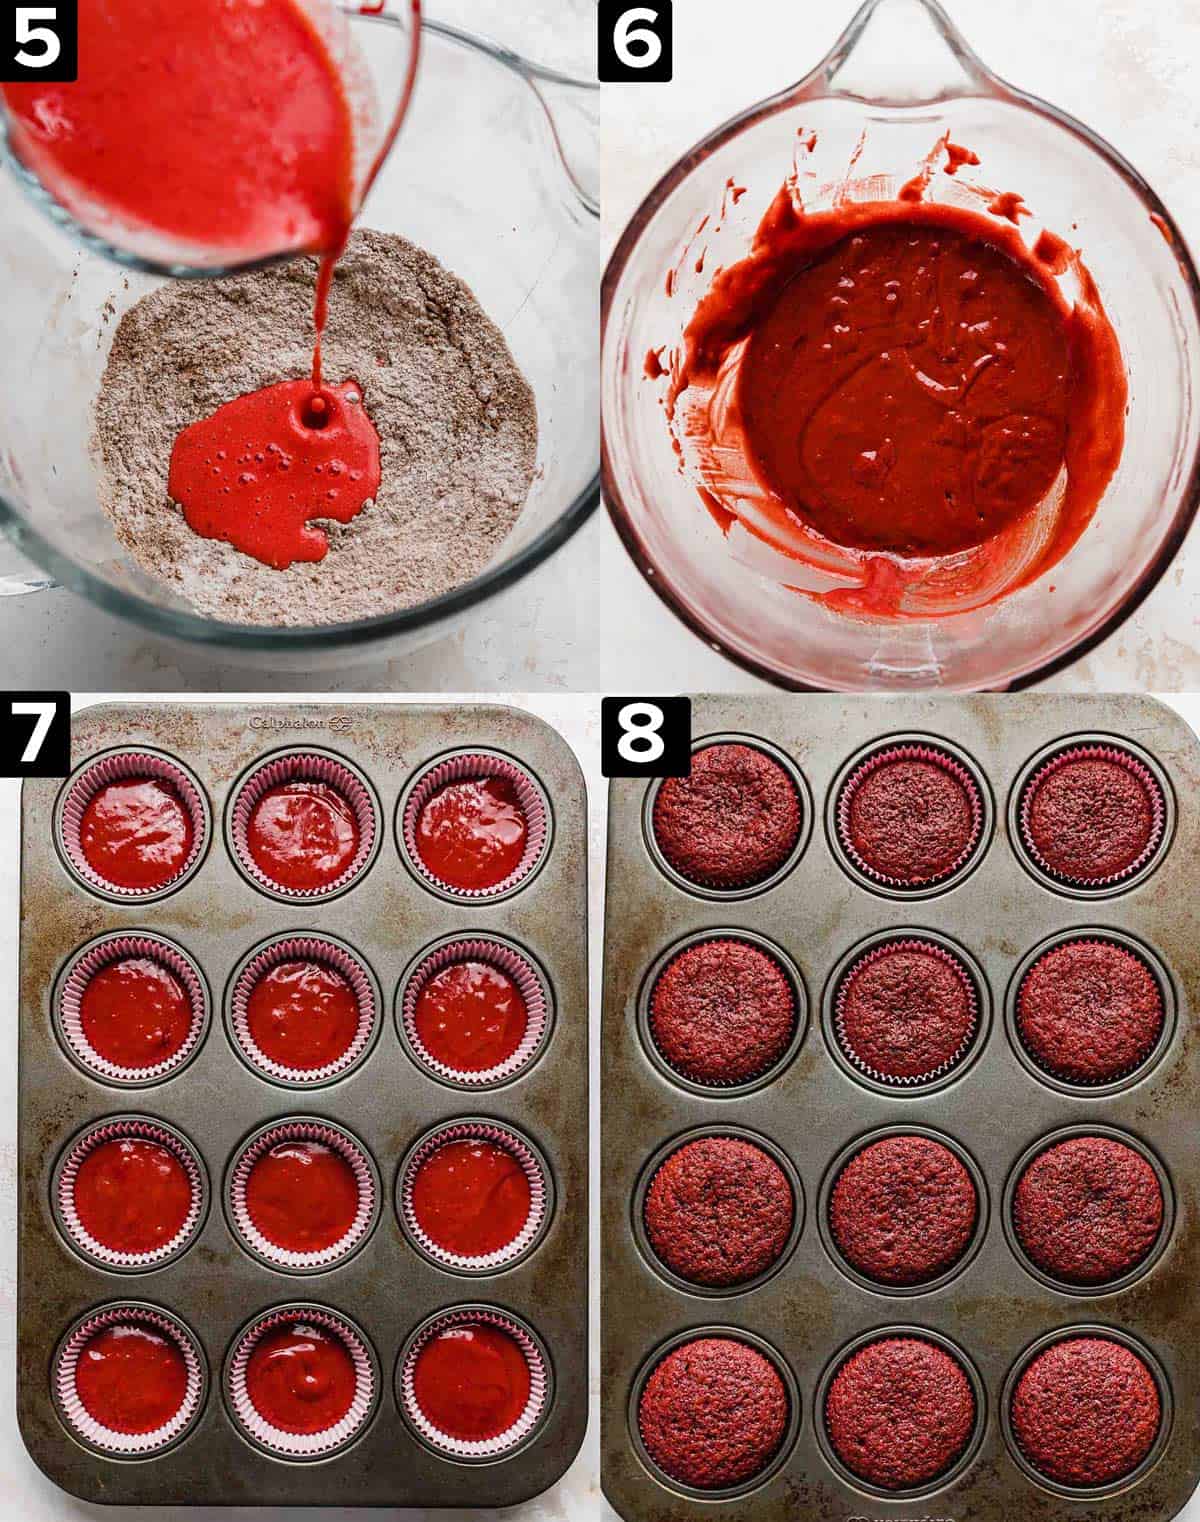
- Pour wet ingredients into the flour mixture. With the stand mixer fitted with the paddle attachment and on low speed, slowly pour the wet ingredients into the bowl. Mix until just combined. Use a rubber spatula to stride the sides of the bowl to make sure everything is evenly incorporated.
- Portion into cupcake pan. Line a 12-cupcake pan with cupcake liners. Fill each cupcake well with enough batter to fill no more than 2/3 full.
- Bake. Bake for 18-20 minutes or until a toothpick in the center of a center cupcake comes out with a few moist crumbs but no wet batter. Remove and let cool in the pan for 5 minutes. Turn out to cool on a wire rack.
- Make the cream cheese whipped cream frosting. Beat 4 oz cold cream cheese in a stand mixer or large bowl and hand mixer. Beat until smooth. Add 1/2 cup powdered sugar, 1/2 tsp vanilla extract and mix to combine. Slowly pour in 1 cup cold heavy cream while mixing on low. Once all the cream is added, mis on medium-high speed until thickened.
- Frost the red velvet cupcakes with cream cheese whipped cream frosting. Place the frosting in a piping bag or in a ziplock bag with the corner snipped. Pipe the frosting on top of the red velvet cupcakes. Top with sprinkles if desired. Enjoy!
Recipe Tips
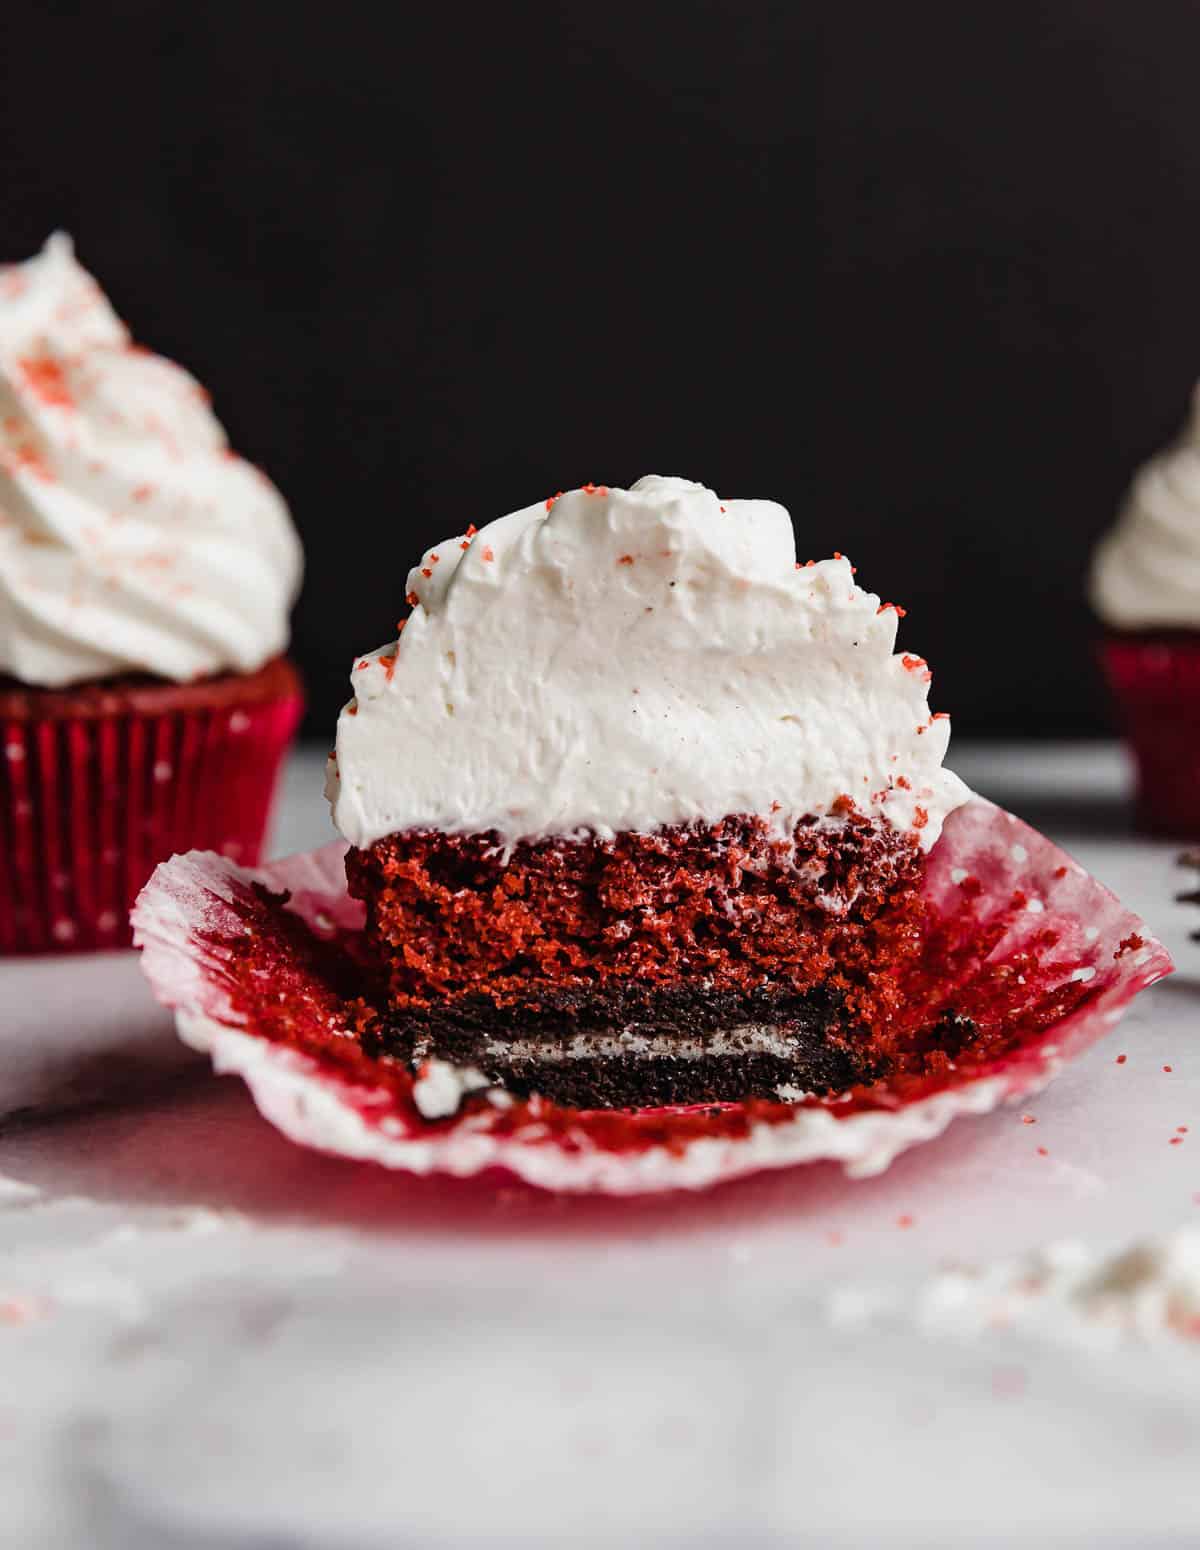
You can add a full Oreo to the bottom of each cupcake liner and spoon the batter on top. If you do this, you will only need about 2 – 2 1/2 tablespoons worth of batter in each cupcake well.
I used a 3 tablespoon cookie scoop to portion the batter into the muffin cups. I just didn’t fill the scoop the entire way. You don’t want to fill more than 2/3 full or else the cupcake will bake over.
Pouring it along the edge of the bowl will prevent the cream from hitting the whisk and splashing everywhere. Turn the mixer to medium high speed. The frosting should thicken and take shape. Mix for about 30 seconds, but keep a close eye on the frosting as over-mixing it can cause the mixture to get soupy.
You’ll know the frosting is finished when you stop the mixer, dip the whisk attachment in the frosting and turn it upside down. The frosting should keep its shape and hold its’ peak. If yours hasn’t reached this stage, mix in 15 second intervals and test again.
You can use liquid red food coloring if that’s what you have!
Make Ahead, Storing, and Freezing
You can make the cream cheese whipped cream frosting ahead of time and store it in an airtight container in the fridge for 1-2 days. But I would then use it after that so you can at least enjoy treats with it for a few more days after that.
Store any frosted red velvet cupcakes in the fridge in a covered container for 3-4 days (the cupcakes will keep for up to 4 days, but are really best enjoyed on day one or two).
Unfrosted cupcakes can be stored at room temperature in an airtight container or ziplock bag for up to 3 days or frozen in a freezer safe container for up to 3 months.
To freeze frosted red velvet cupcakes, flash freeze in the freezer until the frosting is firm. Then wrap in plastic wrap and store in an airtight container or freezer safe bag. Freeze for up to 3 months. Remove and let thaw in the fridge overnight, unwrapped but in a covered container.
Recipe FAQs
Yes they are! They are made with cocoa powder for a chocolate flavor base.
If they don’t have any frosting on them, you can store them at room temperature in a ziplock bag or airtight container. If they do have frosting on them, you’ll need to store them in the fridge in a covered dish or airtight container. This is due to the whipped cream base for the frosting.
Over mixing the cupcake batter and/or over baking the cupcakes will result in a dry cupcake. Mix the batter until things are combined, but don’t over mix it. This will make the batter tough, affecting the bake of the cupcakes as well. Pull the cupcakes out of the oven when a toothpick inserted in the center of the cupcake comes out with a few moist crumbs (this means the cupcake is moist!) but no wet batter. Wet batter means the cupcakes aren’t baked through yet.
More Cupcake Recipes
- Best Chocolate Cupcake Recipe
- Black Velvet Cupcakes
- Ferrero Rocher Cupcakes
- Cookie Dough Cupcakes
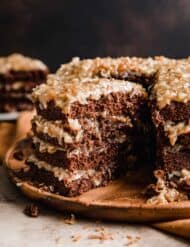
- German Chocolate Cupcakes
Red Velvet Cupcakes
Ingredients
Cupcakes
- 1 1/4 cups all-purpose flour
- 3/4 cup granulated sugar
- 2 tablespoons unsweetened cocoa powder
- 1/2 teaspoon baking soda
- 1/2 teaspoon salt
- 1/2 cup buttermilk
- 1/2 cup vegetable oil - or canola oil
- 1 teaspoon vanilla extract
- 1 large egg
- 1 teaspoon white vinegar
- 1/2-1 teaspoon red gel food coloring
Cream Cheese Whipped Cream Frosting
- 4 oz cream cheese - cold
- 1/2 cup powdered sugar
- 1/2 teaspoon vanilla extract
- 1 cup heavy cream - cold
Instructions
Cupcakes
- Preheat oven to 325°F. Line a 12 cupcake pan with cupcake liners.
- In a the bowl of a stand mixer whisk flour, sugar, cocoa powder, baking soda and salt.
- In a large liquid measuring cup whisk the buttermilk, oil, vanilla, eggs, white vinegar, and red gel food coloring.
- Add the liquid ingredients to the dry ingredients and mix (with a paddle attachment) until just combined and no dry streaks remain. Scrape down the bottom and sides of the bowl so everything is evenly incorporated.
- Portion the batter, filling no more than 2/3 full. (I use a scant 3 tablespoon sized cookie scoop to portion the batter). Bake for 18-20 minutes or until toothpick inserted in center of one of the cupcakes comes out with a few moist crumbs but no wet batter. Remove from the oven and let cool in the pan for 5 minutes then turn out to cool on a wire rack. Once completely cool, frost the cupcakes.
Cream Cheese Whipped Cream Frosting
- In a large bowl, or the bowl of a stand mixer fitted with a whisk attachment, beat the cream cheese on medium speed until smooth. About 1 minute.
- Add the powdered sugar and vanilla and mix until smooth and combined.
- With the mixer on, slowly pour the heavy cream down the side of the bowl, into the cream cheese mixture. Pouring it along the edge of the bowl will prevent the cream from hitting the whisk and splashing everywhere. Turn the mixer to medium high speed. The frosting should thicken and take shape. Mix for about 30 seconds, but keep a close eye on the frosting as over-mixing it can cause the mixture to get soupy.
- You'll know the frosting is finished when you stop the mixer, dip the whisk attachment in the frosting and turn it upside down. The frosting should keep its shape and hold its' peak. If yours hasn't reached this stage, mix in 15 second intervals and test again.
 Welcome to this delicious corner of the internet! Here I share the recipes my family loves.


10 Comments on “Red Velvet Cupcakes”
Which tip did u use for the frosting?
Which piping tip?
Wilton 1M
Hello,
I am thinking of making these for Super Bowl Sunday. I’d like to make 24 cupcakes and was wondering if I can get that number by simply doubling the ingredients. Thanks!
Laura, these would be perfect for Superbowl Sunday! You should be able to double the ingredients in this recipe with no problem. Let me know how they turn out!
Hello Whitney,
I’m making these tonight and I think that I did something wrong because the frosting is the consistency of a milkshake. I used the right amount of ingredients for frosting for 24 cupcakes and both the cream cheese and heavy cream were cold as per the instructions. Any thoughts? Thanks!
Hi Laura, I’m sorry to hear you’re having trouble with these. When you say milkshake…a thin milkshake or a thick one? This should be a thick frosting. If it is too soft, pop it in the fridge to get cool and more solid. If it is grainy in any way, try microwaving a small amount of frosting, then adding it back to the rest of the frosting and whipping them together.
Hello Whitney,
I apologize for the late reply. But I did find the problem! I was using a hand mixer so I just had to mix it a few minutes longer to get the right consistency. I was afraid of over mixing, but now I realize that I needed to adjust because I was using a mixer with less power. Thanks for your suggestions 🙂
So glad you figured it out Laura! I know making this frosting can feel a little intimidating, since there is a fine line between just the right texture and overwhipping. Thanks for letting me know how it turned out!
Made these for a work party. They were a great hit according to those I work with (I’m on a diet so I didn’t taste test) I made the ones without the Oreo on the bottom, but I will be back to make this recipe with an Oreo at the bottom. On top of that there was no waste of any frosting or batter. Often times when I find recipes from other sites I have more cupcakes made, more frosting or something left over from the recipe. This one hit it on the head with all measurements for a perfect 12/12 frosted cupcakes.