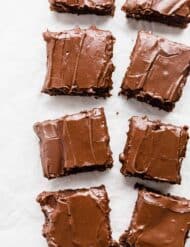
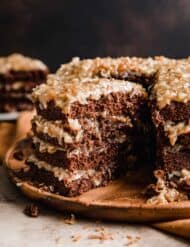
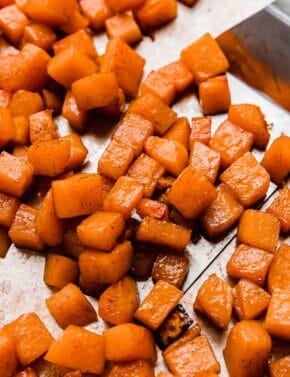
Lunch Lady Brownies
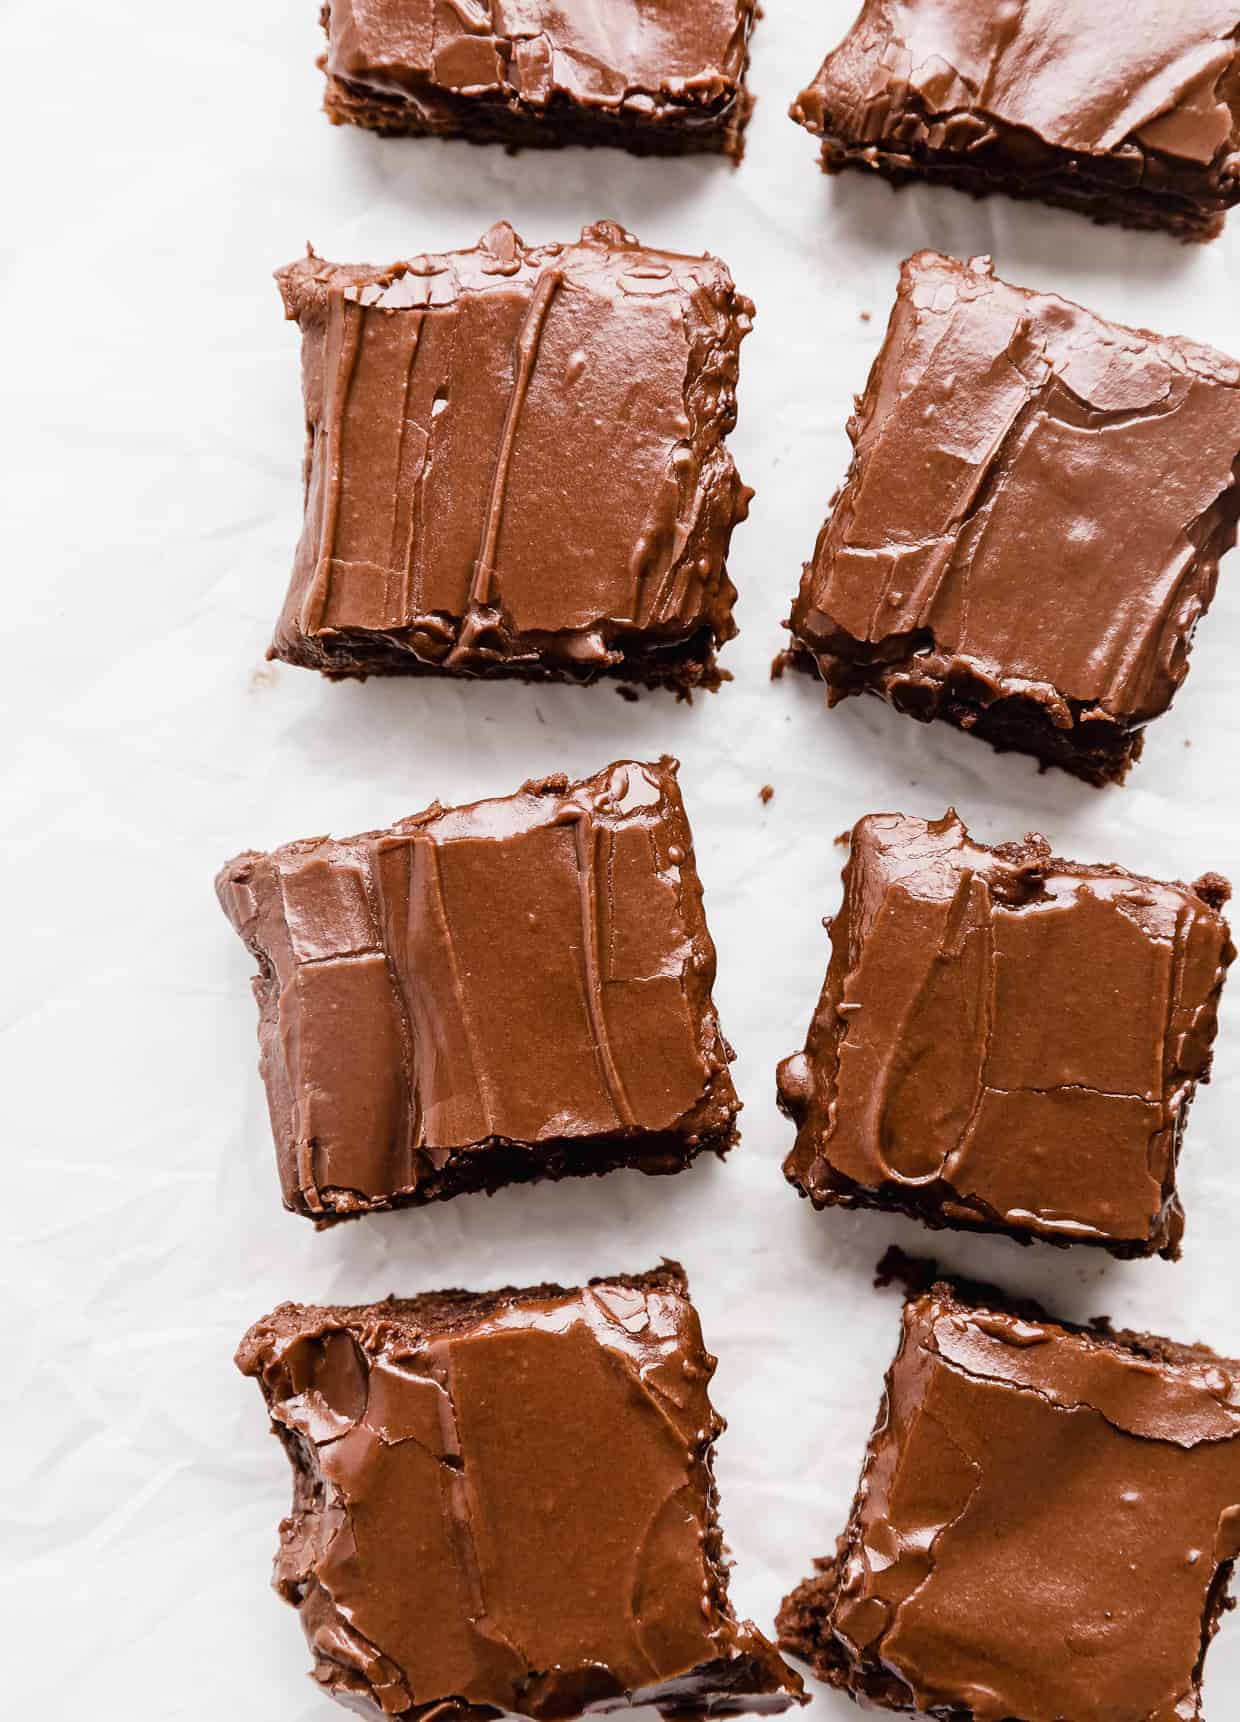
Lunch lady brownies are truly a blast from the past. With fudgy chocolate brownies and a chocolate frosting on top, you may think you’ve stepped into a time machine. Every bite will bring back the nostalgic child that was excited about school and lunchtime.
Don’t stop at these lunch lady brownies! We have cosmic brownies (that put Little Debbies to shame), Nutella Brownies, and homemade fudgy brownies.
Why Make This Recipe
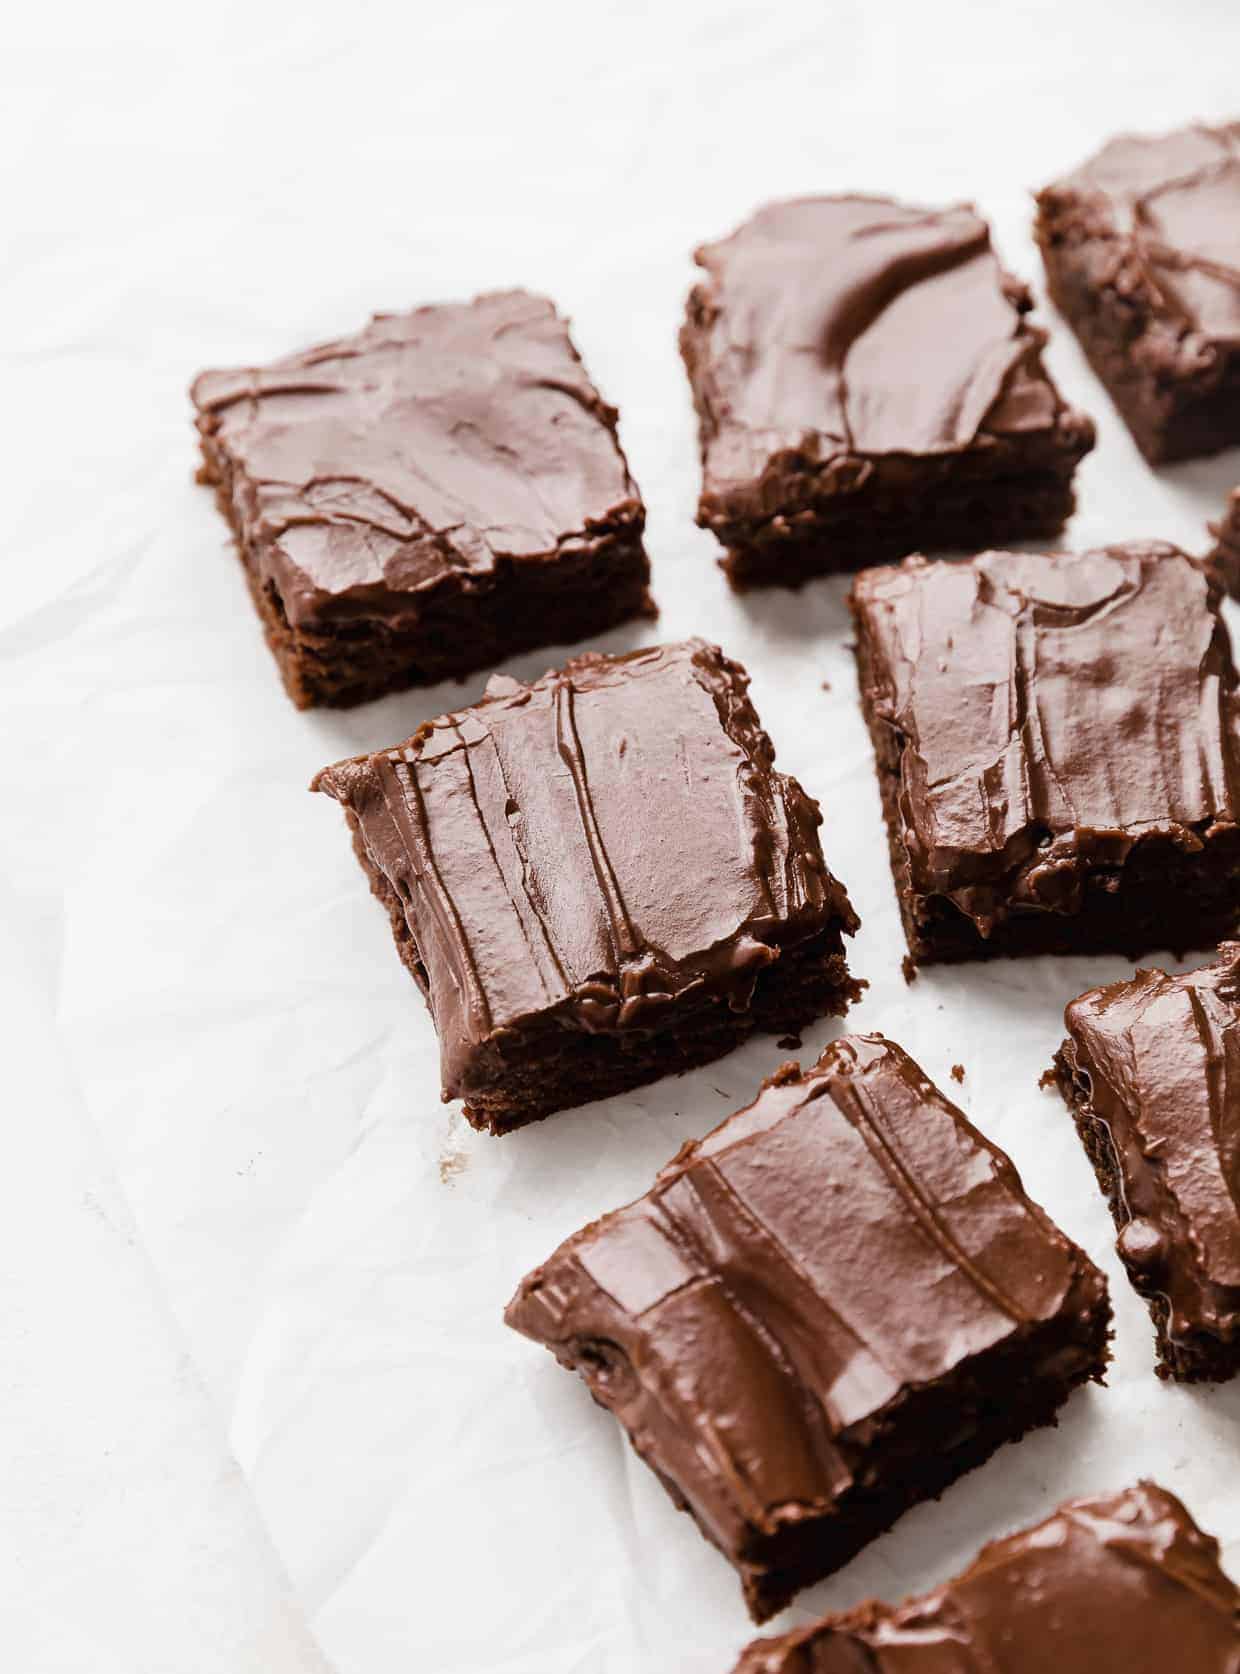
These brownies are truly incredible and thankfully instead of making hundreds at a time like a real lunch lady, we just fill an 8×8 baking dish. Much easier to explain when you finish eating the whole pan because it’s hard to stop and remember to share or slow down.
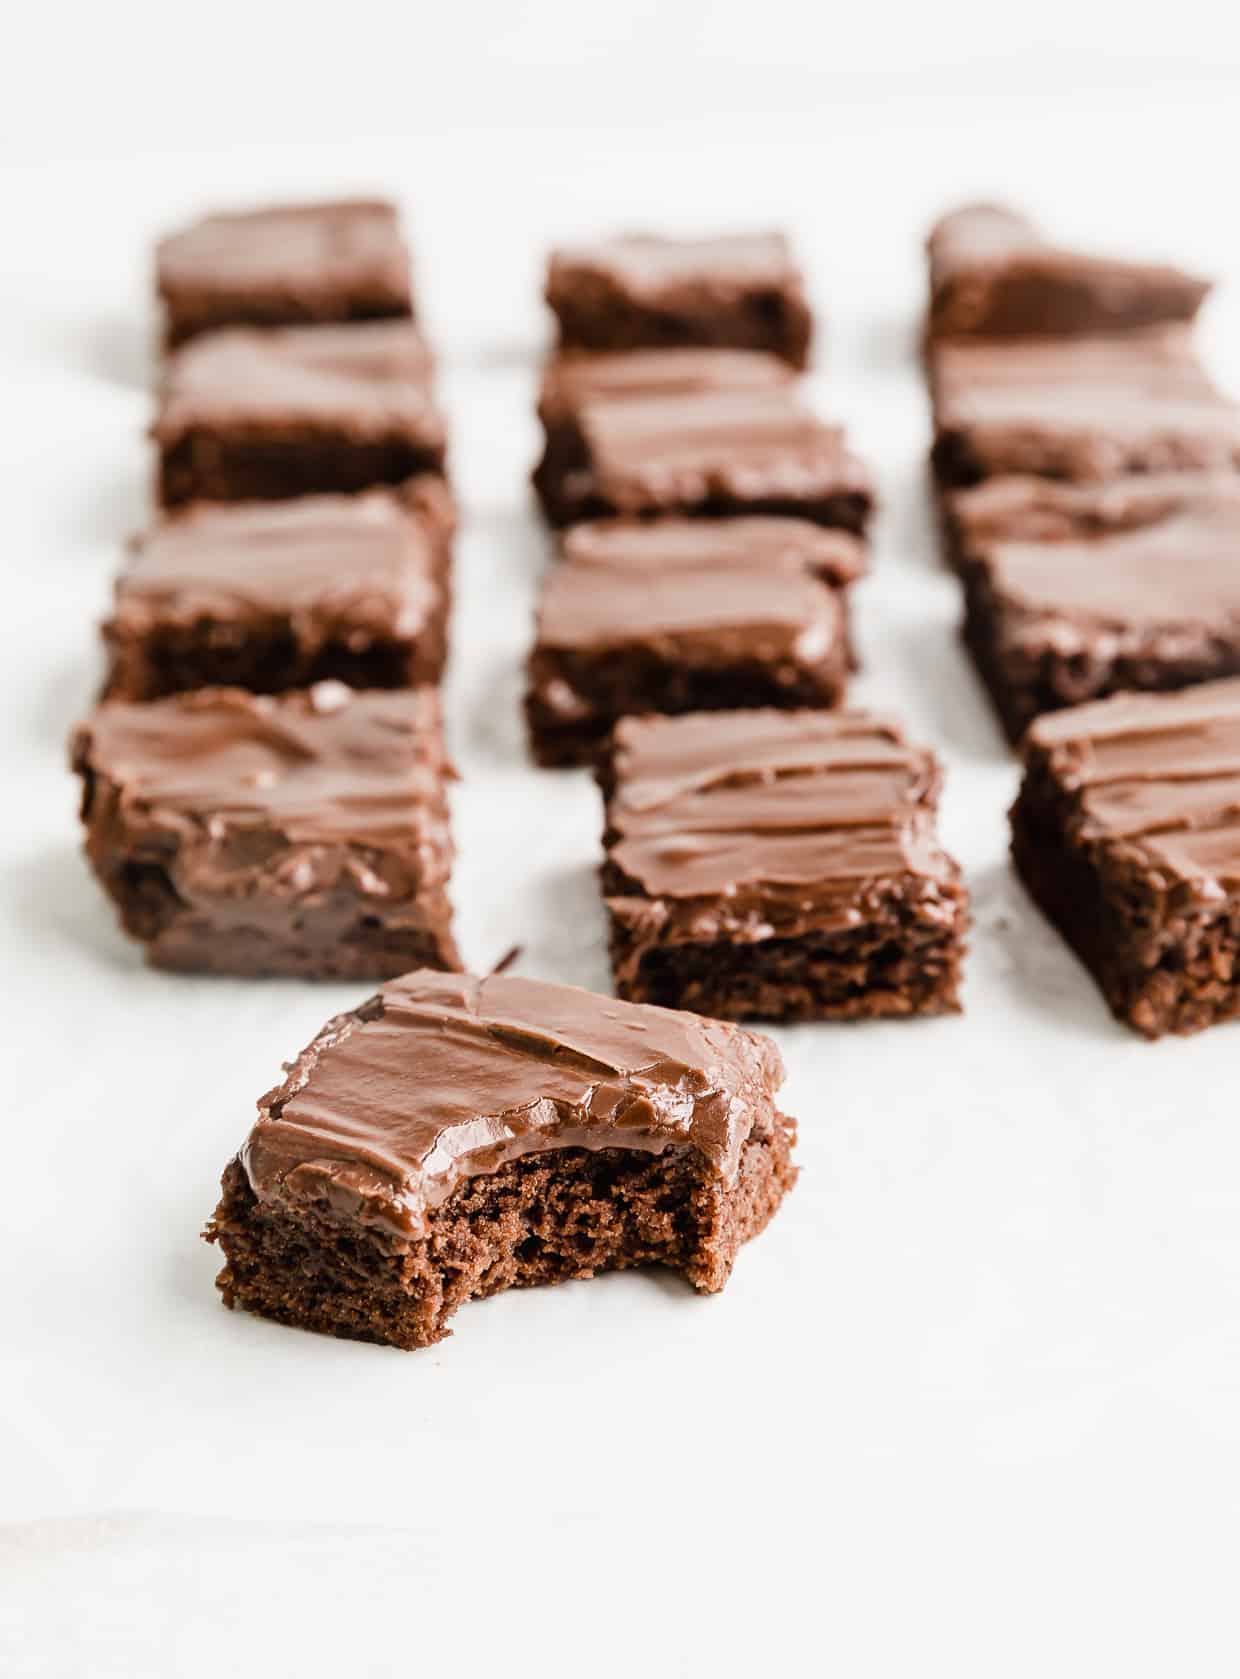
Every bite is a fudgy square of heaven. With a chocolate frosting on top and a great fudgy texture in every brownie piece, it’s just like the lunch lady brownie recipe they served up back in elementary school.
I’ve enjoyed these old-fashioned brownies with frosting for a while now and I’ve noticed that these brownies get even better with time. While most baked goods taste best when fresh, these brownies are perfect the day of and a day later. I almost feel like they become even more fudgy as they sit.
Ingredients
For the brownies
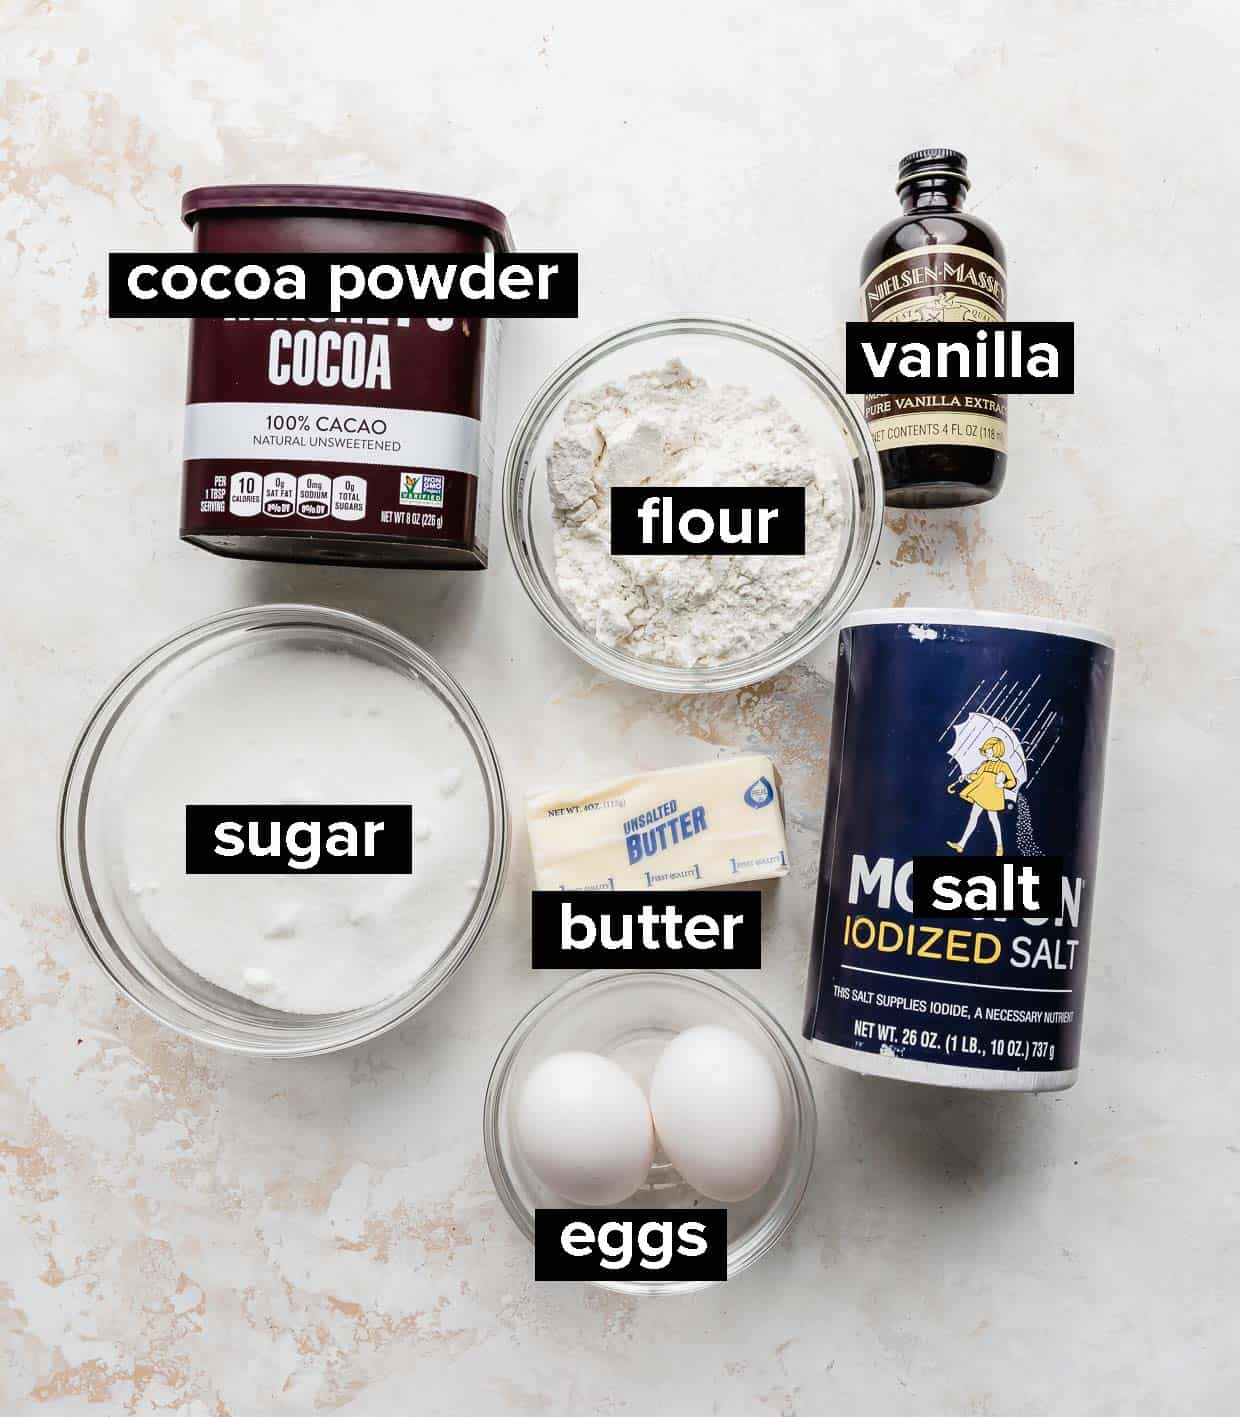
- Butter: We want to use melted butter as the oily fat in our brownies instead of actual canola or vegetable oil. This will give us a richer taste while helping to keep the brownies moist.
- Eggs: The amount of eggs used will determine the end result texture. With 2 eggs we get the perfect fudgy texture whereas 3 would have made it more cake-like.
- Cocoa powder: Adding unsweetened cocoa powder (the baking kind) is how we will achieve our chocolate flavor and brown color.
For the frosting
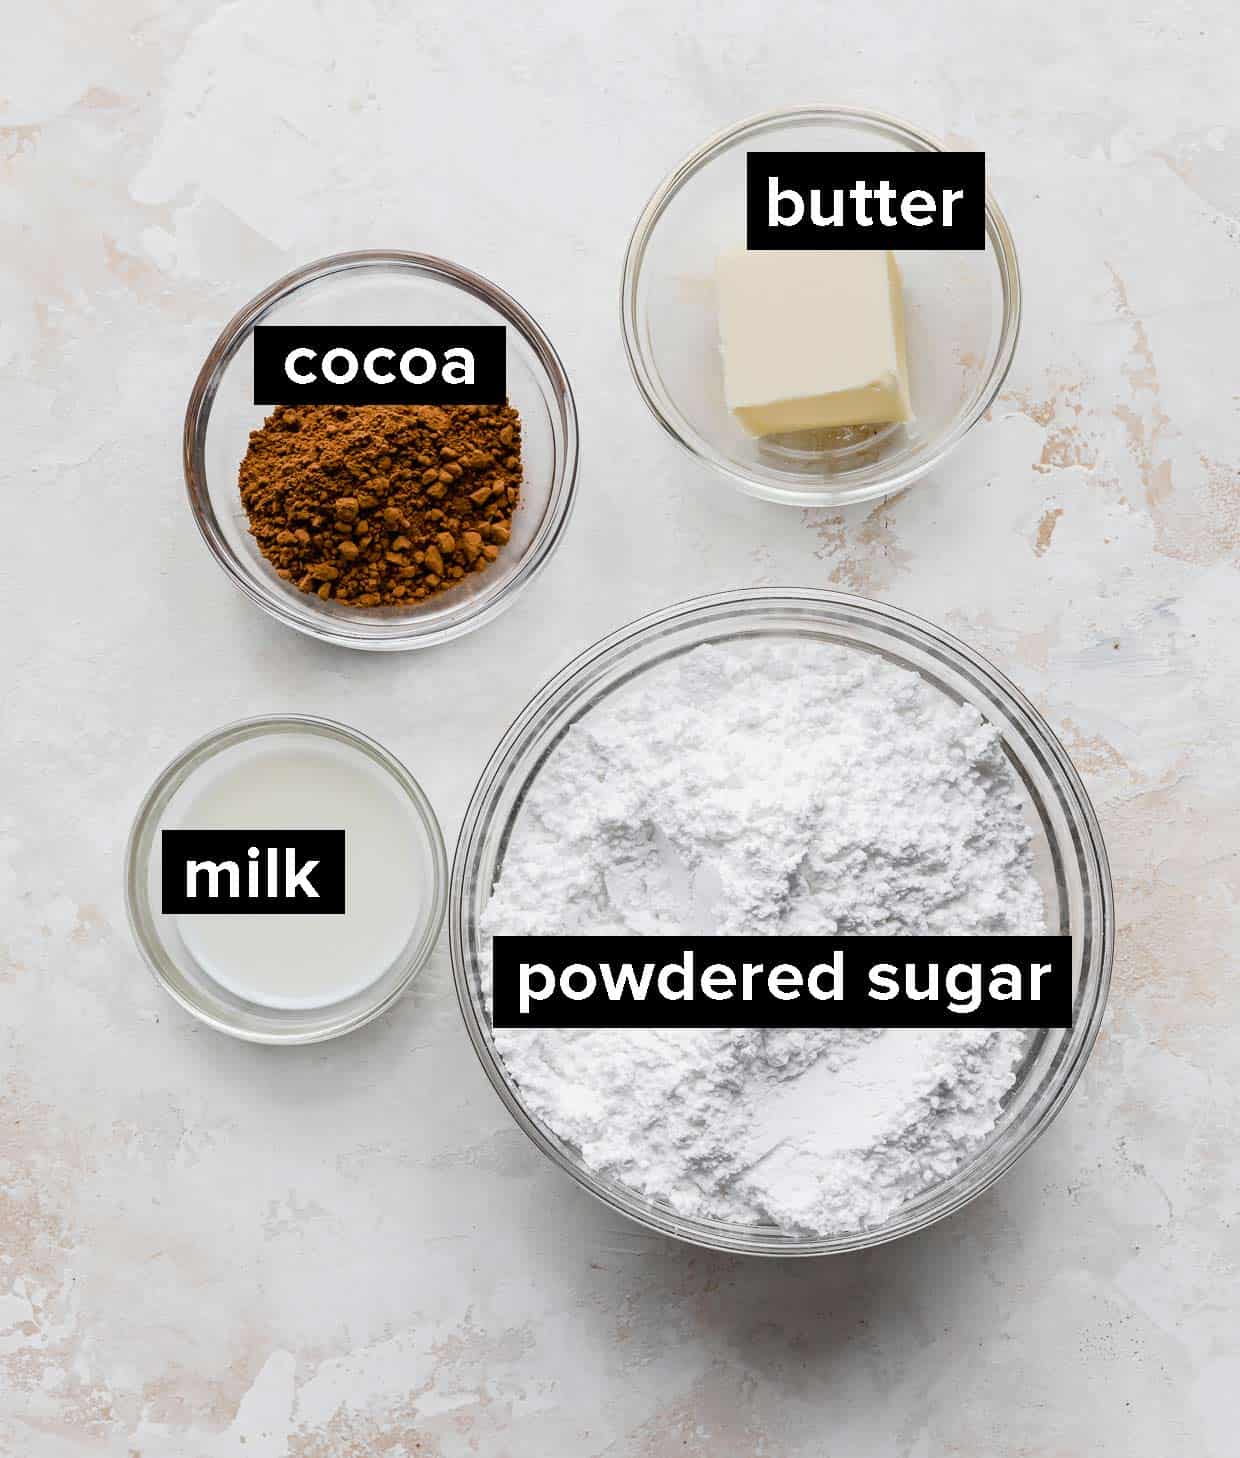
- Butter: Adding richness into the frosting and helping it to gain a nice shine as it sets is some softened butter.
- Powdered sugar: This is what makes our frosting nice and sweet while not changing the texture so it stays smooth and fabulous.
- Milk: Thinning down the frosting to the perfect consistency. You can use any milk (dairy or nondairy) to achieve this.
- Cocoa powder: We want our frosting to taste chocolatey so we will use the same cocoa powder we used in the batter to make the flavors more compatible.
Step-By-Step Instructions
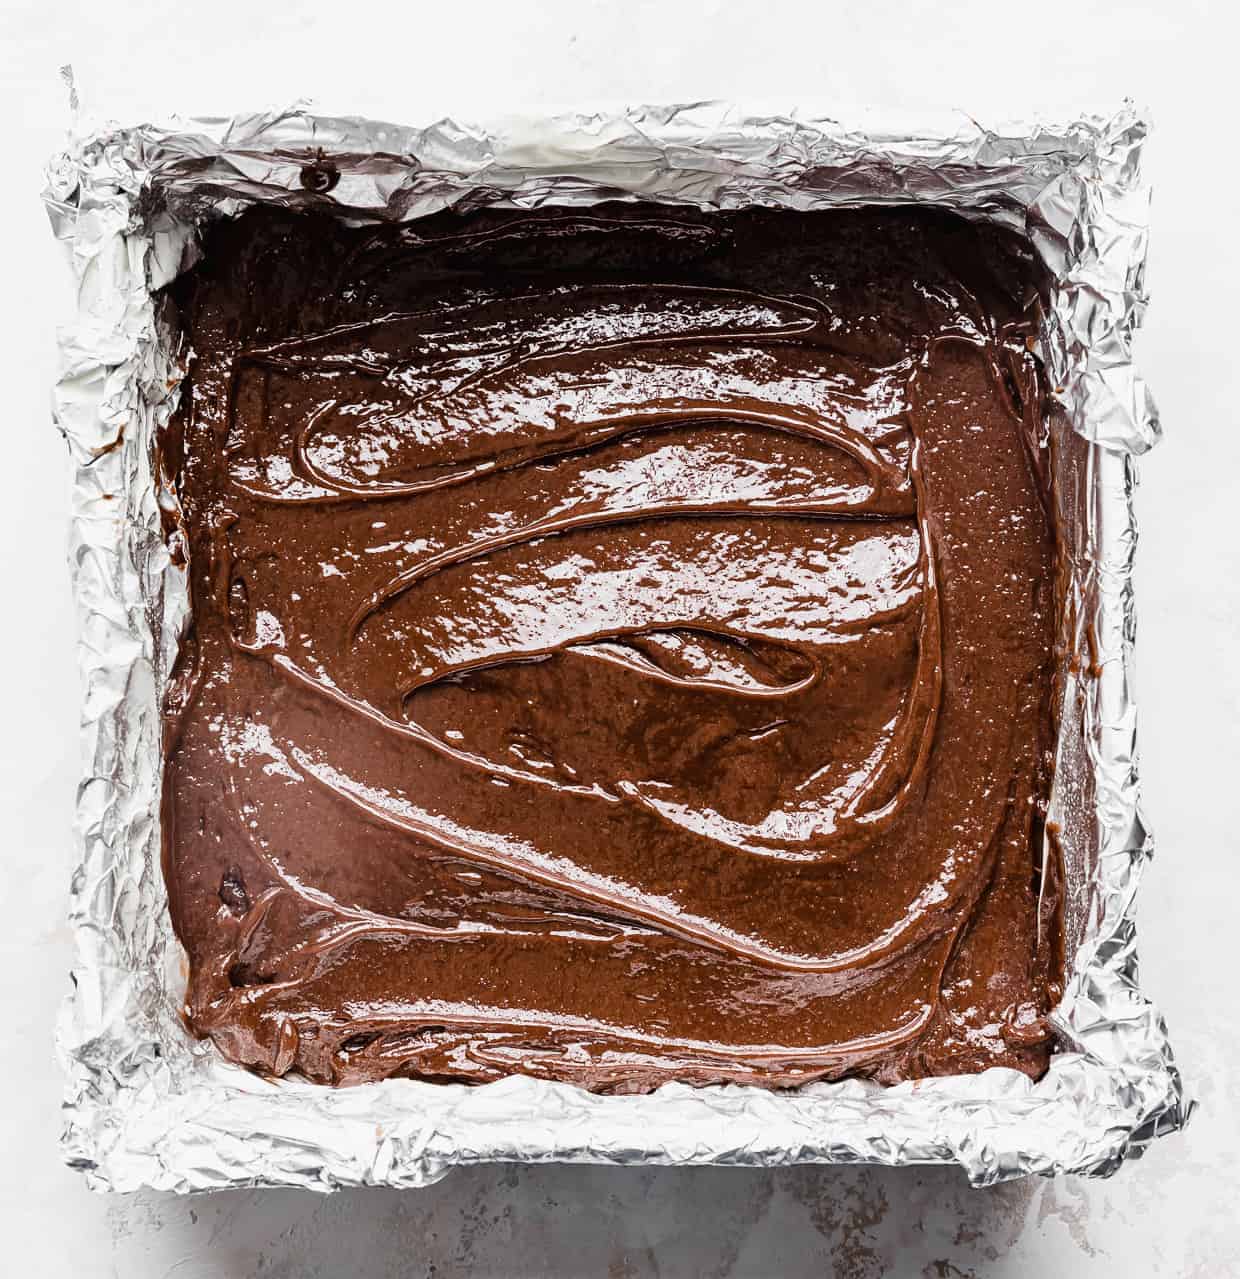
- Preheat your oven to 350 degrees F and line an 8×8 baking dish with foil and spray with nonstick cooking spray.
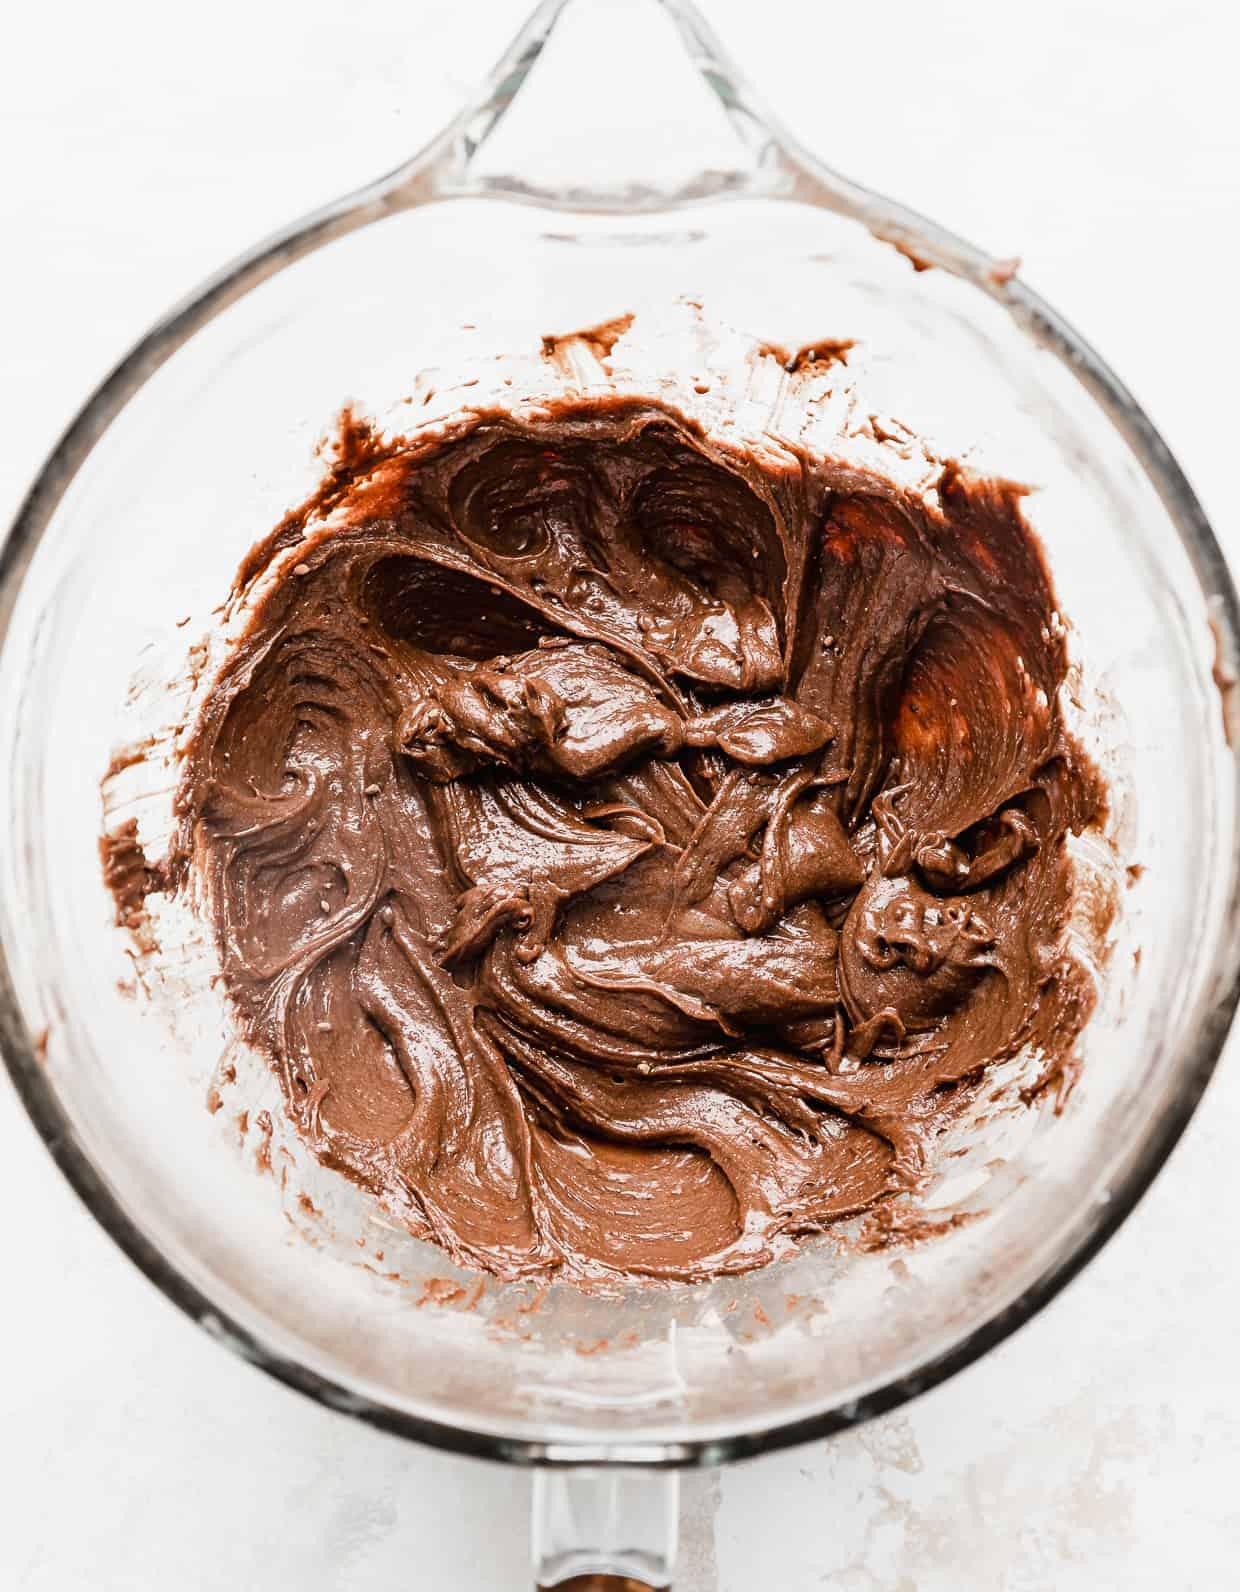
- Beat the butter and sugar together in the bowl of an electric mixer with a fitted paddle attachment (or you can use hand beaters). Add in the eggs and vanilla, mixing again until smooth.
- Add in the flour, cocoa, and salt and mix until just combined.
- Spoon the batter into the prepared pan and smooth it out into an even layer.
- Bake in the oven for 18-22 minutes or until a toothpick can be inserted and come out with just a few moist crumbs but not a wet batter. Remove from the oven and allow to cool in the pan for 5 minutes.
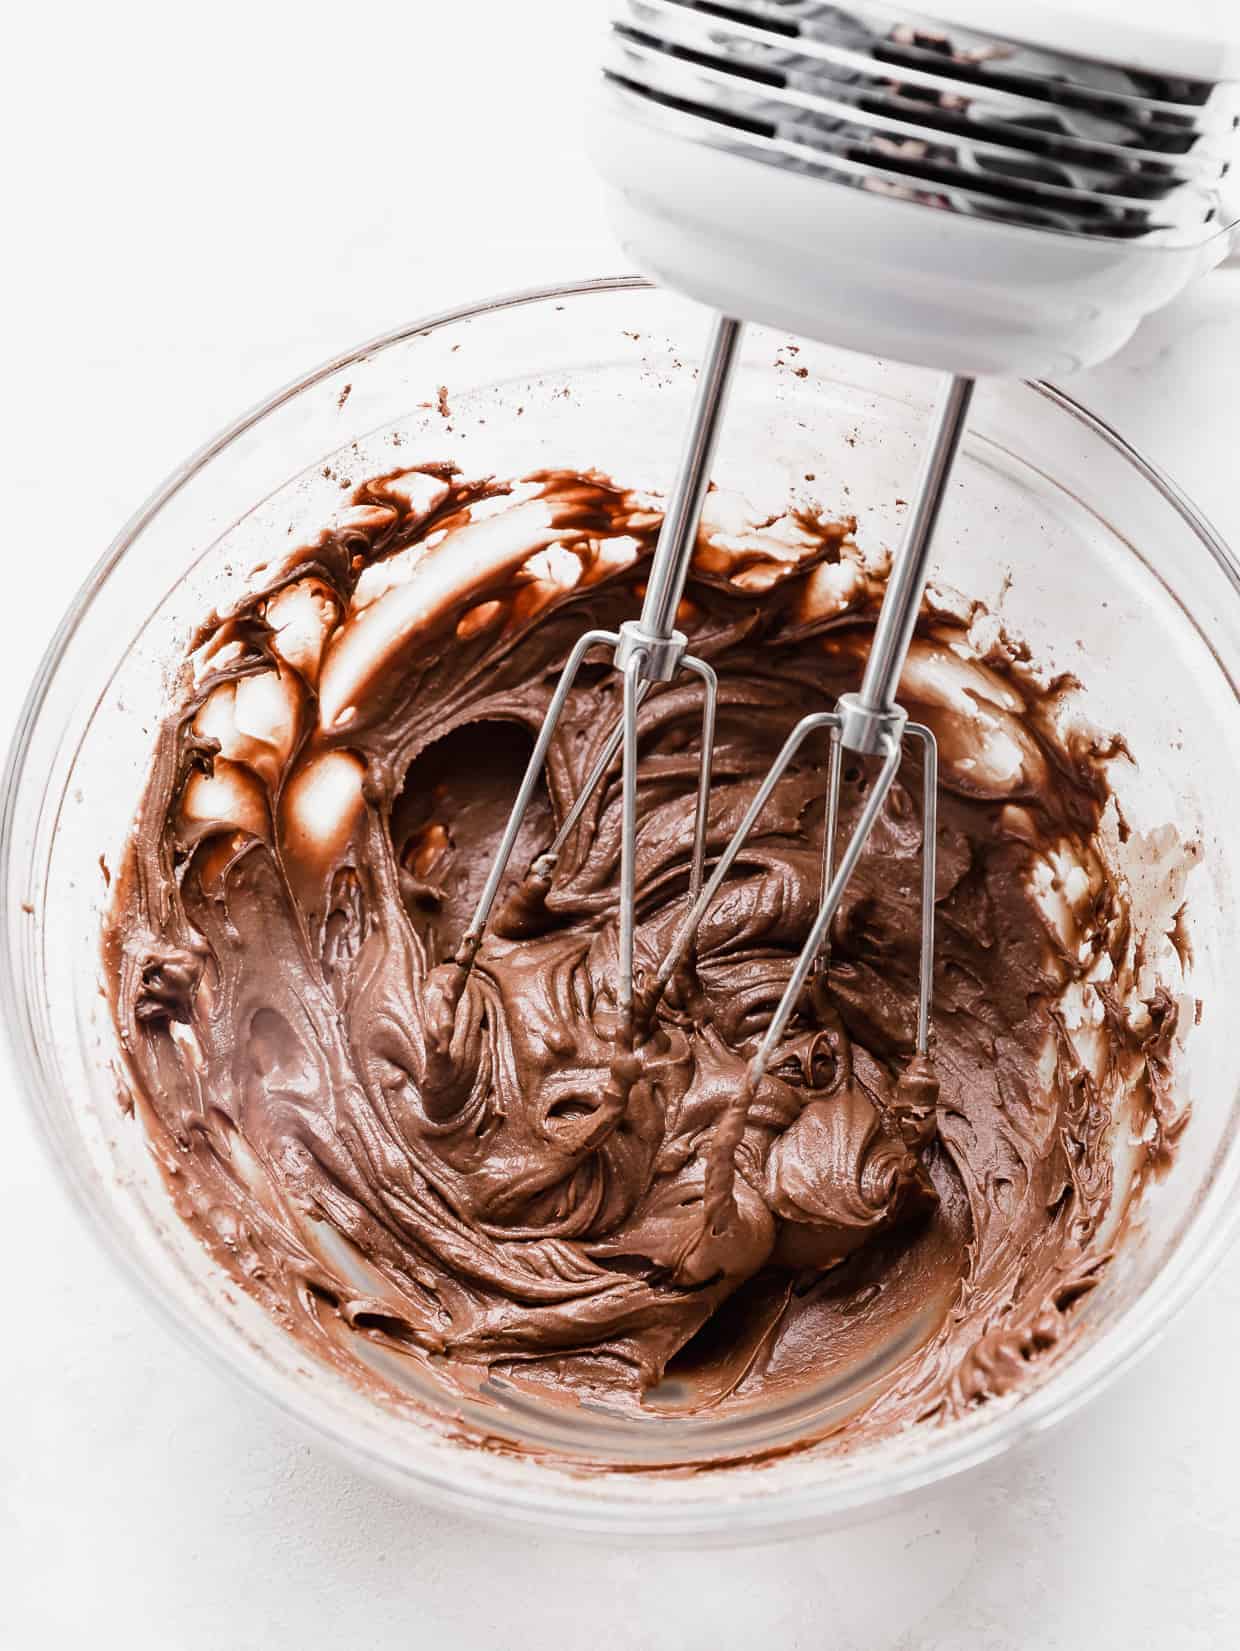
- While the brownies are cooling, prepare the frosting: In a medium sized bowl, add your butter, powdered sugar, milk, and cocoa powder. Using an electric mixer, beat until smooth.
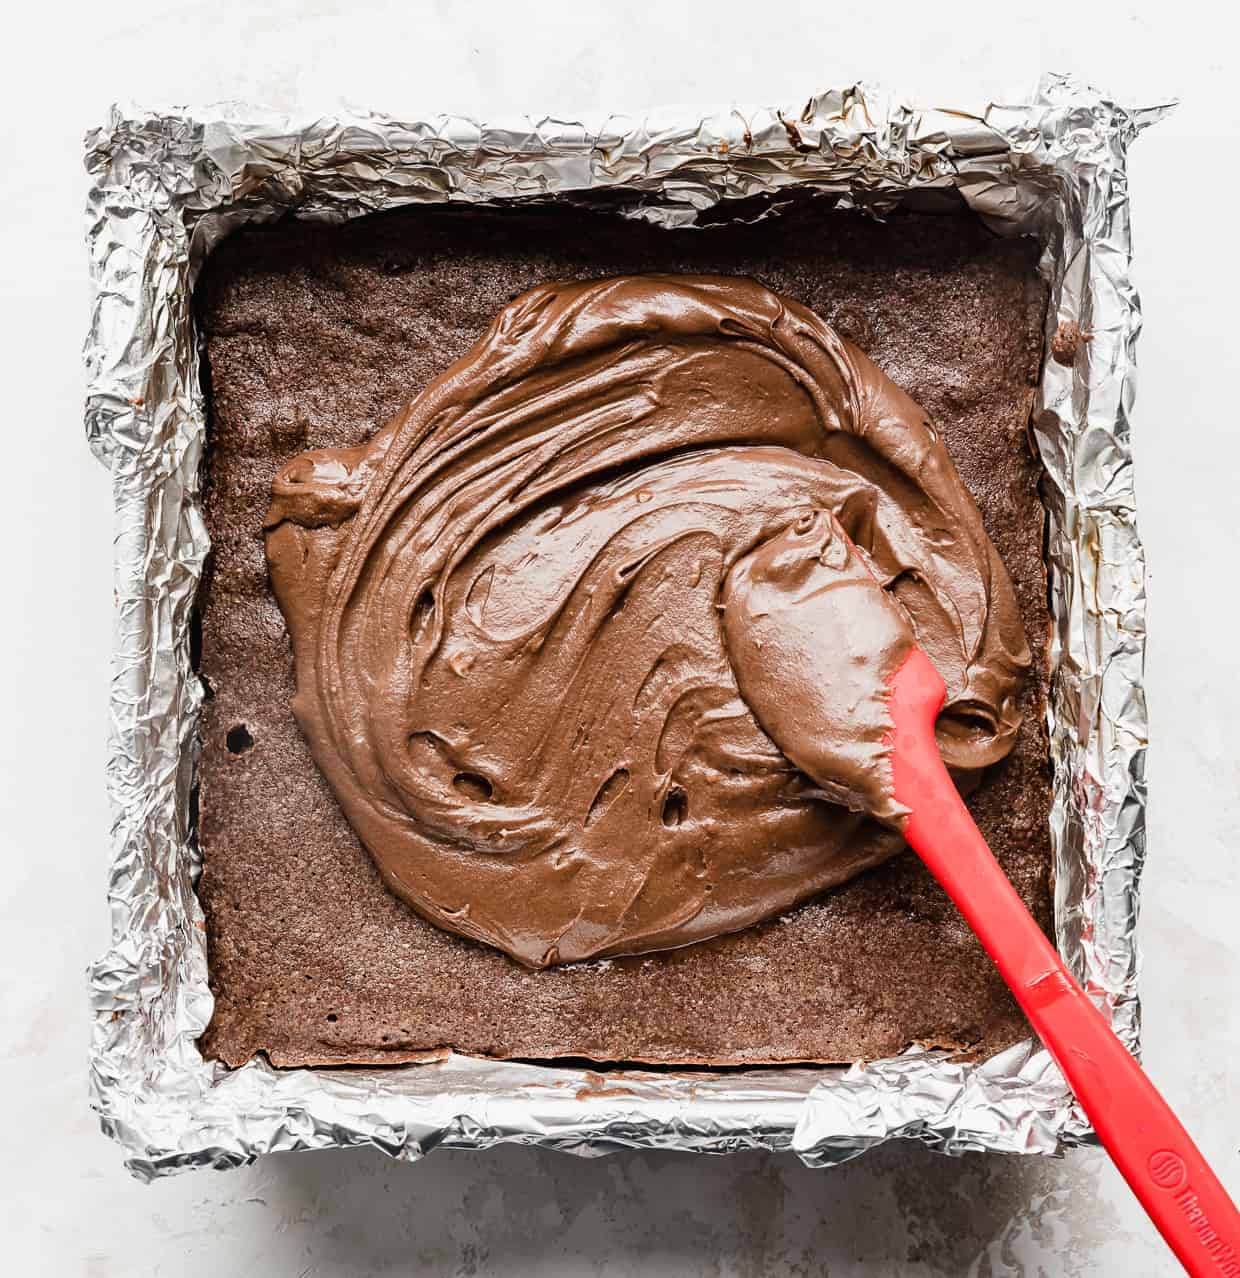
- Frost the warm brownies.
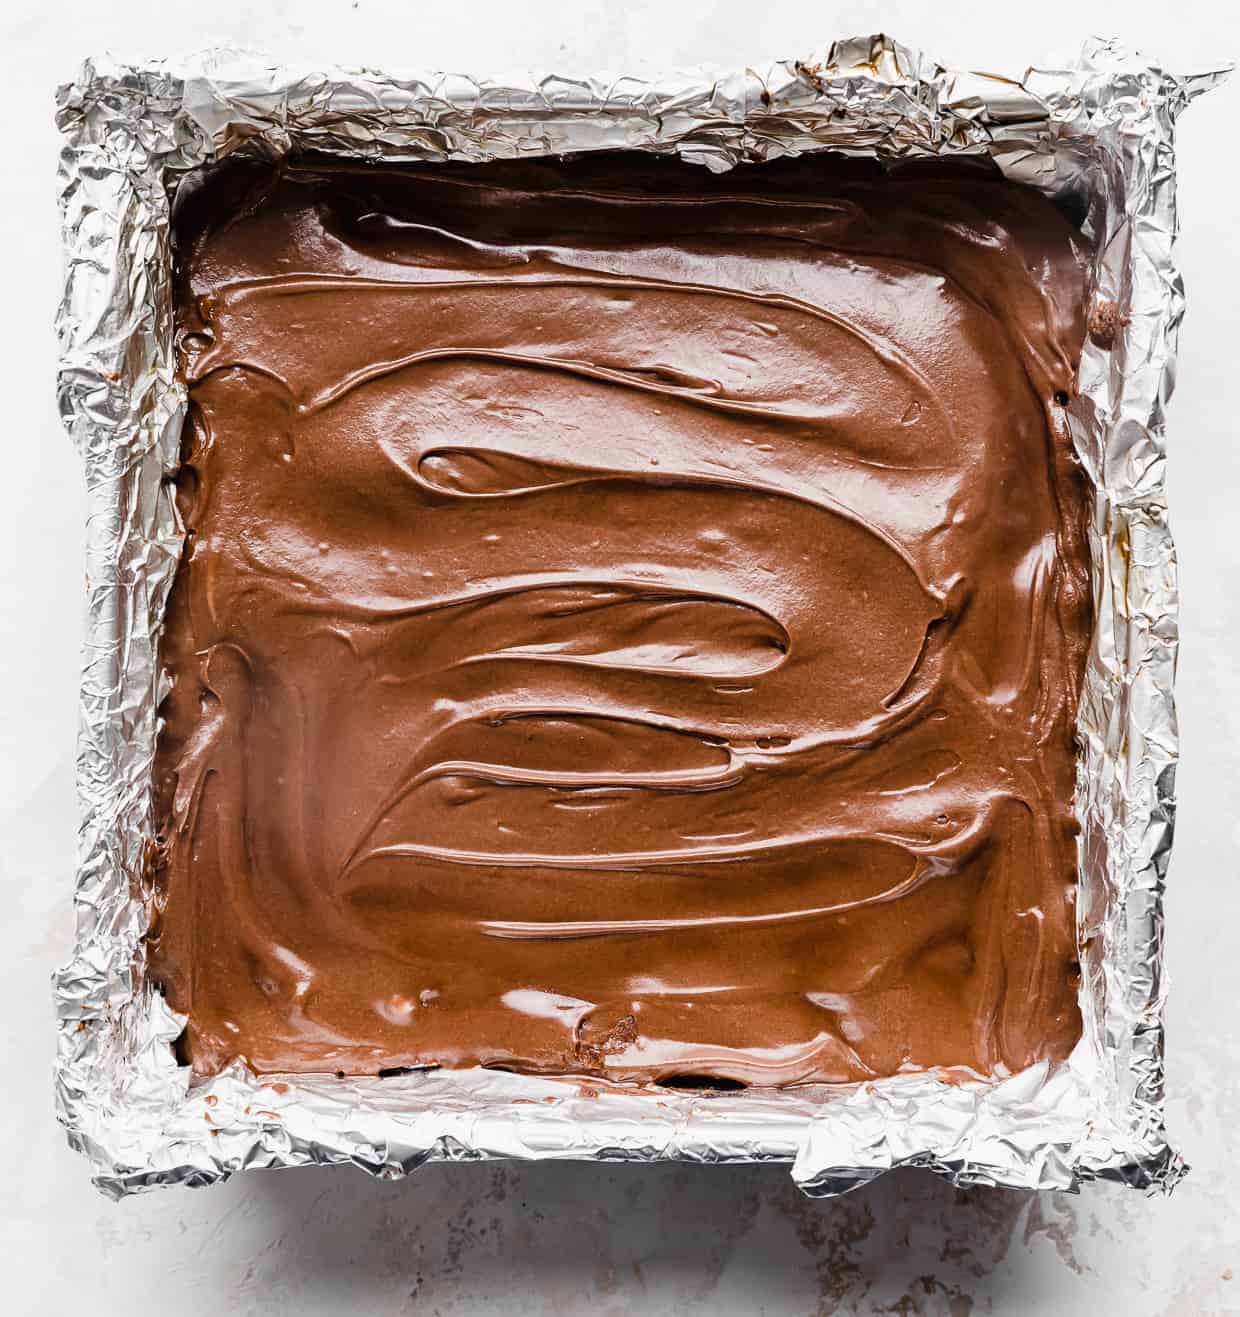
- Allow the frosting to set slightly before slicing and serving.
Recipe Tips
For easy removal of the brownies, line the pan with foil and spray with nonstick cooking spray. It’ll make removing and cutting the frosted brownies a breeze. If you don’t have foil you can use parchment paper.
To make these lunch lady brownies gluten-free use gluten-free flour rather than all purpose flour.
Frost brownies while they are still slightly warm, this helps the frosting spread easily and makes it melty and all sorts of yummy!
Storing
Store lunch lady brownies in an airtight container for 5 days. These brownies don’t need to be stored in the fridge but you’re welcome to do so.

FAQs
Frost the brownies when warm, this will help the frosting melt just a tad and makes spreading it around the brownies much easier.
For this recipe, the brownies do not need to be refrigerated. To keep them fresh store brownies in an airtight container or ziplock bag.
Yes you can. As long as the recipe doesn’t call for baking powder or baking soda. These lunch lady brownies do not use baking powder or baking soda so you can substitute dutch process cocoa powder if you’d like.
More Brownie Recipes
Did you make this recipe? I’d love to hear about it! Click here or scroll below the recipe card to leave a rating and review.
Lunch Lady Brownies
Ingredients
- 1/2 cup butter - melted
- 1 cup granulated sugar
- 2 eggs - at room temperature
- 2 teaspoons vanilla extract
- 1/2 cup all purpose flour
- 1/4 cup unsweetened cocoa powder - see notes
- 1/4 teaspoon salt
Frosting
- 3 tablespoons butter - softened to room temperature
- 1 1/2 cups powdered sugar
- 2 tablespoons milk
- 2 tablespoons unsweetened cocoa powder - see notes
Instructions
- Preheat oven to 350°F. Line a 8”x8” inch pan with foil and spray the foil with nonstick cooking spray.
- In the bowl of an electric mixer fitted with the paddle attachment beat the butter and sugar and well combined, about 1-2 minutes. Add the eggs and vanilla extract and mix until smooth.
- Add the flour, cocoa, and salt and mix until just combined.
- Spoon the batter into the prepared pan and smooth into an even layer.
- Bake for 18-22 minutes or until a toothpick inserted in the center comes out with moist crumbs on it but no wet batter. Remove from the oven and let cool for 5 minutes.
- While cooling make the frosting. Add the butter, powdered sugar, milk, and cocoa powder to a medium bowl. Using a hand mixer, beat until smooth and combined.
- Frost the warm brownies and then let frosting set slightly before cutting and serving.
 Welcome to this delicious corner of the internet! Here I share the recipes my family loves.


5 Comments on “Lunch Lady Brownies”
Hello!
This Lunch Lady brownie recipe looks delicious! I am feeding a crowd, can I double it using a 9×13 pan? Or an 11×15? What about baking time? THANK YOU! Beth
I think you could double it in a 9×13 pan and be just fine. As for baking time, you’ll most likely need longer than the 22 minutes. But I would check with the oven light at 22 minutes and then go from there. I would imagine somewhere between 25 and 30 minutes depending on your oven. But definitely keep and eye on your oven.
These were amazing! One of the best brownie recipes I’ve made!
Hi, I am new to your blog. These lunch lady brownies caught my attention I so want to make these, but I always like to weigh my flour.
Can you tell me how you measure flour ?
Everyone measures flour differently.
Look forward to hearing from you
I fluff the flour in my container so that it’s not compact. Then scoop my measuring cup inside and level it off with a knife.