Halloween Spider Cookies
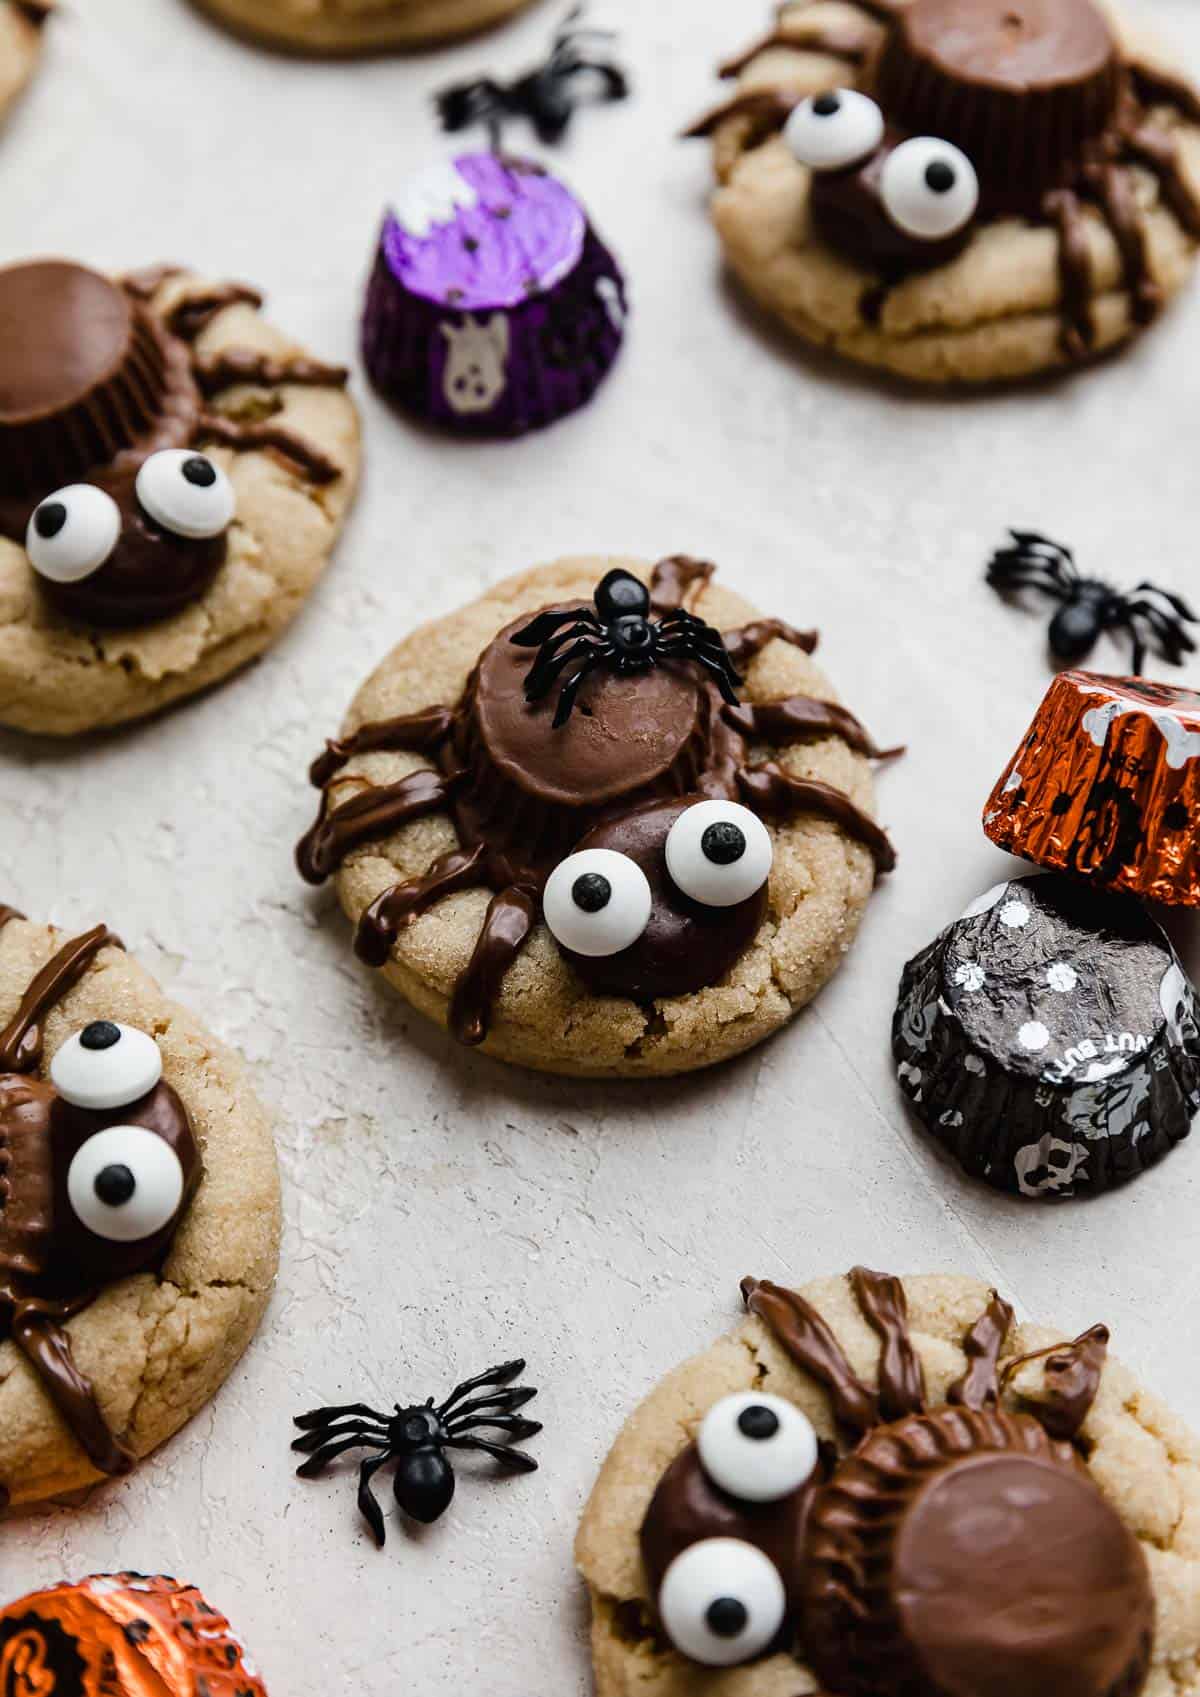
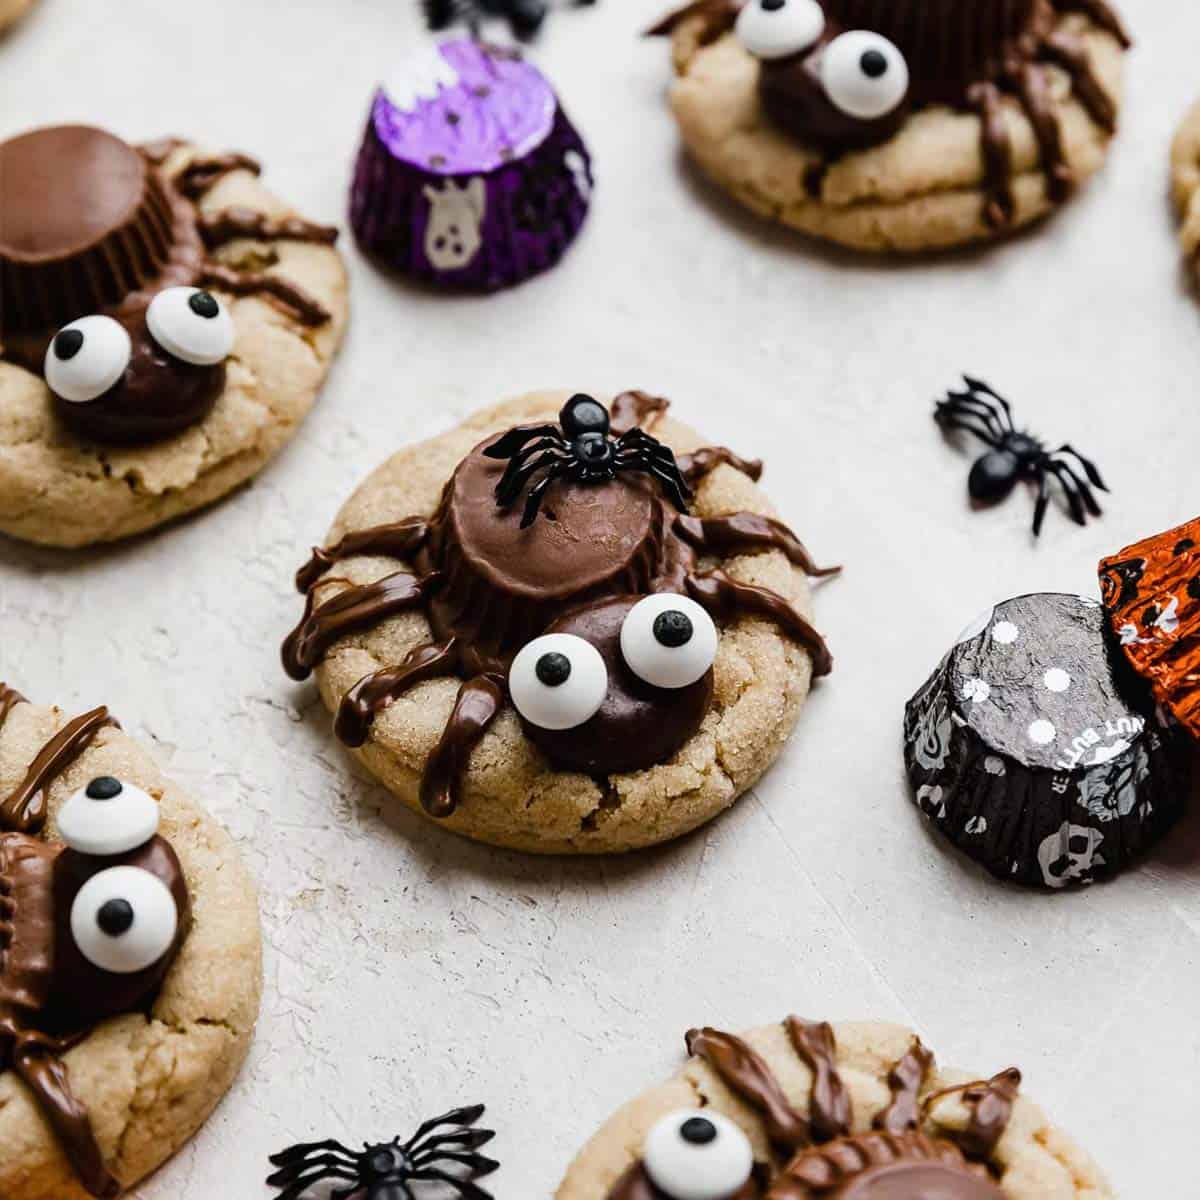
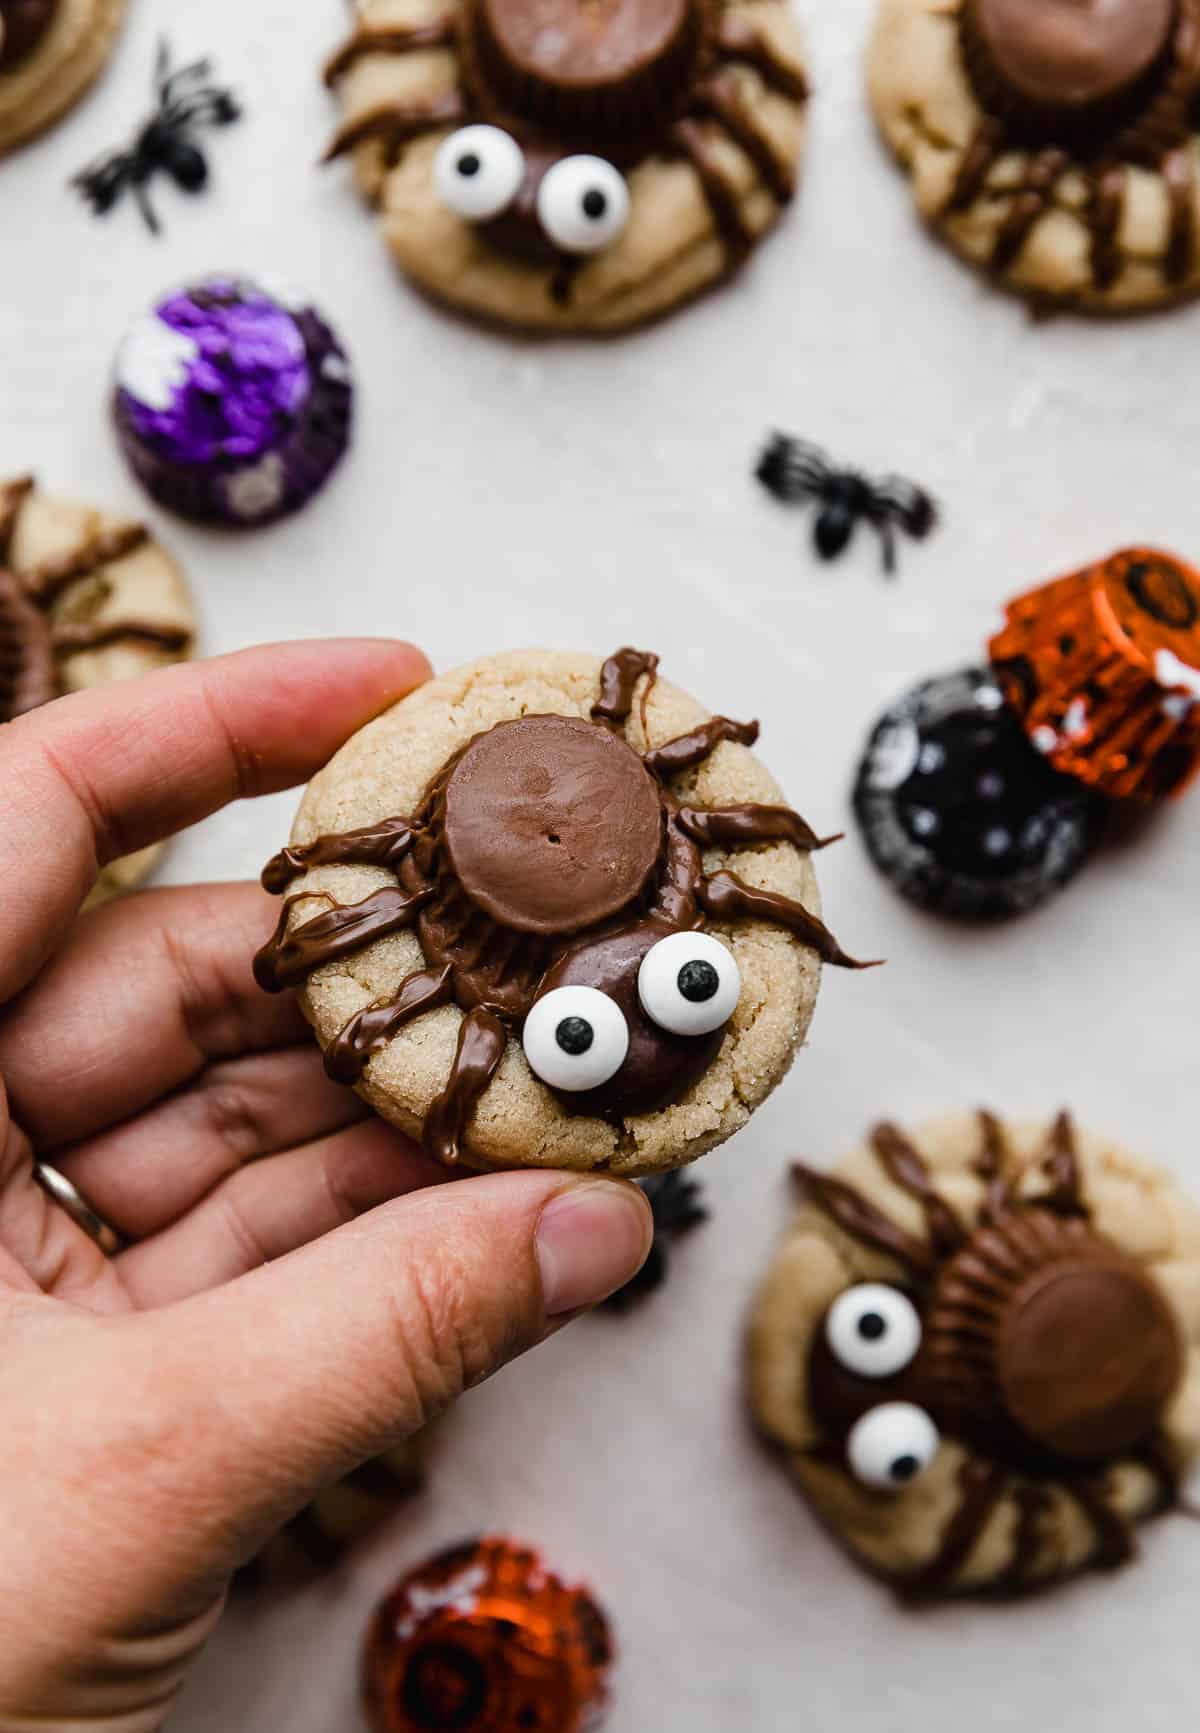
These Halloween spider cookies are the perfect cute but creepy treat! Yummy peanut butter cookies are topped with mini Reese’s peanut butter cups, Milk Duds, candy eyes, and decorated with melted chocolate legs for a cookie that is scary good.
Wash these cookies down with some Polyjuice Potion or Pumpkin Juice. Or, make them part of a spooky spread this Halloween season alongside my other Halloween recipes like Ghost Cupcakes and Graveyard Dirt Cups! Now it’s time to bake…if you dare….
Why This Recipe Works
- Cute Halloween spider. I know for Halloween, some people are into making food look as gross as possible. That’s not me. I prefer my Halloween foods to be more spooky than scary, so these easy spider cookies hit the spot!
- Reese’s spider cookies. The combination of peanut butter and chocolate is always a winner for me! These peanut butter cup spider cookies comfort my soul. Which is ideal if anyone is going to make me watch any scary movies. I’ll just close my eyes and eat a cookie, thank you very much.
Ingredient Notes
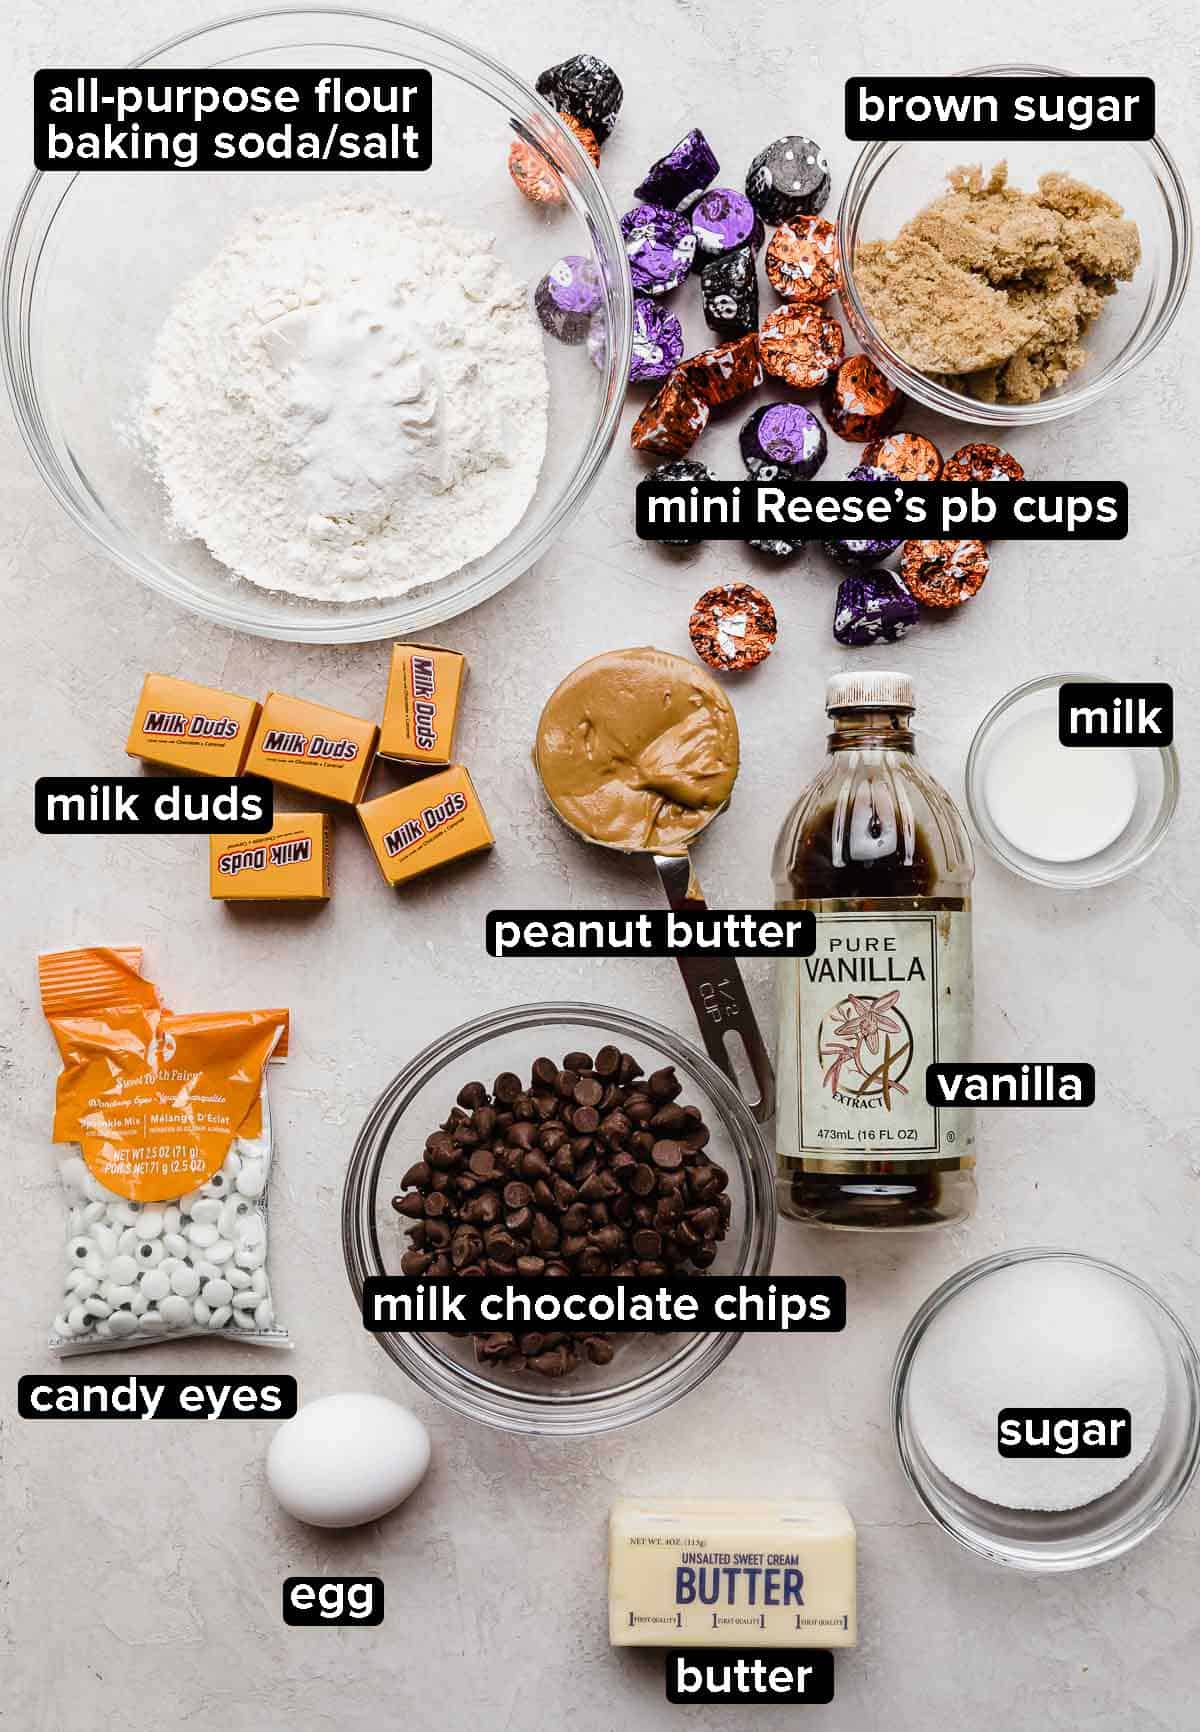
- Creamy peanut butter: For a wonderfully soft and classic peanut butter cookie recipe.
- Brown sugar: Brown sugar adds a caramelized flavor to cookies that pair beautifully with peanut butter. Brown sugar is also going to help create a dense and chewy peanut butter cookie base.
- White sugar: White sugar, or granulated sugar, tends to do the opposite of brown sugar by making cookies more crisp. Using both kinds of sugar gives us a cookie that has the best of both worlds texture-wise in this spider cookies recipe.
- Milk: This uncommon cookie ingredient adds moisture to our Halloween cookies and will also help these cookies caramelize and brown.
- Vanilla: The perfect complement to any baked good.
- Reese’s miniature PB cups: These Reese’s are the perfect size for making little spider bodies! Make sure to unwrap them BEFORE you bake your cookies since you’ll need to press them on top of the hot cookies immediately after baking.
- Milk Duds: These little round candies are perfect for creating the heads of our spiders. If you’re not a Milk Dud fan, another small, round chocolate could work for the head.
- Candy eyeballs: You can find candy eyes in the bakery aisle, or try ordering them online. While candy eyes aren’t necessary, they make these cookies extra cute and fun!
- Milk chocolate chips: To match the color and flavor of our candy, we’re going to melt milk chocolate chips instead of semi-sweet chocolate chips to draw the legs on our spider peanut butter cookies and help attach the eyes.
Step-by-Step Instructions
- Prep oven and pan. Preheat your oven to 375°F. Line a baking sheet with parchment paper and set aside.
- Mix dry ingredients. In a medium bowl, whisk together 1¾ cups of all-purpose flour, 1 teaspoon baking soda, and ½ teaspoon salt.
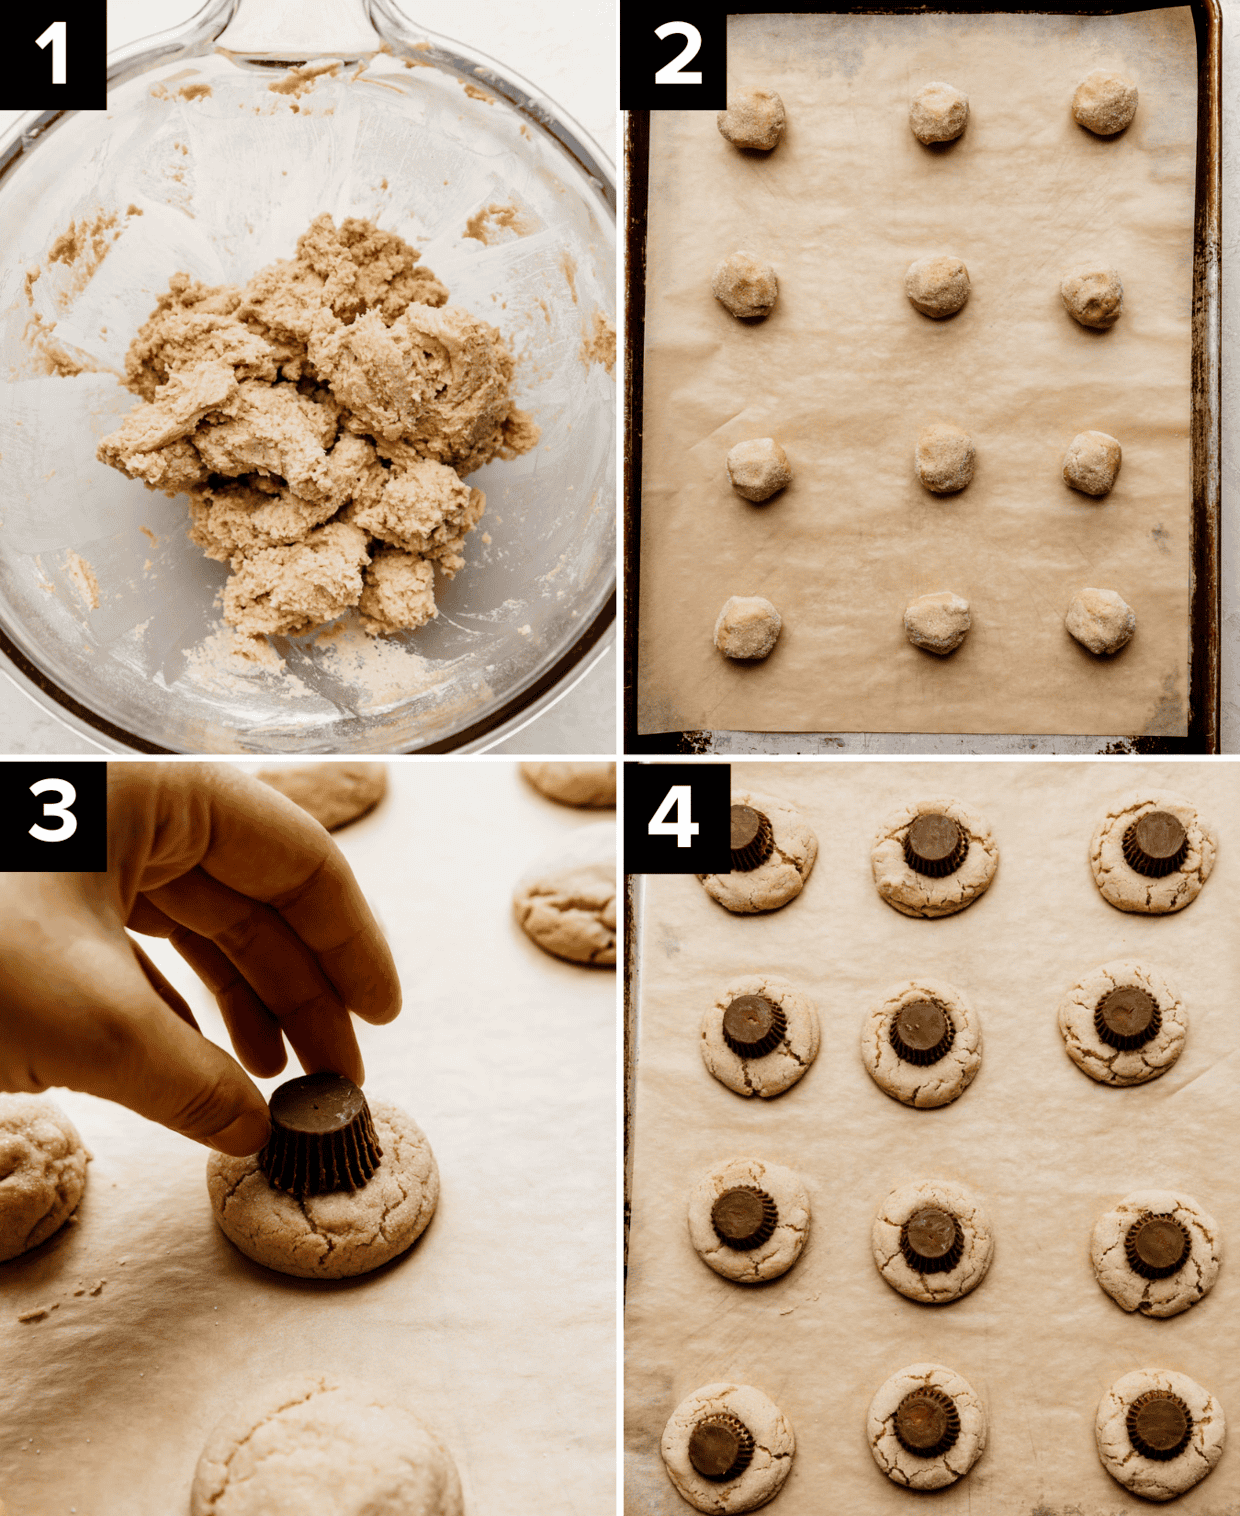
- Mix wet ingredients. In the bowl of a stand mixer fitted with the paddle attachment, or in a large bowl using a hand mixer, cream together ½ cup of room temperature unsalted butter with ½ cup brown sugar and ½ cup of granulated sugar. This takes about 2 minutes with your mixer set to medium speed. Scrape down the bowl as needed. Once the butter and sugar are combined, add 1 large egg, 2 teaspoons of milk, and 1 teaspoon of vanilla extract. Mix until fully combined.
- Add dry ingredients and make cookie dough balls. Pour the flour mixture into the bowl with your wet mixture and mix until everything is evenly combined. Be careful not to overmix. Once mixed, portion dough into 1½ inch sized balls. Pour a spoon full of granulated sugar into a small bowl and roll the dough balls in before placing them on the lined baking tray 2 inches apart.
- Bake and add peanut butter cup and Milk Dud. Bake cookie dough balls for 7-9 minutes or until light brown and puffy. Remove cookies from the oven and immediately press an upside down peanut butter cup in the middle of each cookie, followed by a Milk Dud pressed next to it. Cool cookies for 10 minutes on the baking pan before transferring them to a wire rack. You may also put the cookies in the freezer for 10 minutes to help the chocolate set, but this isn’t necessary.
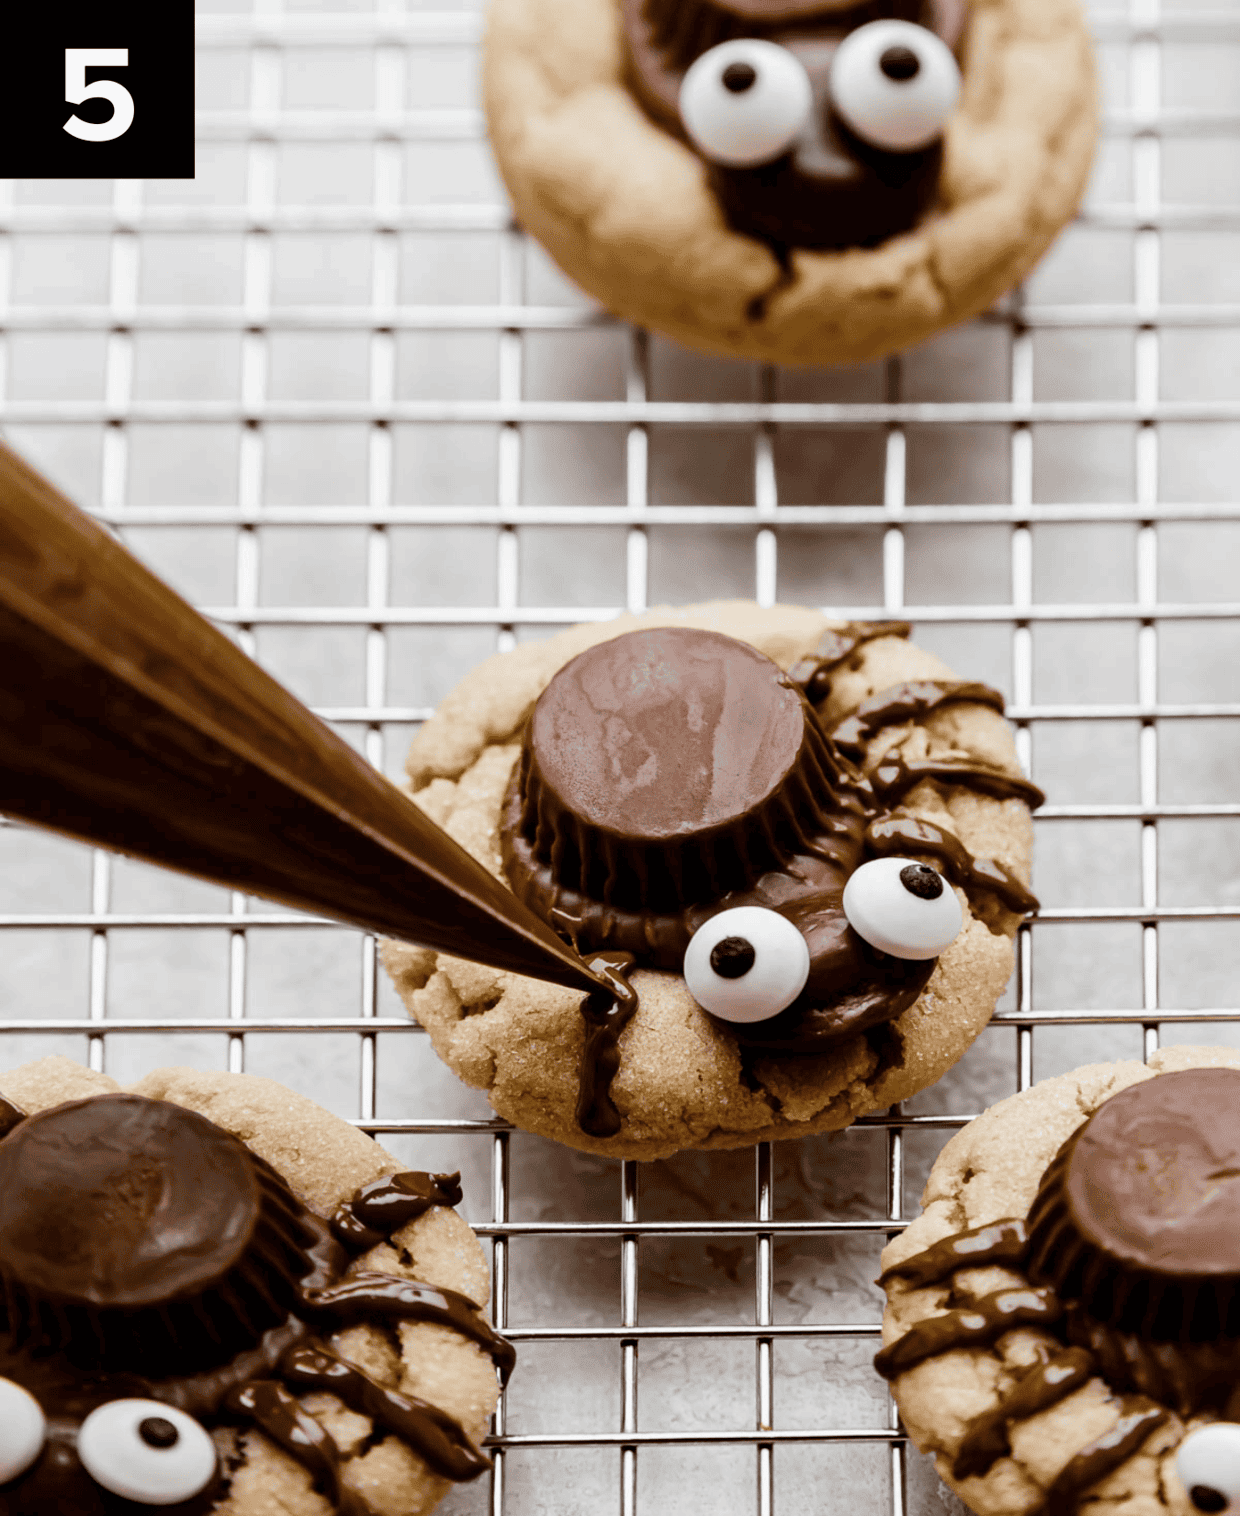
- Melt chocolate for spider legs. Once the cookies have cooled, melt 1 cup of milk chocolate chips in the microwave. Do this in 30-second bursts, stirring in between until the chocolate is completely melted. Transfer melted chocolate into a zip-top bag and snip one corner of the bag. Drizzle four legs on each side of the peanut butter cup on the cookies.
- Finish assembling spider cookies. To attach the eyes, put little dots of melted chocolate on the back of each candy eye and stick it on the Milk Dud. Enjoy your creepy creation!
Recipe Tips
If you don’t like Milk Duds, you can substitute another chocolate candy around the same size such as malted milk balls. A chocolate-covered almond could also work! You can also skip the Milk Duds and stick the candy eyes on the Reese’s.
After the cookies have cooled on the tray for 10 minutes, I like to stick them in the freezer to help the Reese’s a Milk Duds stop from melting further, before adding on the legs and eyes.
If you can’t find candy eyes, you can skip them! They just add to the cuteness factor in this recipe for spider cookies.
Make sure you use miniature Reese’s peanut butter cups, which are different from mini Reese’s cups. The mini Reese’s cups are too small! Also, definitely unwrap the Reese’s peanut butter cups BEFORE you bake. You’ll want to add the Reese’s peanut butter cups IMMEDIATELY after the cookies come out of the oven to ensure that they stick.
Make Ahead, Storing, and Freezing
Make Ahead: These cookies are best eaten within the first 3 days. Make them up to a day ahead of when you plan to serve them.
Storing: Store leftover Halloween spider cookies in an airtight container at room temperature for 3-5 days.
Freezing: These cookies can be frozen! Flash freeze baked and assembled cookies, then store them in a ziptop bag or freezer-safe container for up to two months. You can also freeze the cookie dough and bake it at a later date. Check out my blog posts on freezing cookies and freezing cookie dough for more guidance!
Recipe FAQs
Absolutely! Make these a day or two in advance for an event or Halloween party.
Up the chocolate factor by using Chocolate Chip Cookies for the base! Graham Cracker Cookies would also be a yummy choice.
Yes! You can freeze the peanut butter cookie dough or the baked and assembled cookies.
More Halloween Recipes
- Black Velvet Cake
- Halloween Crackers
- Mummy Hot Dogs
- Black Cocoa Brownies
- Halloween Oreo Balls
- Halloween Candy Cookie Bars
Halloween Spider Cookies
Ingredients
- 1 3/4 cups all-purpose flour
- 1 teaspoon baking soda
- 1/2 teaspoon salt
- 1/2 cup unsalted butter - softened to room temperature
- 1/2 cup creamy peanut butter
- 1/2 cup granulated sugar - plus more for rolling
- 1/2 cup light brown sugar - packed
- 1 large egg
- 2 teaspoons milk
- 1 teaspoon vanilla extract
Toppings/decoration
- Milk Duds
- 30 mini Reese's peanut butter cups - unwrapped
- mini candy eyes
- 1 cup milk chocolate chips - melted
Equipment
Instructions
- Preheat oven to 375°F. Line a baking sheet with parchment paper. Set aside.
- In a medium bowl whisk the flour, baking soda, and salt.
- In the bowl of an electric mixer cream the butter, peanut butter, sugar, and brown sugar, about 2 minutes on medium speed, scraping down the bowl as needed.
- Beat in the egg, milk, and vanilla extract. Once fully combined, add the dry ingredients and mix until combined. Again, making sure to scrape down the sides of the bowl so everything is evenly combined.
- Portion the dough into 1 ½ inch sized balls.
- Place a spoonful of granulated sugar in a small bowl. Roll the cookies in the sugar and place on the baking sheet 2 inches apart. Bake for 7-9 minutes or until light brown and puffed. Remove the baking sheet from the oven and immediately press a Reeese's peanut butter cup upside down into the center of each cookie, and then press in 1 milk dud next to the pb cup (the milk dud will be the spiders head.
- Let cookies cool on the baking sheet for 10 minutes before transferring to a wire rack. Once the cookies have cooled place the melted chocolate in a ziptop bag and snip the corner off. Drizzle 4 legs on each side of the peanut butter cup. Then add a small dot of melted chocolate to the backs of the mini candy eyes and attach 2 eyes to each milk dud. Enjoy!



 Welcome to this delicious corner of the internet! Here I share the recipes my family loves.















One Comment on “Halloween Spider Cookies”
I wanted to make a fun halloween treat for my kids and this was the perfect option. It reminds me of those peanut butter cup cookies, but turning it into a halloween theme was so fun!